Tutorial:Things not to do
Reason: The article needs to be converted into second person, as it is a tutorial page.

The Minecraft community has developed some suggested standards of playing to help new players become comfortable with the game. Millions of users have at some point been too inefficient or died unnecessarily. Therefore, a collected list of things you should not do or forget has been compiled below in order to make the game experience as enjoyable as possible. However, making mistakes is also an important step to learning in Minecraft. Don't feel bad if you follow these suggestions and still make a mistake. In a way, this tutorial acts as a collection of frequent mistakes many other players have made.
Regardless of the advice given here, you should feel free to ignore it and play the game in your own way.
Possible death
Doing the following things in Minecraft could possibly result in the death of the player.
By the player
Hunger and food
Especially during the first days of a new world, you should avoid wasting your hunger bars. If the hunger bar drops too low, you cannot naturally regenerate health or sprint (making it difficult to run from dangerous situations). When the hunger bar is completely empty, you quickly lose health to starvation: Down to 10HP![]()
![]()
![]()
![]()
![]() health in easy, 1HP
health in easy, 1HP![]() health in normal, and 0HP
health in normal, and 0HP![]() health in hard. NOTE: The starvation damage ignores all of your protective effects (armor, protection, and resistance).
health in hard. NOTE: The starvation damage ignores all of your protective effects (armor, protection, and resistance).
Some movement, such as sprinting and jumping, drain hunger and saturation much quicker than walking, and are much less efficient per block traveled. Boats and horses can be used to move around quickly without using up any of your hunger bar or saturation. The biggest drain on hunger and saturation is natural regeneration of health, so you can also conserve hunger and food by avoiding taking damage.
Some food sources can give you the Poison or Hunger status effects. If you need to eat rotten flesh or raw chicken (which can cause the hunger status effect), you should eat multiple pieces at the same time so you get more hunger/saturation from the food than you lose through the status effect. You should avoid eating pufferfish, spider eyes and poisonous potatoes because they cause the poison effect, which would take more hunger/saturation to heal from than these food sources can return. You should also be careful with suspicious stews they found or traded with villagers for. Some types of suspicious stews can give a poison effect. For any of these food options, you can drink milk to override the status effect, which may make them a more viable food source.
Horse armor
If you own a horse, finding horse armor for it is advised, because ranged mobs and creepers can easily end up killing it while you advance or retreat on horseback.
Getting lost
After the first few days of work, you should have some basic facilities for survival (e.g. farms, a shelter, and a mine). Many players are tempted at this point to venture farther from their base to look for resources and explore.
However, you should always keep in mind the location of your base. Even a brief moment of activity in an unfamiliar place, especially areas with no landmarks, can confuse your sense of direction and result in you losing the way back home. Without knowing where your base is, you are in danger of losing valuable time and may have to start over most of the game. It is also much easier to die trying to get back to your base, both from starvation and attacks by hostile mobs.
Here are some orientation tips:
- Coordinate notation: Coordinates can be displayed in the game settings without enabling cheats.[Bedrock Edition only] You can also record your base's coordinates from the Debug screen[Java Edition only] (this is done through F3 or Fn + F3, depending on BIOS settings). The coordinates are also reported when you teleport using
/teleport @s ~ ~ ~, and also copied to the clipboard in the form of/teleportwhen F3 + C is pressed, if cheats are enabled. You can take a screenshot to record your coordinates or simply write them down, but any written version of coordinates should be kept in a secure and findable place. If you do not want to write it down in real life or take a screenshot, you can craft a book and quill in-game and write the coordinates of your home down there. - Lit landmark: Perhaps for smaller distances, you can build tall towers with some torches on the top while traveling, as well as placing one on top of your house. Keep in mind that the towers can be seen only if your render distance is high enough. A beacon can also be used for this purpose, although a beacon is unobtainable for new players in survival mode. Alternatively, place a torch on the side of a block indicating the direction to the nearest safe haven.
- On grassy earth, mark arrows by digging path squares with a shovel, or use the shovel on grass to make grass path blocks every few paces to mark your way.
- Keeping a running list of important coordinates is recommended.
- Make a compass: Four iron ingots and a piece of redstone are the ingredients needed to craft a compass. It points toward the world's spawn point, or a lodestone if used on one. The spawn point cannot be changed by sleeping in beds (which changes the individual spawn point), making a compass useful only if you built your house close to your original spawn. That is, unless you have obtained a lodestone, which, if you have iron (or netherite in versions before the recipe change) in stock, can be a very good way to avoid getting lost. The world spawn can also be changed if cheats are enabled by using the
/setworldspawncommand. - If you have a compass and 8 paper, you can craft a map to prevent getting lost. Additionally, a single paper and a compass can be combined in a cartography table to make a map. A zoomed-out map can also be crafted by surrounding a map with 8 paper on a crafting table, or by combining a map with one paper in a cartography table. (Note: In Bedrock Edition, you can choose to start with a map.)
- While traveling, leave a trail of cheap but visible blocks, such as wood planks or cobblestone, every few blocks (torches also work). These blocks should not be native to the biome to make them stand out.
- Keep track of navigation directions. Clouds always move slowly from east to west, as do the sun and the moon. Sunflowers also always face east.
- Crafting a book and quill allows you to take notes. Craft a book with one leather and three paper, then combine the book with a feather and an ink sac to make a book and quill.
Forgetting essentials
When planning to venture far away from their main base, you should carry wood, a crafting table, building blocks, a pickaxe, plenty of food, a weapon like a sword or axe, some quality armor, a water bucket, a long-ranged weapon such as a bow, crossbow or trident, and (if using a bow or crossbow) plenty of arrows unless the bow is enchanted with the Infinity enchantment. Make sure to bring wool for beds to set a new respawn point and sleep when it gets dark. When you get a large distance away from the last bed you slept in, it is likely time to use another one. Don't break the bed after sleeping in it, or else you respawn at the world spawn upon death instead of at the bed's location. If you are going to mine, make sure to bring at least a stack of torches. Even if you aren't mining, torches can also be helpful to mark your way and prevent getting lost.
Using spawn-setting items in the wrong dimensions
Beds in the Nether or the End explode upon attempting to use them. Respawn anchors safely create spawn points in the Nether, but when fully charged explode upon use in other dimensions. There is no way to set a spawn point in the End; you may set your spawn near an end gateway or the exit portal with a bed.
Bed obstruction
Normally, when you sleep, you wake up next to your bed if the space around it is not taken. It is important to leave a clear area around and above your bed. If there is not free space next to and/or above your bed, you may wake up inside a block and begin to suffocate. If this happens, remove the block quickly to avoid death by suffocation. If you are killed, you cannot respawn at your bed; instead, you spawn at the world spawn, which can be far away from where you were trying to sleep, along with a message saying, "You have no home bed or respawn anchor, or it was obstructed"[Java Edition only], or "Your home bed was missing or obstructed"[Bedrock Edition only].
You should also avoid placing transparent blocks such as glass around your bed as you cannot spawn on a transparent block after waking up, nor can you respawn on it.
Carrying dangerous or non-essential items in the hotbar

Lava is a dangerous resource. You should not keep lava in their hotbar unless you are about to use it. Death can result from accidental use of a lava bucket, as well as damage to any builds in the immediate area. Apart from lava, having items in the hotbar which are either not essentials (like weapons or food) or not in use consumes valuable space. Unless you are going to throw them or have nowhere else in their inventory for the items to go, leaving these items there just clutters up the hotbar, setting you up to waste time later.
Not bringing a water bucket
During adventures, have a bucket of water on your hotbar at all times if not in the Nether. In the case of an emergency, it can do the following:
- Extinguish fire
- Solidify pools of lava to a walkable surface of obsidian
- Safely descend cliffs
- Allow you to scale cliffs
- Repel endermen without aggravating them
- Kill melee mobs easily, as they are slower in water
- Be placed on the ground to break a fall
- Be placed on the ground, then used with a fishing rod, to generate a mobile food source
Without a bucket of water, all these situations are made much more dangerous.
Falling
Heights are dangerous, and jumping off a structure, especially without knowing how tall it is, can result in death. A risky method would be to place a water bucket just before you land; this is colloquially called water bucket clutching. It is much safer to descend mountains or cliffs by climbing down normally or even swimming down water. However, this strategy does not work in the Nether since water evaporates there, which can catch newer players by surprise. Make sure to be especially careful on Amplified worlds, which are have many steep drops, as even netherite armor with Protection and Feather Falling may not reduce enough damage to survive enormous falls. Death at the bottom may make it impossible to reach the items scattered everywhere. Riding off of a cliff in a boat can also negate fall damage.
Arrows
If an arrow is shot directly upward, it may fall back down to hit you[Java Edition only]. Also, you should not charge at a mob immediately after firing an arrow at it, especially if you are wearing elytra, as you may collide with the arrow. Death from this method is highly unlikely unless done intentionally.
Also beware of mining blocks with arrows stuck into them. If the arrows were shot by a skeleton or shot from a bow enchanted with Infinity, you will not be able to pick them up, but they can still do damage: if you break a block that is supporting shot arrows, the arrows will fall and can deal damage. This is relevant when opening trapdoors with arrows in them as well.
Fire
While not as dangerous as lava, fire is still quite hazardous due to its item-destroying abilities. In addition, it spreads every few seconds and can travel across trees. Luckily, it can be toggled in the world settings. Fire is especially dangerous in dark forest and jungle biomes because the trees are larger (so they burn longer) and closer together, and if too many trees burn up at the same time it can heavily affect the game performance. If trying to clear the forest, it is advised to be careful with the fire and have a quick means of escape such as elytra or a Fire Resistance potion. If the random tick speed is high enough, fire may burn so fast that it does not render, so you may end up on fire without seeing anything.
If you wish to create a fireplace in a building (for decoration, lighting, or disposing of unwanted items), make sure that the area under and surrounding the fire, as well as the four blocks above it, are made of non-flammable material, or use campfires to make it in a compact wood-themed building.
Carelessly launching Riptide-enchanted tridents
A trident enchanted with Riptide is both a weapon and a means of quick air travel. If you carelessly launch yourself into the air with Riptide, you may put yourself at risk of serious fall damage and death. You should be careful not to launch yourself into dangerous situations. Using an elytra or a potion of Slow Falling is recommended to prevent accidental death. While it is raining, you can essentially use Riptide to fly through the air. However, due to its fairly long charge-up time, you may accidentally fall a long distance if you do not use the trident fast enough, or if it suddenly stops raining.
When digging or mining
Mining vertically (straight down or up)
Mining straight up or down is definitely one of the riskiest things a player can do, because both can carry to dangerous event. While there was a video by Mumbo Jumbo showing the actual rarity of dangerous events by such a deed, it is still unadvisable to mine like this. The phrase "Never dig straight down" is often called the #1 rule of Minecraft by the community.
For example, if you are mining straight down by mining the block you are standing on, there is a chance of:
- Falling into a pool of lava, which can randomly generate underground, as under Y=10 (1.17 and earlier) all air blocks are replaced with lava upon generation, and all water pools are completely replaced with lava pools
- Accidentally breaking into a cave system, underground ravines, or monster rooms and taking significant fall damage along with possibly getting swarmed by mobs
- Getting stuck in the hole you just dug. In that case, placing ladders or pillar jumping should get you out.
- Breaking into ancient cities, monster rooms, or trial chambers unprepared.
Safer ways to dig downward include:
- Mining in a 45 degree angle staircase pattern
- Finding an open-mouth cave on the surface

Mining In A Dripstone Cave (left) Strip Mine (right) - Placing ladders or scaffolding while digging
- Digging a 2×1 hole while standing between both blocks or on the block opposite the one being mined
- Strip mining (Digging down in a staircase pattern then changing to a horizontal 1×2 pattern)
- Repeating the steps of digging down 3 blocks from the surface, placing a ladder on the bottom block, standing on that ladder, then mining the blocks below
- Digging straight down, but turning up your volume, listening for lava and mobs, and regularly placing ladders
- Digging straight down, but holding a water bucket to prevent fall damage or lava damage. However, this needs a quick reaction time and skill.
Should you insist on digging narrow shafts downward, you should try to listen for water, lava or mob sounds (this can be aided by turning on subtitles). This can alert you to the presence of a cavern, lava, or mobs.
Almost as dangerous as mining the block are standing on is mining the block right above your head. Dangers of mining straight up include:
- Lava, which could burn you and your items. This is especially dangerous in the Nether, as in that dimension, random lava pockets generate in the terrain, and lava flows half as fast as water does in the Overworld.
- Water, which could drown you if the pool generated with a low ceiling and no other escape routes
- A cave or monster room with hostile mobs, which attack you on sight. While this would normally be a little problem for experienced players, the added element of surprise means that you may not be able to react in time.
- Gravel or sand, which could suffocate you
A possible way to make mining upward safer would be for you to place a torch at your feet and keep a block in your hotbar that you can switch to easily. The torch breaks any gravel or sand that falls onto it and if liquid comes out of the hole, you can quickly place a block to stop the flow of the liquid. These precautions are not perfect as there still is the possibility of mining into a cave with mobs or you not reacting fast enough to a lava flow (especially in the Nether where lava flows half as quickly as water). As with digging straight down, you should be wary of noises (mobs, water, lava, etc.) or particle effects (specifically, water/lava dripping from a block) which may signify the presence of lava, water, hostile mobs or a cave.
Desert Pyramid
You should never dig straight down in the center (the blue terracotta block) of a desert pyramid. Doing so results in you falling directly onto a pressure plate and triggering a concealed TNT trap, which explodes. This can kill you, destroy your items (because of all the TNT), and destroy the chests and their contents. There are safer alternatives to get down and back up:
- The simplest and quickest way is to dig a channel straight down the sidewall, collecting the sand blocks on the way down. To ascend again, jump while replacing the blocks underfoot.
- Dig down in a staircase fashion, and simply walk up the stairs to ascend back up.
- Use a bucket of water to fall down to the treasure room at a lower speed, making it easier to avoid the pressure plate. Ascending can be done by digging stairs or placing ladders.
- Mining the pressure plate and/or TNT after falling down the side of the pit.
Once at the bottom, you can safely mine the pressure plate, harvest the TNT, and loot the chests.
Careless underwater digging
In Survival mode, blocks take five times as long to break when your head is underwater (if you don't have a helmet with Aqua Affinity on). Therefore, there is a high risk of drowning while digging underwater, especially if you are not close to the surface. Digging an air pocket under the ocean floor or placing magma blocks or soul sand to create a bubble column can produce a place where you can slowly recover their air supply. In Java Edition, placing a door on the ocean floor creates an air pocket where you can stand. It takes time to recover the breath meter, so you should come prepared.
Should you need to dig underwater for long periods of time, a helmet enchanted with Aqua Affinity and/or Respiration, a turtle shell, or a Water Breathing potion can be used. You can also build a conduit if you expect to be underwater even longer. You should be careful near ocean monuments, as the elder guardians within inflict Mining Fatigue III, drastically reducing mining speed.
Finally, you may want to have light underwater. Torches cannot be placed underwater (actually, the water will displace the torch in one tick), so it is better for you to come with full-block light sources such as sea lanterns, glowstone, lanterns, sea pickles, jack o'lanterns, a redstone lamp beside a block of redstone, or a magnesium torch.[BE & edu only]
TNT
TNT explosions are deadly. Whenever possible, you should use redstone wiring and repeaters to delay the explosion and/or remotely detonate the TNT. Should you happen to have a bow enchanted with the Flame enchantment, you can also remotely detonate the TNT by shooting it. If necessary, you should find cover to protect yourself from the explosion. If flint and steel must be used, sprint away from the area as quickly as possible.
TNT also affects the nearby environment. If there are multiple blocks of it, the first explosion launches the others in random directions due to them being entities when primed. This means that even placing it a reasonable distance away may still mean your base is partially blown up.
Additionally, large TNT explosions can result in severe lag, and possibly freezing and crashing.
It is recommended to wear armor while using TNT, especially armor enchanted with Blast Protection. Feather Falling reduces the fall damage if you are blasted into the air. It is also recommended to use a totem of undying in the offhand and water bucket in case of a fall from high altitudes.
Not bringing blocks for mining
There are many risks linked to deep mining operations. Bringing a good supply of common blocks (e.g. cobblestone, dirt, etc.) provides material to overcome potential hazards such as lava pools, large cliffs, or mobs. Blocks may also be needed to be used when pillar jumping out of a cave. It is also essential to have log or wood on hand for crafting. Underground, wood generates only in mineshafts, which are rare.
Lava beneath ores
Sometimes diamond ore may be the only block between you and death. You should mine away all blocks around diamond ore found while mining. Care should be taken to completely remove or replace any lava around the diamond ore so that you are not in danger while extracting the diamonds. The same principle can be applied to any rare resource you would not want to risk losing. More common materials such as dirt, gravel, and stone should be gathered above ground, where it is safer, and lava should be collected from the Nether, surface lava pools, or an infinite lava generator as it is easier to use a bucket on source blocks in these places. You should also remember to relight up areas after block light from any removed lava is gone.
The Void
Assuming you have found a way to get past the bottom bedrock layer of the Nether or Overworld or have an active portal to the End, you have access to the void. Jumping into the void results in death. Once you fall below Y=-64[Bedrock Edition only] or Y=-128[Java Edition only], you rapidly suffer from void damage, for which there is no immunity even in Peaceful difficulty or Creative mode[Java Edition only]. Each half-second below Y=-64[Bedrock Edition only] or Y=-128[Java Edition only], you lose 4HP![]()
![]() health. To survive the void, you would need Regeneration VI or higher, which is inaccessible in survival. In addition, Totems of Undying cannot protect you from death if they fall into the void. If you die in the void, you lose all of your items unless the
health. To survive the void, you would need Regeneration VI or higher, which is inaccessible in survival. In addition, Totems of Undying cannot protect you from death if they fall into the void. If you die in the void, you lose all of your items unless the keepInventory game rule is set to true. Therefore, do not even think about jumping into the void under any circumstances. It is one of the worst things you can do in the game.
If you accidentally fall into the void, forcibly quit the game immediately, using Alt + F4 or ending task via Task Manager (unless you are playing on a server). Minecraft auto-saves once every 45 seconds, so unless you get unlucky, you find yourself right back where you started from. Triggering a crash on Java Edition by holding down F3 + C for 10 seconds would not work, because the manually-triggered debug crash saves your game before closing.
However, if you are in the End and run out of equipment while fighting the ender dragon, or you don't know your way back to the end portal, then you could jump into the void to get back to the overworld. Before you do this, though, you should put all of the items including armors in an ender chest so that you can access them in the Overworld. Note that this makes you lose your Experience without the ability to recover it unless keepInventory gamerule is set to true. It should be noted that the void can be used to your advantage as a means to kill enemies. (NOTE: Don't do this in Hardcore mode)
Building Nether portals too low
If you build a Nether portal at levels near bedrock, your have a good chance of spawning on a small island near a lava lake, meaning that shelter area may be limited to only a few blocks of space. Nether lava lakes usually leave a lot of room which can also hide ghasts trying to snipe you from the lava. This area leave you vulnerable to the possibilities of death or entrapment, depending on whether the fireballs hit you or the portal. It is recommended that you build your portals above y-level 20. Even worse, you may spawn inside a Nether cave and must dig your way out, which is dangerous due to the chance of digging into lava pockets or lakes, or your can spawn right above a lava ocean, meaning that when you leave the portal you fall right into the lava and die. You can also spawn inside a lava ocean, and if this happens, the lava destroys the Nether portal and you die.
Gravity-affected blocks
The Efficiency enchantment can cause problems if you carelessly mine. If you dig around in sand or gravel while moving forward, you may get trapped in the blocks and suffocate for a short time. You should keep your distance with all gravity affected blocks while mining. Block glitches as described most often occurs on laggy servers or single-player worlds played on slower computers, so players are less likely to come across such issues while playing on fast computers or servers.
You should note that death is extremely rare from this kind of scenario; a close call is far more likely. Another note worth taking is to be careful near desert ravines, as there are sometimes overhangs of sand with no sandstone beneath them. These blocks fall as soon as they are updated by a player -- or a mob that can grief -- placing or breaking a block next to the sand. This can result in the sand falling away and dropping you down large heights. Be careful when building in the desert if you think there might be a ravine nearby.
Getting lost underground
One way you can stay oriented in caves is to place torches on the walls on only a specific relative side (right or left). This makes it so you can follow the torches back by keeping them on the opposite side of the cave that you originally placed them (caves are known to split so you know which path leads to the surface). Another way to stay oriented is to place blocks as markers in intersecting cave areas. You can easily get lost in a mineshaft as they have complicated but repetitive structures. If you get lost underground you should mine back up to the surface in a safe manner, as described above.
Mineshafts
Mineshafts are some of the most dangerous places in Minecraft. Have these points in mind:
- Cobwebs slow you down, but not cave spiders. If you are careless, you could end up stuck next to a cave spider or a cave spider spawner. The fastest tool to break cobwebs is a set of shears or a water bucket, but a sword works quite well.
- Cobwebs appearing underwater in flooded mine shafts are extremely dangerous as you may become trapped and drown. Always keep a sword, water bucket, or shears handy when traversing mineshafts.
- You should be wary of fire: mineshafts that generate near lava can catch fire.
- Mobs can easily lurk behind one of the mineshaft's many corners. If the mineshaft intersects a ravine, mobs may drop from a ledge high up in the ravines and attack any unsuspecting player. Be wary of mobs that may be in these blind spots.
- You should keep yourself orientated to make exiting the mineshaft easy, as the maze-like corridors can be confusing and disorienting. One way to help find an exit is to make several exit points.
- There is no reason to drink milk when poisoned and under positive effects if you have honey bottles, which you can drink to clear only the poison, leaving positive effects like night vision or regeneration active.
Mobs
Looking at endermen
If your crosshair touches any part of the upper body of an enderman while within 64 blocks of it, it becomes aggressive toward you. Endermen deal higher damage than most other Overworld mobs, and their teleportation abilities make them unpredictable. If you provoke an enderman and are unprepared to continue to engage it, you can use water to keep the enderman at bay. You can also stand on a platform of scaffolding; endermen are rendered immobile (even while provoked) on scaffolding, a similar function to cobwebs. If you have no other option, put your back to a wall and hit the endermen from there.
If you want to hunt endermen without fear of provoking them prematurely, you can wear a carved pumpkin instead of a helmet to prevent endermen from becoming hostile when looking at them. While this is an effective way to approach an enderman safely, the pumpkin also makes it more difficult to see other monsters and fight them, unless using third person camera view, though this too has its disadvantages if one is not accustomed to it. Another way to use a pumpkin as a helmet is to press F1 (Fn + F1 on Macs and other laptops). However, this view hides your hand and hotbar. If your armor is of high quality, such as enchanted iron, Diamond, or Netherite armor, a normal helmet may be used instead of a pumpkin as the boost in defensive armor may allow you to fight more efficiently.
If you do not have a carved pumpkin or high-quality armor with which to fight an enderman, a simple strategy is to build a small roof two blocks high, and take refuge under it while fighting the enderman. You can enter a space that is two blocks high, but endermen cannot, as they are three blocks tall. Hiding under the roof and striking any enderman with a sword is an easy way to dispatch the mob without taking damage, although most other mobs can still hurt you. Alternatively, constructing a pillar four blocks high and attacking from the top of it produces roughly the same result, as an enderman cannot attack you from that height. In all cases, you should still be cautious of other wandering mobs, especially skeletons which can shoot you off of pillars.
Finding creepers
You should stay away from creepers as they can deal large amounts of damage from their explosion. The danger of a creeper to an individual player depends on the game's difficulty setting and how prepared defensively you are. If you hear the hissing sound of a creeper (which sounds similar to primed TNT) you should immediately back away. If a creeper surprises you, your first goal should be to gain distance from the creeper. Any bit helps, as you move faster than a creeper even at walking speed.

When fighting a creeper, you should maintain distance. For players inexperienced with killing creepers with a sword, the best option is to use a bow, as this allows you to kill creepers from beyond their explosion range. A creeper must get close to you before exploding, enough so that you can build a 5 block high pillar by jumping and placing a block underneath your feet to allow you to safely shoot a creeper wandering around the base of the pillar without fear of it exploding.
While fighting a creeper using melee attacks, you can use a sprint attack by hitting the creeper while sprinting. This attack hits the creeper farther away than hitting it normally. Usually, this distance is enough to keep the creeper far enough that it doesn't explode, but if it hits a block while being knocked back by your attacks, the creeper may not be knocked back far enough. This or missing an attack on a creeper could leave the creeper close enough to explode. Using weapons with Knockback or Punch may help keep a creeper away from you. Shields are effective against creepers.
When all else fails, you should at least get the creeper to explode as far away from you as possible. Ironically, this is the easiest to do on the "Hard" difficulty setting, since creepers are less likely to cancel detonation from further distances in harder settings than easier ones. It is even possible in some situations to persuade a creeper to explode without causing any damage to you at all. Their explosion causes damage to the environment unless the creeper is partially in water or lava. Thus, ideally, you may want to move the creeper into the water before it explodes to decrease damage to the environment.
If you hear a creeper's hiss behind you, you should not attempt to turn around and knock it away as it is nearly impossible to kill a creeper at that point quickly enough to prevent the explosion. Sprinting away to attempt surviving the blast should be your highest priority, unless you have a shield, which can block the damage from the creeper explosion, in which case you should turn around and use it.
In the worst case, if you find yourself without a shield or any way to flee and a creeper begins hissing nearby, you should try to place a solid block between you and the exploding creeper, right in front of your legs. If done correctly, this greatly reduces the explosion damage (since it is calculated from the feet), although this tactic requires perfect timing and huge precision. Another way to survive is to immediately jump into a nearby hole, or to any space at least 1 block below the creeper to protect your low hitbox and reduce damage.
Hard difficulty for beginners
Trying Minecraft for the first time in Hard difficulty is a bad idea for new players who may not have enough experience to do well in that difficulty. In it, mobs deal more damage, you can starve to death if you run out of food, certain mobs gain additional abilities, and some status effects last longer.
First-night exploration
Normally, the first nights are used to gather more resources, because you are not well-equipped yet. You should stay away from anything that can kill you during the beginning of the game, as you do not have much in the way of resources such as armor, food, or weapons. For some experienced players, this is not a problem, as it provides them a challenge that they are experienced enough to handle. Some mobs are more difficult than others and you should be extra careful about them (see Tutorial:Combat). Players playing on Peaceful mode do not have this problem. If you plan on spending nights outside, certain biomes such as plains are safer than others such as forests and jungles as the you can see monsters coming from a distance. An area with lots of barriers can be dangerous because you can easily be surprised by a hidden mob hiding behind a barrier, or be cornered by mobs. Shields should be used when exploring, as they can help you get out of situations where there are too many mobs to kill.
Forgetting melee weapons when caving
A good melee weapon, such as a sword or axe, is your best friend when in dangerous situations. One of the worst places to forget a melee weapon is in a cave. In underground places, you come across mobs in tight spaces, making ranged attacks difficult. It is important for you to be able to kill mobs near you. If you have no other option, you can use a flint and steel to burn any mobs, as flint (from gravel) and iron are abundant in caves. This can be effective if combined with using a shovel or pickaxe to actually attack, though you should keep in mind that mobs on fire can set you on fire if they hit you.
Short walls
A wall is an excellent means of defending a certain area, either as a way to keep monsters out or for players to shoot enemies from afar without posing any danger to themselves. However, if a wall is designed incorrectly, spiders can easily scale the wall and make the wall far less effective. Spiders treat all vertical surfaces as ladders, allowing them to climb any wall with ease. However, they cannot pass through a block that is directly above them, so building an overhang on the outer side of a wall prevents spiders from climbing any further. You should be careful to make walls tall enough because spiders can jump over walls shorter than three blocks tall. Note that enemy players can ride horses to jump up to 6 blocks tall, or wear elytra to fly over walls completely.
Gaps in shelters
The purpose of a shelter is to protect you from the outside world. Leaving any sort of opening in that shelter defeats the purpose of having one, as monsters can walk right in and attack you. You should make sure that your house or fort is secure from all monster attacks, and only has entrances that can be defended easily. If you wish to see what is going on outside of your shelter while standing within, windows made out of glass or glass panes are always better than just punching a hole in the wall as an uncovered hole allows skeleton and pillager arrows to strike you from outside of the house, and allow mobs to pathfind to you.
If a creeper sees a you next to such a hole, it can explode from the other side of the wall. You can also use a collection of partially transparent blocks as windows such as wooden gates, stairs, slabs, or trapdoors as hostile mobs cannot see through them. If you must have a hole and not a window (if you need, for example, an arrow slit), a block such as stairs can be used. Two upside-down stairs facing toward each other in the wall leaves a space almost impossible to shoot through, making it safe from skeletons. A trapdoor also works great for this purpose, as you can flip it closed when the hole is not in use.
Creepers in sugar cane
It is difficult to identify a creeper hidden within sugar cane. By the time you may recognize the threat, the creeper may already be about to explode. If you desire a sugar cane farm near your house, make sure it is completely safe with the correct precautions to prevent mobs from spawning or wandering into the area. Sugar cane does have its uses, such as the fact that you can hide from mobs within the middle of a 2-block tall sugar cane. This may help you avoid dangerous mobs, but it is not a perfect method.
Iron golems
Iron golems can be a reliable source of iron, but getting this iron the wrong way may lead to major trouble. They only drop 3-5 iron ingots when they are killed, while making one requires 4 iron blocks (36 pieces of iron). Attacking village iron golems is not a good idea either, as this causes them to become hostile toward you. They are significantly stronger than you in both health and damage, to the point of being able to kill a player in one hit. In addition, killing a village's iron golem lowers your popularity with a village by 5 points[Bedrock Edition only]. If your popularity with the village drops to -15, iron golems become indefinitely hostile toward you, until your village popularity is restored to a higher amount, as well as causing villagers to significantly increase their prices. However, if you do not want to trade, you can get on a 3-block tall tower or stand in top of a village house and hit the iron golem from above, provided that there are no blocks for the iron golem to climb onto next to your pillar.
This does not mean you cannot harvest iron from iron golems, but it is safer and more efficient to construct an iron golem farm, where the iron golems (technically) are naturally spawned and are not killed directly by you. It is just that you must provide conditions for the "natural" spawning of iron golems.
Bad Wither spawning places
Withers can easily destroy any structure, except those made of indestructible blocks. If you are planning to fight the wither, you should move far away from important land and buildings, such as their house and farms. Withers make huge explosions when spawned and shoot out wither skulls that explode, all of which cause destruction to the environment. In addition, the wither attacks any players as well as the majority of all mobs in the game, including villagers, animals, and even many hostile mobs. You cannot stop the wither from dealing damage to the world. The wither still takes a large number of hits to be defeated even with the most powerful weapons and enchantments in the game and potions of strength. If a wither is summoned near your builds, the builds are destroyed. Even worse, if you die while fighting the wither and the wither destroys the bed you slept in, you will respawn at the world spawn point, making it difficult for you to return to your base.
If you spawn the wither in the Nether, the wither could destroy the floor -- opening up holes to lava or large caverns and thereby increasing the chances of you falling into lava or a pit -- as well as the ceiling, which could result in lava pouring down from above and possibly onto you. If you know the placement of the soul sand and wither skeleton skulls, you may try using the top bedrock layer in the Nether to help trap the wither during the fight. (This is not that hard, but has disastrous consequences if done incorrectly.) Additionally, if you defeat the wither near a lava ocean or lake, the Nether star may drop into the lava and be destroyed, leaving you with no reward for your effort.
If the wither is spawned in the End, it could create holes in the End stone, increasing the chances of you falling into the void. If you spawn the wither during a fight with the ender dragon, you have to deal with two bosses. You may attempt to have the wither kill the ender dragon or distract endermen, but for most players, killing the ender dragon is easier without the wither being there, as the wither often is more of a hassle to you than the ender dragon. So, if you are planning on fighting the wither in the End, you should do so only after the ender dragon is defeated. In this case, battling the wither could make things easier for you. Since there are a lot of endermen in the End, the wither focuses more on attacking the endermen than on attacking you. Additionally, the endermen retaliate against the wither, thereby assisting you in the fight. However, you should be careful about spawning the wither near an End city because the wither will fly up the end city to destroy the mobs there, which means the player likely must climb up the End city to reach the wither. Also, you should make sure not to land the last hit on the wither near the edge of an island so that the Nether star does not fall into the void.
For most players, the Overworld is the most ideal dimension for summoning the wither. However, you should still think carefully about where to fight it. It is usually easier to fight the wither in caves than above ground since the ceilings in the caves prevent it from flying high, making it easier to fight. The most effective strategy to fighting the wither is to create a long 1 by 2 hallway and a small 3 by 3 room to one side of it. You should then summon the wither in the 3 by 3 room and then immediately back off into the hallway before the wither explodes. You can then shoot the wither safely from the hallway because the wither cannot fit in the hallway and therefore cannot reach you. Once the wither reaches half health, you can then run forward and finish it off with a sword. A player using this tactic can defeat the wither easily even with iron armor, a little bit of food, and a few healing and strength potions.
Wooden doors on Hard difficulty
On Hard difficulty, zombies can break down wooden doors and attack you while you are within your base. There are multiple ways to protect a wooden door from zombies in Hard difficulty such as placing a block front of the door anytime you are not using it, using an alternative door (fence gates, iron doors, trapdoors, etc.), or placing a slab at the top of the front of the door. Another way to block zombies from doors is to place the door sideways, so when the door is open it closes off the doorway. The zombie's A.I. treats it as open and prevents the zombie from attempting to break it (instead trying to walk through it). The door can also be built one block higher then the ground outside, allowing for you to enter it jumping but not allowing zombies in. Tutorial:Traps has more ways to protect your door from zombies along with other threats such as players.
Knockback and skeletons
Using a sword enchanted with Knockback on a skeleton knocks it away and gives it more time to attack you, making it harder to kill the skeleton. There are exceptions, such as when the skeleton could be knocked back into a position which kills it or removes from where it can harm you, such as over a cliff. It would likely die from the fall, and if the water broke its fall then it would not be capable of attacking you (if the cliff was high enough).
This is also true when attacking a drowned that is using a trident (a ranged weapon).
Being unprepared for boss fights
If you find an End portal, have the soul sand and skulls required to make the wither, or find an ocean monument, and you decide to defeat these bosses, then you must bring enough equipment that is relevant for the fight. These are some suggested items for boss fights:
- High Protection enchanted iron, diamond, or netherite armor
- A sword, preferably diamond, netherite or enchanted (Sharpness for the ender dragon and guardians; Smite for the wither)
- A bow or a crossbow, also preferably enchanted (Infinity and Power for the dragon and wither)
- An Impaling V and Loyalty trident to kill guardians
- Golden apples or Health potions
- Building blocks or ladders to navigate the terrain
- Milk, since it removes the Wither and Mining Fatigue effects (not needed for the dragon).
- Note that milk also removes beneficial potion effects such as Water Breathing & Night Vision. Be sure to bring extra potions to restore those desired effects that were removed from drinking milk. This is important to remember when relying on potion effects to explore ocean monuments.
- Friends: it is easier with more than one person, so if you are on a server it is better to fight as a group. On singleplayer, wolves, axolotls, and iron golems could work as a partial substitute.
- A helmet (or turtle shell) enchanted with Respiration and Aqua Affinity and boots enchanted with Depth Strider for fighting guardians and maneuvering around ocean monuments
- Potion of Water Breathing (for guardians only)
- Potion of Slow Falling for the ender dragon fight, to safely drift back down if knocked into the air.
- If you are fighting the wither, it is effective to do so in a low-ceiling cave so you can have the option of using melee attacks.
- Do not fight the wither with melee attacks in the Nether unless you make sure that there is no lava lake below the floor for the fight.
Silverfish
Once you attack a silverfish (usually in strongholds), it awakens all other silverfish in the vicinity, meaning you have many silverfish to deal with. If you use a weapon that can kill it in one hit, or if you deal damage through indirect means (for example, placing lava on the ground), the silverfish does not call reinforcements. A diamond sword, or an axe that is stone or better, can kill a silverfish in one hit. Note that the sweeping effect from a sword could damage nearby silverfish without killing.
Snow golems and beds
Because of the fact that snow layers count as a block, any snow layers next to the bed you slept in may result in you waking up standing on your bed and taking suffocation damage (if you have a low ceiling). You may also not respawn at your bed if you die, because it is obstructed. To avoid this, keep snow golems away from your bed. Also, if you must sleep in a snowy biome, you should remove any nearby snow layers.
Not bringing the right equipment for ocean monuments
Ocean monuments are dangerous to an unprepared player. Guardians spawn in them, which do 4.5 hearts of damage on hard, and 3 elder guardians, which inflict Mining Fatigue III to you, which makes breaking blocks nearly impossible, even when you use a netherite pickaxe with efficiency. Recommended equipment is:
- Enchanted armor (minimally with Respiration)
- A fairly large amount of food
- A good weapon without the Knockback or Punch enchantments
- Pickaxes should be enchanted with Efficiency if you plan to mine with mining fatigue.
- Slime blocks, honey blocks, or TNT. These blocks can be broken instantly, even with mining fatigue, and can be used to break line of sight with guardians and make them cancel their attacks. They can also be arranged to produce air pockets.
- A large amount of doors to produce air pockets.[Java Edition only] These can also be used to break the guardians' lines of sight.
- A turtle shell.
Optional useful equipment includes:
- Conduits, as the large supply of prismarine makes it easy to build a frame. The conduit power grants water breathing, improves visibility, and improves speed.
- Milk (optional, but can get rid of the mining fatigue effect for a few seconds or after the player kills all the elder guardians). Milk is useless in Bedrock Edition because Mining Fatigue returns instantly after drinking milk.
- TNT, some solid blocks, and redstone blocks (optional). This can be used to blast into the monument by placing the TNT against the side or top of the monument, surrounding it with blocks, and placing the redstone block nearby to power the TNT.
- A hoe to break the sponges if they generate (optional).
- Various potions are useful: Water Breathing, Night Vision, Invisibility, Instant Health I or II, Regeneration, Strength
- A few buckets of axolotls, as axolotls fight guardians and elder guardians.
Woodland mansions
While they contain plenty of chest loot and are absolutely massive, the woodland mansions also contain illagers, which are hostile versions of villagers. Two kinds are found: vindicators and evokers. Both are extremely dangerous to fight. These structures are designed for the end-game, so make sure to bring the best gear.
Witch-fighting while unprepared
Witches are dangerous. They throw negative splash potions such as Poison, Instant Damage, Weakness, and Slowness. Witches have 26HP![]() × 13 hearts—6HP
× 13 hearts—6HP![]()
![]()
![]() more than you. You should never go unprepared when fighting a witch, because no matter how strong your armor is, it does not protect you from the potions. Also, witches drink positive potions such as Instant Healing, Speed, Fire Resistance, and Water Breathing. Lava, flint and steel, and Fire Aspect weapons are ineffective against witches because they can drink a potion of Fire Resistance to negate these effects. Witches are also impossible to drown since they drink potions of Water Breathing. Splash potions are also not useful against witches due to the fact that they are 85% resistant to splash potions, which is almost equivalent to not taking any damage from them at all. It is suggested you use a bow to kill a witch, as the bow has a much longer range than the witch's potions. Using good armor enchanted with Protection is a great help as well.[Java Edition only] If you choose to engage a witch in melee combat, then you should kill the witch as quickly as possible to avoid the amount of potions you are hit with. Milk is also useful as it removes poison, a dangerous negative status effect that can drop you down to 1HP
more than you. You should never go unprepared when fighting a witch, because no matter how strong your armor is, it does not protect you from the potions. Also, witches drink positive potions such as Instant Healing, Speed, Fire Resistance, and Water Breathing. Lava, flint and steel, and Fire Aspect weapons are ineffective against witches because they can drink a potion of Fire Resistance to negate these effects. Witches are also impossible to drown since they drink potions of Water Breathing. Splash potions are also not useful against witches due to the fact that they are 85% resistant to splash potions, which is almost equivalent to not taking any damage from them at all. It is suggested you use a bow to kill a witch, as the bow has a much longer range than the witch's potions. Using good armor enchanted with Protection is a great help as well.[Java Edition only] If you choose to engage a witch in melee combat, then you should kill the witch as quickly as possible to avoid the amount of potions you are hit with. Milk is also useful as it removes poison, a dangerous negative status effect that can drop you down to 1HP![]() heart, allowing the witch to easily finish you off with a harming splash potion.
heart, allowing the witch to easily finish you off with a harming splash potion.
Attacking villagers
Your popularity in a village determines the prices that villagers offer when trading. The lower your popularity, the higher the price. Attacking (or even accidentally hitting) a villager causes you to lose 1 popularity (see Village). Killing one results in a loss of 2 popularity, which is not worth anything to you as villagers drop nothing. Attacking a baby villager results in you losing 3 popularity and killing a baby villager results in you losing 5 popularity. In Bedrock Edition, if you kill the village's iron golem, you lose 10 popularity.
In Bedrock Edition, the reputation system works differently. Just attacking a villager provokes the iron golem. Getting out of range helps because iron golems have a short memory. Dying also pacifies the iron golem. In Bedrock Edition, prices do not depend on reputation; they depend on the villager's demand for certain items.
If your popularity is -15 or lower, any naturally spawned iron golems attack you without being provoked. Also, the village popularity does not reset when you gets killed, so the only way you can get your popularity back up is to trade with villagers. So you should only attack villagers (or iron golems in Bedrock Edition) in special circumstances. If a villager or iron golem must be killed for some reason, you should contrive to use natural damage such as fire, lava, or suffocation. Iron golems drop iron ingots upon death. You should also build an iron golem farm specifically to collect iron ingots. Remember, villagers are your friends, not your foes.
Spending the night near villages without sleeping
In Java Edition, if you are in a village at midnight, there is a 10% chance that a zombie siege could begin. Dozens of zombies spawn regardless of how walled-off the village is. A few good sieges can easily wipe out your local village, and it is extremely tedious to try to repopulate it using zombie villagers. Staying out of the village boundary is sufficient to prevent zombie sieges from occurring, but it is still advised to stay farther away from the village, in order to prevent random zombie spawns.
Attacking wolves
Remember that wolves can also be allied with you. If you attack them, all the wolves around get angry also, and when wolves are angry, they cannot be tamed, similar to zombified piglins. Also, wolves do not despawn on Peaceful mode, but they can damage you in Bedrock Edition (but do not damage you in Java Edition and the Console edition) on Peaceful mode. Also, wolves do not drop anything, so there is almost no use in killing wolves; it is much better of an idea to tame them instead.
If you cannot find a bone, leash the wolf and bring it back to your base to feed it bones later.
Attacking a Nautilus or Zombie Nautilus[upcoming Mounts of Mayhem]
Untamed nautiluses and zombie nautiluses are neutral mobs and if hit will retaliate with their dash attack, dealing up to 4.5HP![]() × 2.25 damage per hit and striking multiple times. These can be devastating blows if you are at low health or unarmored. Additionally, zombie nautiluses only spawn with trident-wielding drowned riders, so taking one on unprepared is extremely dangerous. When attempting to remove the drowned rider, take special care not to accidentally provoke the zombie nautilus. If you provoke a nautilus near land, get out of the water immediately and move away from the shore. The nautilus may dash onto the shore but once it is there, it is immobilized and will die from suffocation damage (or from burning if it is a zombie nautilus). If you are stranded in the open ocean, you can try to dodge the nautilus's attacks, but it is far more effective to just swim away from the nautilus. If you have any buckets of fish or fish items, you can hold these to pacify the nautilus, but beware that when you switch from those items, the nautilus will resume its attack, and it will also follow you if you are holding fish.
× 2.25 damage per hit and striking multiple times. These can be devastating blows if you are at low health or unarmored. Additionally, zombie nautiluses only spawn with trident-wielding drowned riders, so taking one on unprepared is extremely dangerous. When attempting to remove the drowned rider, take special care not to accidentally provoke the zombie nautilus. If you provoke a nautilus near land, get out of the water immediately and move away from the shore. The nautilus may dash onto the shore but once it is there, it is immobilized and will die from suffocation damage (or from burning if it is a zombie nautilus). If you are stranded in the open ocean, you can try to dodge the nautilus's attacks, but it is far more effective to just swim away from the nautilus. If you have any buckets of fish or fish items, you can hold these to pacify the nautilus, but beware that when you switch from those items, the nautilus will resume its attack, and it will also follow you if you are holding fish.
Polar bears with cubs
Polar bears are neutral mobs, but they can deal up to 9HP![]()
![]()
![]()
![]()
![]() damage per hit on Hard mode, and are also incredibly easy to provoke. An adult polar bear which is with a polar bear cub attacks you without being provoked.
damage per hit on Hard mode, and are also incredibly easy to provoke. An adult polar bear which is with a polar bear cub attacks you without being provoked.
Not throwing potions far enough
If you do not throw a splash potion with a negative effect far enough, you can become affected by the potion. You will then be adversely affected. You should make sure that if you are throwing a splash potion at an enemy, you should throw it far so that you do not get affected by your own potion; if you have milk, immediately drink it to remove unwanted effects.
Creepers in water
Creepers submerged in water cannot destroy blocks and structures by exploding, but the slowing effects of the water make it especially tricky to kill them effectively. Unless you want to make it explode to get rid of it quickly without affecting the terrain, you should use a trident or bow instead of a melee weapon to kill a creeper submerged in water. Ideally, the trident should have Loyalty to allow you to throw the trident without having to swim to retrieve it.
Not carrying carved pumpkins to the ender dragon fight
As the carved pumpkin severely impairs your vision, it may not be a good idea to wear it and fight the dragon head-on, even if it prevents endermen from attacking you. However, if you use a resource pack, third-person view, or if you remove the GUI (and the view with the carved pumpkin), you can see the entire screen, and endermen cannot become provoked by you looking at them. If you would rather use a helmet and you are confident you can keep you crosshair away from the endermen, using a diamond or netherite helmet might be a better idea.
On a Peaceful level of difficulty, this is not necessary.
Not keeping an eye on the ground
If you do not watch for hazards at your feet while moving, you might fall off into a ravine, lava lake, or a patch of mobs, or fall off a mountain. Keep an eye on the ground while moving (even if it is pressing F5 twice to change the camera view).
Standing next to blocks while mining
This is not quite so obvious, but if you mine the blocks directly in front of you while too close to the block, several negative things could happen. You could walk into a ravine, walk straight into a monster spawner, or even worse, have lava flow onto you (especially in the Nether). You should use ambiance noise to your advantage. If you hear mobs, lava, or water, you should proceed with caution. Subtitles may be used to highlight such sounds if you cannot turn the game volume up high. One possible mining technique to fix this may be mining two blocks forward at eye level, then digging out the feet-level blocks. Do this and almost all chances of lava or water flowing in can be noticed before they harm you.
Hardcore mode for beginners
Hardcore mode should not be played by beginners. Once you die in Hardcore mode, the world becomes unplayable in survival. Players in Hardcore mode need to be extra careful to keep dangers away from them, such as by lighting up dark areas or preparing equipment for fights against mobs. You will be forced to play the game in such a way that may limit the experience. Also, Hardcore is locked to Hard mode, which is also difficult for beginners.
Staying outside during thunderstorms
Thunderstorms are a particularly dangerous form of weather, as the sky darkens enough for monsters to spawn, even during the daytime. An unprepared player with few or breaking supplies can be killed quite easily if a thunderstorm begins and monsters start to spawn. While thunderstorms do not occur often, it is always a good idea for you to make sure that you have enough supplies and weapons to survive should one happen. Additionally, a biome with extensive vegetation, such as a forest or jungle, is at additional risk during a thunderstorm, as a bolt of lightning could set trees ablaze and destroy large areas of forest. These bolts are also nearly lethal to you if you are hit by one, so standing outside during a thunderstorm is always a risky prospect. And, if that was not bad enough, lightning bolts can transform pigs into zombified piglins, villagers into witches, and creepers into charged creepers. It also has a chance to spawn skeleton traps. Overall, thunderstorms are a dangerous situation. Note you can sleep in a bed during a thunderstorm even during daytime.
Missing too much sleep
If you goes at least 3 nights without entering a bed, phantoms have chances to spawn high above you. The more nights you go without sleep, the higher the chance for phantoms to spawn (at any time during the night). To avoid phantoms, you don't actually have to sleep through the night; you just have to enter a bed for any amount of time. However, if you want to obtain phantom membranes to repair an elytra or brew Slow Falling potions, it is necessary to avoid sleep. If you are seeking phantom membranes, you should be advanced enough to be able to fight off phantoms efficiently. Another much easier way to obtain phantom membranes is by taming a cat. Put the cat in a minecart or boat, with a hopper and chest underneath. Make sure the cat is standing in the minecart/boat. This way, the cat gives you a gift every morning, which is put through a hopper into a chest. There is a chance to get phantom membranes from this.
Concerning the Nether
Being unprepared and/or making mistakes in the Nether
The vast space inside the Nether, along with its environment, comes with many more risks and hazards than the Overworld. You should come well-prepared with a bow (preferably enchanted), at least two stacks of arrows, (or one arrow if you have Infinity), enchanted iron/diamond armor, especially with Fire Protection, and an iron or diamond sword (preferably enchanted with Sharpness). However, unless you are on Hardcore, you should leave your more valuable equipment such as diamond items at home: an inventory-incinerating death in lava is far more likely in the Nether than it is in the Overworld. You should only bring along one or more iron pickaxes and an iron shovel (unless you plan to collect soul sand to plant Nether wart in the Overworld) as tools, torches, at least a stack of food, flint and steel for relighting your Nether portal if something happens to it, and two to three stacks of cobblestone. If you are inexperienced, bring only what you can afford to lose.
What not to do in the Nether
- Never dig straight down. This is even more important in the Nether, where one-block thick overhangs above lava or high drops are the rules, rather than the exception. It is best not to dig anywhere close to your feet with a diamond pickaxe with any level of efficiency, as netherrack breaks instantly with this combination. You should be careful on gravel as well -- you may dig one block and discover you were standing on a gravel outcrop over a chasm, or worse, the lava sea at the base of the Nether. Safe mining techniques work in the Nether, just as they do in the Overworld. If you have to dig straight down in the Nether, at least bring Feather Falling boots, a totem of undying, and a fire resistance and/or slow falling potion to be safer.
- Do not carry valuable items in the Nether, unless you have set up a secure Nether base. A diamond, netherite, or Efficiency-enchanted pickaxe can be more trouble than it is worth, as it instantly mines netherrack. You can break several blocks with a single click. However, with netherite armor and tools, you may have a little breathing space if this kills you, as they do not burn in lava.
- Do not build structures out of anything weaker than iron doors (5 blast resistance). Ghasts can destroy and possibly set fire to lesser materials. Nether bricks or cobblestone (both with 6 blast resistance) are good construction materials.
- Do not mine glowstone in the Nether if you know where a witch hut is -- you can kill witches every so often to have a chance to get a little more glowstone (the danger of mining glowstone may not be worth the extra reward). For those who have the patience, building a witch farm is worthwhile, and circumvents the danger of ghasts.
- Do not plan on using a water bucket as a defense against death in a lava pool, as water does not work in the Nether. When using the water bucket, some particles appear and the bucket empties. You should try to gain the necessary materials for Fire Resistance potions as soon as possible and use the potions as a defense instead.
- Similarly, do not use water buckets to break your falls in the Nether. A powder snow bucket is a good reusable alternative, and it can also be used as a last-resort method to cool yourself down if you are on fire, though this will melt the block of powder snow.
- Do not attack zombified piglins without ample preparation for the consequences. For example, you should be in an advantageous position or must only be near a few zombified piglins to fight them. Like wolves, nearby zombified piglins all become aggressive to you if one is attacked. Zombified piglins hit harder and are faster than regular zombies, so it is better to kill single, isolated zombified piglins unless you are well-equipped and experienced enough to take on large groups. A building defensible against zombified piglins with holes for visibility is advisable. You can knock them into lava as a defense method because lava slows them down and gives you time to escape, but remember that all Nether mobs (except piglins, piglin brutes, and hoglins) are immune to fire and lava. If you are quick enough, you can pillar up a couple of blocks and attack the zombified piglins safely from the pillar. If you want to kill zombified piglins without angering them, powering TNT with a button does not anger them as it counts as environmental damage, and killing them in one hit does not either. This can be done using a Smite IV or higher diamond or netherite sword or axe and performing a critical hit, or by using a potion of Strength.
- Do not get caught on fire. Fire cannot be easily extinguished in the Nether, as water can be placed only in cauldrons.[Java Edition only]
- Beds explode in the Nether. (Note that you can use this functionality to your advantage, like when mining ancient debris.) Not only can you die from the blast (which is considerably stronger than TNT), but you can subsequently take lots of fall damage, or even fall into lava. Sans a respawn anchor, you respawn in the Overworld. This can make it a pain to recover items, but the items will most likely be in an unloaded chunk (unless you are in a multiplayer world) and will give you plenty of time to gear back up and recover them. See also this section.
Careless mining of netherrack
Note: This is true of any diamond pickaxe or netherite pickaxe with Efficiency II or higher, any iron pickaxe of Efficiency III or higher and any type golden pickaxe.
You should be careful when using any of the above pickaxes while mining in the Nether. Netherrack is a soft block, so these pickaxes instamine it, which could lead to you falling into holes or lava. It also quickly uses up the durability on your pickaxe. However, if you have Feather Falling on your boots and potions of Fire Resistance to survive surprise lava, then you can dig a tunnel without much worry with an Efficiency enchanted pickaxe. Without active Fire Resistance, make any Nether tunnels at least two blocks wide with one side of the floor a block higher than the other (while standing on the higher side), so that if you do hit surprise lava, it is channeled to the lower side.
Not bringing Fire Resistance in the Nether
This advice is more relevant for more risky ventures in the Nether, where you are likely to catch on fire. Fire resistance can be obtained from several different sources before you have access to potion brewing:
- Enchanted golden apples, which are extremely rare and only obtainable from loot chests in certain structures
- Being revived by a totem of undying, which doesn't last long and can be obtained only from killing evokers in raids or woodland mansions
- Suspicious stew crafted using an allium, which only lasts for a few seconds
- Getting a fire resistance potion from killing a witch, at a low drop rate and only if it is killed while drinking it
- Getting a potion or splash potion of fire resistance from bartering with piglins, which requires access to the Nether
The most reliable way to obtain Fire Resistance is by brewing the correct potion. To brew any potion, you must have access to blaze rods, which can be turned into blaze powder to fuel a brewing stand, so you must have fought blazes inside a Nether fortress first. From there, the main ingredients required for Fire Resistance are Nether wart (which can be found growing in Nether fortresses and bastions), and magma cream, which can be obtained from bastion chests, killing larger magma cubes, or by crafting them with slimeballs and blaze powder (see below):
| Ingredients | Crafting recipe |
|---|---|
| Blaze Powder + Slimeball |
Riding mobs in the Nether (except Striders)
Horses are useful in the hilly Overworld, or flat plains, but the Nether is no horse paradise. There are many cliffs that horses can fall off of (especially in the basalt deltas), ghasts to shoot you into a sea of lava, and magma blocks and soul sand to impede travel. If you do wish to use a horse or donkey in the Nether, you should take several precautions:
- Ensure that you are proficient with using a horse, so you can avoid dangers like lava and cliffs.
- Use a Fire Resistance splash potion, which can protect both you and your mount.
- Use horse armor.
- Avoid Speed potions to help avoid running into lava or off cliffs.
Alternatively, if you are making a transport system in the Nether, you can create a pathway exclusively for the horse, effectively creating a "horse subway" that travels extremely fast with the combined speed of the horse and the distance reducing effect of the Nether. This is less convenient for you while traveling through the Nether, but it does take much less setup than a minecart system which is less tedious and less dangerous to use, but harder to build.
Forgetting to bring flint and steel in the Nether
Even if you secure your portal, there is always the possibility for a ghast to de-light it (not destroy it, as obsidian can only be destroyed by a player or the wither). If this happens, you cannot return to the Overworld easily, and you need flint and steel to re-light the portal. If you lack flint and steel, you need to do one of the following activities, many of which are dangerous:
- Trick a ghast or a blaze into shooting the portal again, to relight it. This places you in harm's way.
- If you have found a nether fortress, you can kill a ghast for gunpowder, a blaze for blaze powder, and a wither skeleton for coal, then craft a fire charge. However, all these mobs are dangerous.
- Try to get lava to set wood next to the portal on fire so that fire appears inside the portal frame. Note that this does not work with crimson or warped wood. (And
/gamerule doFireTickmust be set totrue.) - Find flint and steel or a fire charge in a ruined portal chest.
- Find a flint and steel in a Nether fortress chest (or just iron, as flint can be obtained from gravel).
- Bartering with piglins for a fire charge or iron (which can then be paired with flint from gravel).
If you are trapped in the Nether, you can also kill yourself to respawn in the Overworld (provided you don't have a respawn anchor with too many charges left). It is advised that you place your items in a chest if possible first. You can return to the Nether (hopefully with a flint and steel this time) to retrieve your items. Remember that you lose experience by doing this.
Not checking your warped fungus on a stick often
It is possible to ride a strider in the Nether. You need a warped fungus on a stick to do so. However, if the stick runs out of durability midway in the lava, then the stick turns into a normal fishing rod, and the strider stops moving where you want it to go and instead returns to its normal behavior, leaving you stuck in the middle of the lava ocean. You cannot dismount into the lava either without dying. So, it is a good idea to check your stick often.
If you do get stuck, you may use an ender pearl or a Fire Resistance potion to escape. Alternatively, you can bring a spare warped fungus on a stick. However, don't shift-click it into your hotbar, as pressing shift causes you to dismount. You can also bring extra warped fungus to recraft to your fishing rod.
Breaking into a bastion unprepared
Gold armor is useful for avoiding piglin attacks, but if you bring gold armor to raid a bastion, this results in a trade-off: you get less defense (depending on the armor piece) in exchange for keeping piglins from attacking on sight. Of course, this trade-off also exists if you wear gold armor around piglins normally, but the benefits are less likely to last long in a bastion. Piglin brutes are hostile even if you have gold armor on and they deal high damage, and attacking one of these provokes all nearby piglins (even if you are wearing gold). In addition, hoglins, magma cube spawners, holes in the floor leading to deep drops, and lava at the bottom layers (of treasure bastions) provide additional hazards depending on the type of bastion. It is advisable to wear a golden helmet or boots inside a bastion, which slightly reduces your protection (but may reduce it more depending on the enchantments on your regular armor), which you may trade out for a stronger piece if you think you may meet a piglin brute. You should also wear boots with a high level of Feather Falling or bring potions of Slow Falling to eliminate fall damage. A potion of Fire Resistance can help if you find yourself near the lava layers. You should bring a lava bucket to kill the non-fire-resistant piglins, brutes, and hoglins, and TNT can kill brutes in an emergency. For extracting items from chests, a hopper placed underneath pulls them out without aggravating piglins, but gilded blackstone often generates under bastion chests and angers piglins when it is broken. Pull/push gilded blackstone out with a piston before placing a hopper in its place.
Being unprepared while traveling through the End
The End, with its barren wasteland, easy access to the item-destroying Void, and deadly mobs, is extremely dangerous, and even more so if you bring the wrong equipment or run out mid-travel. Endermen are formidable enemies that can catch an unsuspecting player unawares if looked at accidentally, and especially if tunneling between islands, and can easily fling you into the Void. This would be catastrophic, considering that if you are in the End at all, you would be in your best armor. Always bring food, because the only source of food in this dimension is the somewhat hard-to-collect chorus fruit (although you can build farms there by bringing supplies from the Overworld), and you need food to heal sustainably, as well as sprinting and not starving. Bring plenty of materials—which endermen should not be able to pick up—to make bridges between islands, staircases and pillars to get to higher ground and avoid being hit by angry endermen and extra tools if you need them. As well as that, it would make returning much easier if you place a lodestone on the main End island, or the end gateway you came out of, so that you can align a compass to it and always be able to get back home. A pair of ender chests, one in the player's base and one in their inventory, can allow access to the items inside across dimensions, but a pickaxe with Silk Touch is required to pick it back up. Elytra and fireworks, if the player has them, are extremely useful for air travel between islands, unless the durability is low and the player has no means of repairing it.
Wasted resources
These things probably will not result in death if you decide to do them, but they still waste resources, sometimes valuable ones, unnecessarily.
Involving tools and items
Mining cake
A cake does not drop, even when mined with a Silk Touch tool, meaning placing it is final. Do not attempt to mine it.
Logs for fuel (unless you cannot find coal)
A log smelts the same amount of items as a plank (1.5 smelting operations). You can craft 4 planks from 1 log, and then use the planks as fuel to get 6 smelting operations from one log.
In Bedrock Edition, a wooden slab burns the same amount as a log, and one can craft 3 logs into 12 planks and then into 24 slabs, giving 36 smelting operations in total, equivalent to 12 operations from one log.
Charcoal, which you get from smelting 1 log, smelts 8 items. Smelt logs to make a long lasting and efficient fuel source. One log split into planks (Java Edition) or slabs (Bedrock) can make enough fuel to smelt several more logs into charcoal, each of which provides 8 operations.
Carelessly crafting rabbit stew
Rabbit stew restores 10 hunger, making it seem like a great food source, as it restores more hunger than any other food that can be eaten all at once. However, the 3 edible ingredients (the cooked rabbit, baked potato, and carrot) combined restore more than 10 hunger. The carrot restores 3 hunger + the cooked rabbit meat restores 5 hunger + and the baked potato restores 5 hunger. 3 + 5 + 5 = 13 hunger. Therefore, crafting rabbit stew results in a net loss of 3 hunger, not counting the mushroom and the bowl used to craft it. Rabbits are also hard to catch, so it is a poor investment of time to try to get their meat. Plus, rabbit stew does not stack, so it unnecessarily consumes your inventory. This does not mean you shouldn't eat rabbit stew; it restores a lot of hunger, can be obtained from butcher villagers, and conserves up to 3 inventory slots as opposed to keeping separate ingredients.
Brewing mundane and thick potions
Do not brew mundane and thick potions, as they can't be brewed into anything else. In addition, do not consume awkward potions, which give you no effects -- and you have just wasted the Nether wart you used to make them (plus another for when you end up making more potions).
Leaving items uncompressed
Compress items into blocks whenever possible. Ingots and gems (like diamonds) can be compressed into blocks. This saves inventory space by a ratio of 9 to 1. Additionally, do not craft logs into planks if not for immediate use, because planks take up four times as much room because you get 4 planks per log. You also can't uncraft planks, so if you need more logs, you will have to actively collect more.
Note that Nether wart blocks, packed ice, blue ice, cut copper (of any oxidation level), and blocks of amethyst cannot be crafted back into their respective components.
Accidentally crafting a lot of items
If playing on a PC, holding ⇧ Shift when crafting crafts as many of that particular item as possible. If you do this accidentally, you can end up wasting a lot of resources unnecessarily. For example, if you have a lot of diamonds to craft a full set of diamond armor and you accidentally craft 10 diamond boots, you have wasted a large number of diamonds on armor you don't need.
Mining with the wrong tool
If you do not have a high enough level tool for the block you are mining, no item is dropped when the block is destroyed. A good indication for if you are mining with the correct pickaxe is by the amount of time it takes for the block to be destroyed. If you have been mining a block other than obsidian or an ender chest for a long time, then the block likely drops no resources when destroyed and you have just lost the item you were trying to mine. Memorize which pickaxe is needed for each block.
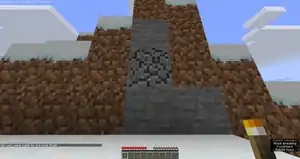
- Using wood for wooden tools wastes wood as these tools are weak and not durable. For instance, wooden pickaxes cannot mine obsidian or any ores other than coal ore, Nether quartz ore, or Nether gold ore. You should only craft wood tools as needed to avoid wasting wood. When you are starting out, you should make a wooden pickaxe, mine 3 stone, and then never use the wooden pickaxe or any other wooden tool again. Use the stone to make a stone pickaxe (which is faster than wood) and collect the rest of your stone.
- You should never use golden tools. Even though they may be highly enchantable and mine quickly, they are the least durable of all the tiers of tools making them not worth using. Additionally, gold pickaxes cannot mine anything a wooden pickaxe cannot (including gold ore and blocks themselves), regardless of enchantments.
- Stone tools are satisfactory, but they are slow and should only be used early game when iron and diamond are not easily accessible. Though cheaper than iron and diamond, a stone pickaxe can only mine iron, lapis lazuli, coal, and copper.
- Iron tools are the tier of tools that most players should be using. Iron is fairly common, so it isn't hard to gather enough to make a full set of tools, and they are the third most durable of the tiers. They can mine all blocks and ores but not obsidian or ancient debris.
- Diamond tools are the tool that you should have mid- and late-game because they are the second most durable and can mine all blocks except unbreakable blocks. Unless you have a lot of diamonds, however, it is recommended that you make a diamond pickaxe, enchanting table, diamond sword, and diamond armor in that order before making other diamond tools.
- Netherite tools and armor are the best, but do not waste them. Netherite is crafted from diamond tools by finding the rare ancient debris in the Nether, smelting it into netherite scraps, then crafting four of these netherite scraps along with four golden ingots to create a netherite ingot. From there, combining the netherite ingot and the diamond tool (since 1.20 a netherite upgrade is also required) in a smithing table creates a netherite tool, keeping all enchantments. Netherite is faster (aside from gold), more powerful, and more durable than anything else and is recommended for you if you are in the late-game.
Wasting valuable equipment on low-value jobs
Diamond and netherite items last long enough that they are as likely to be lost to an unlucky death as they are to wear out, so you must ask yourself when and where you are willing to risk your more valuable tools.
- Iron tools are faster than stone and have almost twice the durability of stone tools. Weapon damage is greater and armor can be created from this material. Iron ore is fairly common but not unlimited. Iron ingots can be infinitely acquired through an iron golem farm. These should be your go-to tools for traveling or adventuring in the early- and mid-game.
- Diamond tools are for special missions where you want stuff without having to create large numbers of tools, and you want to work fast. However, the supply of diamonds is strictly limited, so you should choose carefully how you use and risk them. Given that you should try to get the most out of your diamond items, you should enchant your diamond tools with higher enchantments.
- Shovels also get used up, but are much cheaper than other tools, only one diamond piece is consumed. If you have many diamonds, an "eternal-shovel" may be a decent time-saver.
- Swords only cost two diamonds and can give you a key edge in fights, making them more worthwhile for everyday use.
- Think carefully about making diamond armor. While it is expensive (24 diamonds for a full suit), you are protected much better while wearing it.
- Netherite is more powerful and durable than diamond, but also much more expensive. Upgrading a single diamond item to netherite requires four pieces of ancient debris -- which are extremely rare and difficult to get without blast-mining -- and four gold ingots to craft a netherite ingot, along with to the resources necessary to acquire the diamond item. Repairing the item without Mending costs an additional 4 ancient debris and 4 gold ingots at least, and a matching item at most. Tools, weapons, and armor of this tier should be saved for difficult battles or large projects rather than worn away gradually on resource gathering or chores.
Of course, if a villager weaponsmith, toolsmith, or armorer sells diamond tools, that makes diamond tools much less costly as you can trade renewable resources for emeralds, and then those for iron and diamond tools.
You should also remember that time is another valuable resource in Minecraft. You can easily hollow out a 10×10×10 area with wooden picks and wooden shovels, but it could be a waste of time when you have netherite tools to use on the same project. Using iron and stone tools to mine in order to conserve netherite takes away the point of gathering the diamonds, gold, and ancient debris in the first place, and most people do not want to spend their entire Minecraft experience digging with weak tools when they can finish digging quickly with powerful tools. If you have a shorter time restriction for playing Minecraft, it may be more beneficial for you to use up netherite to save time. However, if you do not have many diamonds or much ancient debris, do not waste them on less necessary tools, such as shovels and hoes.
The Mending enchantment can make the use of high-end tools a much better proposition, especially when paired with Unbreaking and/or Fortune. A Mending pickaxe that is used to mine ores that give experience never breaks because the experience from the orbs repair it instantly. In this case, the durability from netherite also allows it to mine other stuff and it can always be taken to an experience farm for more repairing. A netherite sword with Mending can last forever when killing monsters, making the high damage from netherite a much better investment. It is possible to change the job of your villagers to one of your choice, and reset it until it has a desired trade, making it a lot easier to get the Mending enchantment.
Tools as melee weapons
You should always carry a good melee weapon. Many tools cause less damage to mobs than a sword, are slower, and lose durability quickly when used for combat.
An axe deals high damage and can also chop wood faster. In Java Edition, many axes deal the same amount of damage, meaning any axe, even below diamond, can deal at least as much damage as a diamond sword, and if enchanted, possibly even a netherite sword; however, axes are more expensive and have much slower attack speeds than swords, so you may find them less useful if you often miss your melee attacks. Axes have another use in the ability to disable shields temporarily for any fights you end up in against another player.
In Bedrock Edition, axes do 1 less damage than their sword counterparts, making them a good backup weapon if your sword is lost or broken.
Shovels deal 1.5 HP less damage and pickaxes deal 2 HP less damage than swords. Hoes were useless until 1.16 where they now do 1 damage less than the sword of the same tier, previously having done the same damage as fists.[Bedrock Edition only] In Java Edition, they remain with one attack damage.
For more details on what weapon causes what amount of the damage, see "damage."
Using gold for armor and weapons
Even though golden tools do work faster than netherite (excluding blocks that golden tools cannot mine such as obsidian and most ores), and are much easier to enchant than diamond or iron, or even netherite, they have poor durability. Instead, you should use gold to barter with piglins, or craft golden apples for a high-saturation and fast-healing food, golden carrots for high-saturation food or night-vision potions, glistering melon slice for potions of healing, or powered rails.
The exception to this is if you have a gold farm. If they do, then gold becomes an easily renewable resource. Zombified piglins drop gold ingots and nuggets upon death, making gold renewable. Gold is also better than leather armor in all cases, so if you do not have enough iron to make a full set of armor, gold is good for your armor. However, you are likely to get more iron than gold, unless you find a badlands biome, where gold can be found near the surface. Another exception is a golden helmet or boots if you plan to spend large amounts of time near piglins.
Here are some examples of how weak golden tools are:
- A gold sword with Unbreaking III has around the same durability as a stone sword.
- A gold sword with Sharpness V does the damage of a non-enchanted diamond sword.
Using tools on leaves, grass, vines, and flowers
Using a tool on leaves is a bad idea, because it drains the tool's durability. If you were to use a tool on all of the leaves on a tree, not even an iron tool would last long. It is just as fast for you to use your fists or any non-tool items on leaves as it uses a tool other than a sword or shears on a leaf block or grass. You should use shears on leaves or grass only if you want to collect leaf blocks as an item. If you are cutting through a lot of leaves or cobwebs, you should consider making a hoe, which (on iron tier and higher) can instamine leaves. It is a great idea to enchant this hoe with Fortune, as that increases the drop rate of sticks and saplings, as well as apples from oak trees; this is especially useful when farming jungle trees, whose saplings' drop rates are much lower.
Using axes for beds
Breaking a bed with an axe takes just as long as breaking with your hand. It also consumes the durability of the axe.
Using pickaxes with rare enchantments
You should not use a pickaxe enchanted with Fortune to mine stone as this yields no extra stone and wastes the enchanted pickaxe's durability. A good idea is to bring an iron pickaxe to mine stone, andesite, or diorite because these are not affected by Fortune.
There are two exceptions to this:
- If you have a tool enchanted with Mending. As long as you pay attention to your tool's durability and repair it when necessary, your tool will last forever.
- If you can trade that pickaxe (toolsmith), or the enchants in book form (librarian), from a villager.
Disposing of low-durability items
No one wants to use tools that are about to break, so many players just throw low-durability tools out, even if they are valuable. An item with low durability can still be used. You can also use old tools to repair them. Low-durability items could be kept in a chest in case you die and lose your stuff. Any scrap tools or armor made of iron or gold can be chucked in the furnace to obtain a nugget and old wooden tools and weapons can instead be used as furnace fuel.
The downside of using objects with low durability is that they may break while being used, forcing you to craft new tools or carry extra tools. This is a problem, especially for weapons and armor. You could instead store low-durability items while new items are being used so the pieces of equipment can be combined later.
Fortunately, the Mending enchantment enables you to repair any item you are holding in your main hand, offhand, and any currently worn armor using experience from any source. (Note: All of the said items need an individual Mending enchantment in order for this to work.)
Disposing of less valuable items
Most players do not want their chests and inventory clogged up with less valuable items such as rotten flesh or seeds. However, you should reconsider before throwing away items of any value, even almost seemingly useless items, as the items may come in handy later in the game.
For instance, rotten flesh is not only an efficient food for wolves, but it also makes a great emergency food for you. Also, if you want emeralds, you can use rotten flesh to trade with cleric villagers for emeralds. Another example item is cobblestone. It can be used to create emergency tools, smelted for experience points on demand, be crafted into many different things, or used as a useful, everyday building block. Seeds can be used to make bone meal in composters, or can be fed to chickens to breed them – providing a healthy source of experience points in the process.
You should always think about what you are throwing away before they do. No matter what, chests are cheap to craft.
Wasting experience
As your experience level rises past a certain point, the experience orbs you collect count less toward the next level each time you level up. In other words, each level takes more and more experience to fill up. Since you can never enchant anything at a level higher than 30, you should make sure to enchant as soon as possible as otherwise, you waste much of the experience that you gained after that point. Even worse, if you die, you lose the majority of your experience permanently. For example, when you first defeat the ender dragon, you receive 12,000 experience points, which is enough to bring your experience level from 0 up to level 68. This is a high amount of experience, but a large portion of this experience is wasted because so much of it is used to achieve higher experience levels.
To aid in efficiently using experience levels, you should have easy access to books and tools for enchanting. You also need bookshelves to gain access to high-level enchantments, something which is necessary to allow you to not be forced to either spread low level enchants across cheap gear, put low level enchants on diamond armor and tools, or waste experience from going far past level 30 and possibly dying.
Diamond is the best candidate for enchantment in most circumstances, so if you have enough diamonds, it is always good to enchant diamond armor and tools first. Level 30 enchantments are usually the best since they usually output the highest levels of enchantments. Enchanting pickaxes early on can greatly help you, as you can get the Fortune enchantment on you pickaxe which will increase their diamond output when they mine. If you have run out of diamonds to make into gear and enchant and you do not want to waste their experience, a good candidate is a bow or a fishing rod. Since these items do not have tiers, you are still making sure that you make the most out of your experience points. And then when you do get enough diamonds, you can use those. Netherite and gold-tier items, and iron tools, have a higher enchantability than diamond, though.
Lastly, if you have an efficient mob grinder or villager trading hall with appropriate farms, there is no need to worry about efficiency of using experience points because you gain plenty of experience points and can enchant all of the tools and armor needed, with enough patience. If you use these items well, your in-game activities become easier and efficient.
Overloading enchantments
Try not to over-enchant tools and weapons, as over-enchanting them increases the risk of not being able to repair them. This is because the anvil has a limit of 39 levels for a task, so even if you have enough levels, the anvil still declares the repair work "too expensive" if the task costs more than the anvil's limit. You can avoid increasing anvil costs by not renaming items early on, or combining other items and enchanted books with the item. You can circumvent issues with high anvil costs by enchanting tools with the Mending enchantment, removing the need to repair these tools using an anvil. If you do not have access to Mending books, you can also enchant items with Unbreaking to increase the time between needing to repair items in an anvil.
Collecting excess items
Shears are made for collecting plants like leaves, vines, and grass, but you should avoid collecting too many, as the extra items consume too many inventory slots. You should instead collect a number of items slightly above the amount you need for your projects instead of collecting large amounts of items for no reason. It should also be remembered that shears lose durability from breaking blocks, so if you collected several stacks of leaves and did not know what to do with them, you would have just wasted two iron ingots which could have been used for something else.
Cluttered inventories
You have a limited amount of space in your inventory, so you should keep from carrying items you do not need everywhere so you can collect more of the items you do need without much hassle. Often, you think you will have enough space, but you end up not having enough.
You should consider organizing your inventory for quick access and a professional feel to help yourself keep track of what is necessary and what is not. Organizing also helps cut down on the time it takes to find items you need or just collected. If you need to, they can increase the items they have on hand by using shulker boxes and ender chests, which retain their inventory when picked up.
In addition to this, you are shouldn't store items that have no use other than being crafted into something (e.g. iron ingots) or being expended (e.g. arrows) in your hotbar, clogging it with unusable items. During travel, bundles can be used to store stray items like flowers, seeds or other items that you have in ones or twos but still fill an inventory slot.
Disposing of tropical fish items
Tropical fish are pretty much useless apart from restoring one hunger point. However, one can trade tropical fish to a fisherman, and one can also breed[Java Edition only] and heal wolves with tropical fish. If there is no other option, then tropical fish can be used as an emergency food.
Using hay bales, melon blocks, dried kelp blocks, or cakes as compost
When these blocks are in smaller components, they give you more bone meal. Even though the high level of compost is tempting, it doesn't get you anywhere further. For example, using 100 kelp blocks as compost only yields 7.143 bone meal while if crafted into 900 kelp you get 38.571 bone meal, which is more than 5 times as much.
Making your base out of the wrong material
Wherever you are, make sure your base cannot be destroyed by endermen (particularly in a warped forest or the End), as they can pick up some blocks, and preferably use strong, blast-resistant materials unless it interferes with the aesthetic that you care about, so that neither creepers nor griefers can blow it up. Lava and lightning both have massive destructive power, so if you don't have a lightning rod and "Fire spreads" is on, try not to use flammable blocks like wood or wool.
Using fire charges
If you have a flint and steel, you should not use fire charges to light casual fires. Fire charges require far more expensive materials to create than flint and steel, and unlike flint and steel, each fire charge only has one use. Under normal circumstances, it is not worth wasting those hard-earned fire charges when you could just use a flint and steel. However, if you get trapped in the Nether without flint and steel, they can be useful for re-activating the portal, since all their ingredients appear naturally in Nether. (Gunpowder from ghasts, coal from wither skeletons, and blaze powder from blaze rods obtained from blazes.) They can also be used for redstone contraptions, such as automatically lighting portals and ranged firebombs.
Naming wandering traders with a name tag
Wandering traders despawn, even if they are named, so naming one is just a waste of a name tag.
Smelting ores rather than mining them
| Ingredients | Smelting recipe |
|---|---|
| Ore + Any fuel |
Except for ancient debris, ores can only be obtained using the Silk Touch enchantment. You always gain more experience from mining ores with the correct pickaxe to collect the raw material than from smelting the ore. Additionally, you misses out on the chance to collect multiple items from each mined ore, especially if you own a pickaxe enchanted with Fortune, or if mining redstone ore or lapis lazuli ore. The only exception is when Nether gold ore is smelted, which makes one gold ingot (9 gold nuggets) rather than gold nuggets (2-6 for Nether gold ore; average yield does not extend 9 nuggets even with Fortune III).
Brewing weakness potions inefficiently
Potion of Weakness can be brewed by adding a fermented spider eye to any of the following potions:
- Water bottle
- Awkward potion
- Thick potion
- Mundane potion
- Potion of Strength
- Potion of Regeneration
By using a water bottle, you use the fewest resources, so using a water bottle is your best option.
Wasting healing potions on harming potions
A potion of healing can be brewed into a potion of Harming, but is far too valuable to waste on attempting to harm enemies. This is especially true if the potion is a lingering one, which is much stronger at either tier and far more expensive to brew. Instant Damage heals all undead mobs, including the wither, so you should never corrupt a healing item in a situation where doing so is counterproductive. In a pinch, it is possible to throw a splash or lingering potion of Healing into a crowd of undead mobs to hurt or kill them and receive the effect if close enough. Lingering potions of both healing and harming at both level I and II inflict their respective effect at half power, but once per second at a total of five seconds, meaning any entity in the cloud receives the effect a total of five times, making such a lingering potion up to 2.5 times more potent than its splash variant. Lingering potions can only be acquired by brewing their respective splash potions with dragon's breath, which can only be obtained at the ender dragon fight, making them extremely expensive. If you want to inflict lots of damage on other players or living mobs without damaging the environment with lava or TNT, a potion of poison can also be corrupted into harming with far less wasting of valuable resources.
Using coal blocks when unnecessary
A coal block burns for 16,000 ticks, which is equivalent to 800 seconds (13 minutes 20 seconds). A piece of coal burns for 1600 ticks -- that means a coal block is giving out an equal energy and burning time of 10 coal, despite the fact that a coal block is crafted with 9 coal. This may seem like a good deal, but however, one coal block is able to burn 80 items; that means if you do not have 80 items to smelt, you wind up wasting some of the coal. If you plan to smelt fewer items, coal blocks should be crafted back into coal first. You can get more info here.
Making Planks when you need Charcoal
Charcoal is made from logs, not from planks; if you make planks from a log, you cannot use them as the top ingredients to get charcoal. But it is useful for completing the achievement renewable energy.[Bedrock Edition only]
| Icon | Achievement | In-game description | Actual requirements (if different) | Gamerscore earned | Trophy type (PS) | ||
|---|---|---|---|---|---|---|---|
| PS4 | Other | ||||||
| Renewable Energy | Smelt wood trunks using charcoal to make more charcoal. | Smelt a wooden log with charcoal as the fuel. | 10 | Bronze | |||
Mining Budding Amethyst Blocks
Budding amethyst is unobtainable in Survival and (via the amethyst clusters that bud on it) is the only source of amethyst buds, clusters, shards, and blocks. Budding amethyst can be hard to make out in an amethyst geode among all the normal amethyst blocks, but it has an X-shaped crack on each face and is often seen growing amethyst buds or clusters. To farm amethyst, it is advisable to mine out all the blocks touching each face of a budding amethyst block (unless it is another budding block) and allow each face to grow shards. As this can only be done in the geode in which the budding blocks are found, noting down the coordinates or building a distinct landmark would be a good idea.
Using Fire Protection as your main resistance from fire
Fire Protection can get you out of a bind in clutch situations. However, a Fire Resistance potion is almost always better to use, as it completely negates lava and fire damage. That, and only one type of Protection is available per piece of armor, locking out the most viable option, regular Protection (with one piece of Blast Protection mixed in if explosive PvP is a factor).
Involving blocks and entities
Not killing passive mobs with flint and steel when safe and available
If the player is already carrying flint and steel while they are hunting, they should save themselves some time. When hunting a mob that yields meat (porkchops, chicken, steak, mutton, rabbit), using a flint and steel cooks the meat for the player. This is especially useful on chickens, since they are easy to kill and the fact that raw chicken is not as useful, as it can inflict food poisoning. The player saves furnace fuel and time they would have spent cooking it, and also, a flint and steel cost less to make than most weapons, so it is even more efficient than Fire Aspect or Flame. When using this tip, the player should be careful not to set fire to themselves, or to try it on mobs near water. The player can also be more efficient by setting multiple animals on fire with the same flame. The player should watch out for wooden houses or trees while using this technique.
Lava also works similarly to flint and steel except that it does not have any durability and it spreads, requiring the player to quickly remove it. Also, lava is more damaging to the player than regular fire, so be even more careful when using lava. It could also burn the dropped meat by the animals.
The player should be careful using these methods in an animal farm since this tactic would kill the player's entire animal farm, and at least 2 animals are needed for reproduction. A good idea is to let a few of the animals out of the pen and then set fire to those animals.
If the player has a sword with the Looting enchantment, they may want to use it for killing animals as it provides a higher drop rate than regular weapons. Some may deem this far more useful of a tactic than the other suggestions due to the ease of collecting furnace fuel. The player should not use flint and steel or lava for killing animals if they want the experience points earned from killing animals or the raw form of an animal's meat.
Using swords in animal farms
In the Java Edition, swords have a sweep attack that can hit several targets at once. This is useful when fighting monsters, but can cause problems when slaughtering animals, especially in a crowded ranch. When trying to kill one mob, the player may accidentally hit or even kill another mob standing next to it, particularly with Sweeping Edge. This can be avoided by using an axe instead of a sword, which has the added bonus of getting the job done in fewer hits. The player should remember that an axe hits slower than a sword.
However, there is a benefit to using a sword instead of an axe to slaughter animals when the sword is enchanted with Looting or Fire Aspect, as these enchantments are unavailable to axes in survival and can cause additional resources to drop from the animals you kill or cook meat without having to do so in a furnace, respectively. To avoid doing a sweep attack with a sword, either attack the animal while sprinting or jump and attack the animals in midair, as doing either of these actions prevent a sweep attack from occurring. In addition, attacking animals while falling after a jump causes a critical hit, which can provide enough of a damage boost to kill the animal in a single strike.
Fighting magma cubes near zombified/regular piglins
When fighting magma cubes, it can be a good idea to use sweeping edge or the sword sweep attack to kill multiple tiny cubes in one hit, but that can cause problems when you are near zombified or regular piglins. An accidental hit makes the other piglins angry at you and both types of piglins are powerful, especially if you anger a piglin brute and they can finish you in a few hits if your armor is not good enough.
Killing sheep for wool when the player has enough iron for shears
Sheep can only drop one block of wool when the player kills them. If the player has shears, they can right-click on a sheep with shears, yielding one to three blocks of wool. Also, if the player right-clicks a sheep with a dye in their hand, the color of the sheep changes to that color. If that same sheep is sheared then eats grass to re-grow their wool, it has the same color of wool as the player dyed it earlier. This makes wool of any color renewable. Baby sheep cannot be sheared and do not drop anything when killed.
If the player plans on killing a sheep, they should shear the sheep first before killing them, as it increases the wool gathered before the player kills the sheep for experience points and mutton. Also, the only essential use for wool is a bed, so the player should avoid killing more than enough sheep to collect the wool needed to make a bed on their first few days.
Shearing mooshrooms
Mooshrooms drop 5 mushrooms of their color when sheared, turning them into cows. However, the player can get infinite mushroom stew out of them by right-clicking them with a bowl, meaning "milking" them with a bowl is more efficient. In addition, mooshrooms never grow back their mushrooms when sheared so the player needs to find another one in a mushroom fields biome. If the player has enough mooshrooms to breed them, then shearing extra mooshrooms could be used to get cows and mushrooms. However, if the player plans on killing the mooshroom for beef or leather, then it is okay to shear them beforehand if the player needs mushrooms, as killed mooshrooms do not drop any mushrooms.
Breaking spawners or budding amethyst
When in a monster room, mineshaft or Nether fortress, don't try to break any spawners, with the exception of the silverfish spawner found in the stronghold. A spawner drops only 50 experience points when broken, but a working spawner can be used for mob farms to gain more experience and rare drops. The spawner should simply be disabled by placing a torch on one side, except for blaze spawners, which require many torches within a couple of blocks of it. An exception may be the stronghold since it may be annoying to try to set up a silverfish farm and the player may wish to just get experience other ways.
While there were historically different ways to obtain spawners as items legitimately in Survival, the majority of players create worlds in much newer versions, and as such, actually obtaining a spawner by breaking it is no longer possible in said new versions.
For a similar reason, avoid breaking budding amethyst blocks, as their supply is similarly limited and does not even drop anything when broken.
Using torches to break anvils
Many players use torches to break gravel after having built a large tower of it. Unlike gravel, sand, and the dragon egg, if anvils fall on torches, the torch is destroyed without dropping itself as an item, and an anvil falling on a player deals damage. Use different non-solid blocks such as slabs, signs, cakes, and soul sand to break anvils, all of which cause the anvil to drop as an item.
Breaking bookshelves repeatedly without Silk touch
If the player needs to move bookshelves, they should use a Silk Touch enchanted tool to do so. Breaking a bookcase normally yields 3 books, which results in the player losing 6 wooden planks (this can add up quickly). Using a Silk Touch-enchanted tool gives the player the actual block back, saving resources and time.
Woodland mansion and Stronghold libraries generate lots of bookshelves, so ignore them until you have a silk touch tool.
Destroying ender chests without Silk Touch
Ender chests drop only eight obsidian blocks when destroyed, meaning that the player loses an eye of ender. Ender chests never lose their items, as all ender chests are linked for each player. To avoid wasting eyes of ender, a player should use a Silk Touch pickaxe so the ender chest drops as an item instead of eight obsidian blocks.
Destroying glass without Silk Touch
Glass does not drop itself when broken unless the player uses a tool enchanted with Silk Touch. Thus, players should be careful where they put glass, because if placed it in the wrong place and broken, it cannot be recovered. For this same reason, the player should also avoid holding glass in the hotbar, unless they plan to use it soon. This same advice is recommended for glass panes and glowstone.
Shooting paintings, boats, minecarts, item frames, or armor stands
Do not shoot these items. They count as entities, and as such, they can be hit off walls by arrows, using the arrow in the process. In fact, an armor stand is destroyed and does not drop as an item if shot. If the player wants to practice archery, the player should shoot somewhere else. A target block is a much better option as it does not consume an arrow and can be linked to a redstone comparator to show more precise accuracy. A button made of wood can also serve as a nice and cheap target if the player does not have the resources to craft a target block.
Exposing armor stands to creepers
Creepers explode when close to the player, and if armor stands are destroyed in the explosion, they do not drop as an item. Therefore, it is important to keep armor stands away from creepers, preferably inside, far away from any mobs.
Try to drive the creeper away or kill it before it explodes to prevent any entity loss.
Curing zombie villagers near zombies
If the player cures a zombie villager when other zombies are around, the other zombies attack the cured villager, reversing what the player just did. Even if the cured zombie is safe from zombie attacks, it takes longer to be cured, so zombie villagers should be kept away from zombies as they are being cured. Also, this wastes golden apples and potions of weakness, losing gold and other valuable materials.
This also applies for illagers, because they attack villagers and not zombie villagers.
Smelting cobblestone excessively
Unlike cobblestone, stone and stone bricks cannot be used to make tools, should the need arise. In addition, having to mine stone out again after having smelted it leaves the player without cobblestone, and the player wastes any fuel used to smelt the stone unless it had been mined with a Silk Touch tool. It is always a good idea to keep a decent stock of cobblestone on hand.
Carelessness with the dragon egg
Many players want to show off that they killed the ender dragon, but many have lost the dragon egg, which is the trophy of the End, and it is lost forever, because any subsequent dragons do not drop an egg. If the player gets too careless, they may send it back to the Overworld. When collecting the dragon egg, the player should cover up the portal with blocks and use a piston to push the egg, or make it fall onto a torch. Here are some of the things the player should not do:
- Try to mine it
- Forget to cover the portal and send it to the Overworld
Also, never leave it where players can obtain it in a Multiplayer server. There are multiple players, and someone might see it and steal it from the player. The player should place it in a safe place such as an ender chest and only display it if the player is playing with friends or is in eyesight of it.
Not using end stone to build on the main end island
If the player wants to build a house in the End, the player should not use anything other than End Stone and Obsidian, otherwise the Ender Dragon will destroy it (if the player wants to summon the dragon again). End stone is best because it is easy to mine. Obsidian is not recommended, as it takes time to obtain, unless your pickaxe is really good.
Using Fire Aspect on an enderman when searching for ender pearls
This is important for people who are purposely hunting for ender pearls. Fire Aspect casts the enderman on fire and make it teleport repeatedly, which means the player might never see that enderman ever again. Also, do not fight them near water, lava, or fire. This makes it easier for them to get distracted and teleport away, as all of those things make endermen teleport away. On the other hand, if the player does not want to fight an enderman and they've accidentally looked at it, they could go into water or rain, stare at the enderman until it leaves, or use Fire Aspect on it.
Throwing away emeralds
This is simple theory knowledge. Emerald ore is actually much rarer than diamond ore, and emeralds act as a currency between villager trades and on some Multiplayer servers. There are multiple uses for emeralds such as beacons and villager trading, meaning this item should not be wasted.
Using diamonds or netherite as beacon fuel
Beacons require one iron/gold ingot, emerald, diamond, or netherite ingot to activate the beacon. However, it is a bad idea to use rare materials like diamond or netherite. Iron and gold farms are easy to make and emeralds are easily obtained from cheap trades. Use those to save rare materials for other things.
Netherite: It requires 5,904 ancient debris and gold ingots respectively.
Using golden apples on horses
The player should not use golden apples to breed horses, as golden apples are hard to obtain. Instead, using golden carrots to breed horses consumes less gold as a golden carrot costs 8 gold nuggets while a golden apple costs 8 gold ingots. The player should avoid using enchanted golden apples on horses even more since they are uncraftable and can only be found in loot chests.
Trading emeralds for obtainable things
The player should never trade emeralds for anything that can be obtained in the near future or would be needed only for a short amount of time, except if they are doing that in order to increase a villager's skill level.
Selling large quantities of rare or non-renewable resources to villagers
Some villagers want hard-to-obtain materials, and give you a low number of emeralds. Some of the cheapest trades for obtaining emerald are trading sticks to fletchers, trading crops to farmers, giving rotten flesh to clerics, etc. You should only sell hard-to-obtain materials if you are trying to level up a villager's skill level and you already have a lot of that resource.
Good:
- Sticks: Fletchers buy 32 sticks for an emerald. Therefore, obtaining an emerald is as simple as mining 4 logs and converting them to sticks.
- Carrots and Potatoes: Farmers give you emeralds if you give them crops. If you break carrots or potatoes with a fortune tool, you get more crops. This doesn't apply to wheat or beetroot. Carrots and potatoes are a cheap way to get emeralds. Sweet berries are also available to sell, but only to master level butchers. Once available, they are a good way to get cheap emeralds.
- Pumpkins: Pumpkins can be easily farmed fully automatically allowing the player to obtain emeralds easily once a simple farm is set up. Unlike melons or paper they don't even require crafting.
- Mob drops: Some villagers buy mob drops for emeralds. It is easy to make a mob farm, making these items plentiful.
- This includes rotten flesh dropped from zombies, as the player usually gets hunger from eating it, it's good to sell it to cleric villagers.
- Any raw meat, such as beef, porkchop, chicken, mutton, or rabbit can be sold to butcher villagers for emeralds. This is not a big problem if the player has a large animal farm, but it's important not to "cook" the meat by using fire aspect enchanted tools/weapons on the animals.
- Any raw fish, such as cod and salmon, could be sold to fisherman villagers for emeralds. Like the mob farm, try not to kill any fish with fire aspect, a good and simple way to prevent that is fishing with a fishing rod.
- Glass Panes: Cartographers buy 11 glass panes for an emerald. Glass is easy to obtain, as sand is easily found in a desert, or it can be obtained via wandering traders. However, it is sometimes hard to find wandering traders.
- Stone: Masons buy stone for emeralds. With a silk touch pickaxe emeralds can be obtained easily.
- Wool: Shepherds buy wool for emeralds, in which the player can obtain easily if they have a large sheep/wool farm with different colored sheep for different colored wool.
- Flowers: Shepherds also buy dyes from the player. Most dyes can be easily obtained through flowers, but sometimes the dye isn't easy to get, such as brown dye.
Bad:
- Lava buckets: Armorers buy a lava bucket for an emerald. However, lava is not renewable even in the Nether and buying a bucket from a wandering trader costs 5 emeralds. Also, a bucket is worth more than an emerald. However, as of 1.17, lava is renewable via pointed dripstone and there is a trade loop with the fisherman (emerald to bucket of cod, raw cod to emerald) that lets a player obtain free buckets, making this a good trade (1.17+).
- Diamonds: Blacksmith villagers (the weaponsmith villagers and the toolsmith villagers) buy a diamond for an emerald. However, a diamond is worth a lot more than an emerald. On top of that, it is hard to obtain and not renewable.
- Wheat and beetroot: Farmers buy it for emerald. However, using fortune on these crops yields only 1 wheat or 1 beetroot respectively. Also, wheat is more useful for breeding animals and making bread and hay bales. However, if you have excess crops, you can use this trade to get a few extra emeralds.
- Coal and iron: Armorers buy 15 coal for an emerald, and 4 iron for an emerald. Weaponsmiths also buy 10 coal for an emerald. Until you have a wither skeleton farm and an iron farm, these items are not good for trading, especially in the early game when you do not have a lot of these resources. The coal can be easy to find underground, which the butcher, fisherman, weaponsmith, and the toolsmith villager also buys for emeralds.
- Gold: Clerics buy 3 gold ingots for an emerald. However, gold is hard to obtain in large quantities. 3 gold ingots are worth much more than an emerald. However, if you have a large gold farm, such as a bastion piglin-killing farm or a zombified piglin farm, this is not a big problem.
Not converting villagers to reduce prices
Curing villagers can make them reduce prices and make things cheaper. It is a good idea to cure a zombie villager when you have the resources. If the trades are expensive, cure them multiple times, like infecting them and curing them. Do not do this on Easy or Normal difficulty as the villager has a 100% or 50% chance respectively to die from a zombie attack instead of being converted.
Wasting arrows
Until the player has a large collection of arrows, has built a mob farm or skeleton dungeon grinder, or has the Infinity enchantment on their bow, they should use their arrows sparingly. Arrows are best used for more dangerous mobs such as skeletons, creepers, and witches. Enemies such as zombies are not as hard to kill with melee combat so the player can save their arrows by not using them on these easier mobs. Sometimes, exceptions should be made with easier mobs, such as when a zombie is burning or their sword is enchanted. Situations such as these in which the player is in extra danger may warrant the need to use a bow. Passive mobs pose no threat to the player and thus have no need to be killed from afar. A special case is the enderman, which is immune to arrows and always teleports away from them.
Coal blocks
Nine pieces of coal burn for 720 seconds in total, while a block of coal, which can be crafted with 9 coal, burns for 800 seconds. This gives the player one free coal's worth of burn time.
| Ingredients | Crafting recipe |
|---|---|
| Coal |
Besides, blocks of coal are more efficient for the inventory. This is also called compacting (compacting also works for diamonds, redstone, lapis lazuli, gold, iron, emeralds and more).
Do not use blocks to smelt only a few items. Whole blocks are consumed at a time, so only use coal block when you are smelting more than 72 items(9 coal*8 items for each coal). For only a few items, it's a good idea to just put in any number of coal.
Not using hay bales to heal horses when available
Similar to the above involving the 9 coal and the block of coal, each wheat crop can heal a horse 2HP![]() health; however, an entire bale of hay can heal a horse 20HP
health; however, an entire bale of hay can heal a horse 20HP![]() × 10 health, and hay bales are crafted with only 9 wheat. Effectively, this heals the player's horse an extra 2HP
× 10 health, and hay bales are crafted with only 9 wheat. Effectively, this heals the player's horse an extra 2HP![]() health.
health.
Plus, just like how blocks of coal store 9 coal, hay bales act as a storage unit for wheat, as 9 wheat can be crafted from one hay bale.
The only exception to this is if the player's horse lost only about a few health points, they should not feed the horse hay bales and instead feed it wheat, as the horse does not need the extra health.
Getting blue dye from lapis lazuli
Some players who have lapis lazuli use it to make blue dye. This is not recommended, because there is a much easier and cheaper way to get this dye: from cornflowers, which are very plentiful. Lapis lazuli, on the other hand, can be only obtained from mining or villager trading.
Using lapis lazuli as a dye is a waste of resources and should not be used, unless you buy yours from cleric villagers. However, it may be okay to do when you have lots left over from mining and you don't plan on enchanting anytime soon.
Other
The following things to not do in Minecraft do not fit any of the categories listed above. Still, they are equally important.
Setting a spawnpoint in the End/below the end portal
It is possible to set a spawnpoint in the End using commands. However, doing so provides no easy way out. Dying or going through the portal sends you back to the spawn point, which is the End. The only way to get out is by executing a teleport command in the Overworld or the Nether or by going out through a Nether portal placed by commands, since Nether portals are disabled in the End. The player can also use /setblock ~ ~ ~ end_portal to get out, or building a end portal and jumping into it in the end can teleport the player back into the overworld where the spawnpoint can be set again.
Setting your respawn point under an active end portal had a similar effect, leaving you stuck in the End dimension forever unless cheats are on.
Building weak or flammable structures
The player should avoid building with dirt, sand, snow, and netherrack, because they are weak materials with a low Blast Resistance, unless it's a temporarily structure or as a temporary base (creepers cannot blow if there is a one block wall between the player and the creeper). They are easily destroyed by creepers or TNT. Instead, the player should use cobblestone, which is a cheap, abundant, and tough alternative. Later on in the game, the player may want to make their main base out of more varied blocks.
A list of low blast-resistance materials can be found here.
Players with the ability to have infested blocks in their inventory (such as in Creative mode) should be careful not to use them for most building projects as they release silverfish when broken, unless they are used to trick griefers into getting swarmed by silverfish.
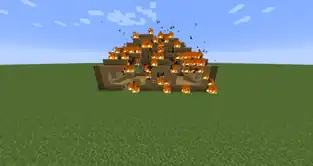
Although wood is flammable, it has a decent blast resistance and is efficient to collect in large quantities. A stack of wood blocks can be harvested at the same time as a stack of cobblestone, but yields four times as many blocks when crafted into wooden planks. For large constructions, such as mob traps, wood planks are a good choice. Wooden roofing may be easy and look nice, but it is vulnerable to being set on fire by lightning. Either the player should make the roof in a fireproof material or have a fireproof layer beneath to limit the spread of fire. In 1.17, a lightning rod can avoid this problem.
Building with obsidian
Obsidian is a blast-proof block which provides great protection but takes a lot of time to collect. The time requirement for collecting obsidian makes it difficult to use in large quantities. Also, despite the fact that obsidian has a high explosion resistance, it can still be destroyed by blue wither skeleton skulls from the wither. If the player is concerned about protecting valuables from explosions, they do so in an efficient manner to use less obsidian.
In some multiplayer war games, the player may want to build the exterior of their base out of obsidian because most explosions have no effect and it takes time for players to mine into it.
Non-reusable TNT traps
It is time-consuming to rebuild TNT traps. Instead, the player may want to use a more explosion-resistant material such as obsidian. Even using cobblestone helps, even if it is not fully explosion resistant. The player could instead use water to avoid terrain damage all together as water has the ability to absorb the destructive aspect of an explosion, but not the physics or health damage, which means that the target is still damaged and launched as normal.
Fire in wood houses
If you want to build using fire in a wooden house, make sure that no flammable materials are nearby, lest you burn down your house. The new campfires can provide the look of flames without a fire hazard, though you still need to be careful not to walk on them.
Destroying the world spawn point
A player who wants to play with any other items that cause explosions when used, should not do so near the world spawn point. If the player dies after blowing up the world's spawn point and loses the spawn point from a bed or respawn anchor, the player instead spawns at a now-cratered area. This makes it hard for the player to get out, lacking any tools or blocks. To help avoid this, the player may want to mark the world spawn point when starting a new world.
Living in the wrong biomes
Some biomes are better to live in than others. This also goes for the desert and non-plateau badlands biomes; while both are devoid of trees and generally flat biomes, they are the perfect setting for pyramids and other exotic builds. The swamp and mountains biomes are not recommended as build sites due to slime spawns in the former and extreme heights and few trees in the latter. Also, in mountains biomes, there is also the danger of finding a silverfish block underground disguised as stone or its variants. However, a mountains biome makes a great spot for building an epic house. A water bucket, Feather Falling boots, and elytra are recommended if a player chooses to live in a mountains biome. The snow biomes periodically develop a layer of snow over dwellings, which can be annoying for some, or desirable for others.
The jungle and dark forest biomes, while full of trees, are hard to build in because of the dense foliage, and can be dangerous to navigate at night. The plains, birch, flower, forest, savanna, giant tree taiga, and taiga biomes are typically recommended for beginner players due to the availability of resources and spawn rates of friendly mobs. Many biome variants and technical biomes are suitable too. See biomes for more. Mushroom biomes are deceptive. No monsters can spawn, and mooshrooms make infinite food sources with bowls, but the player cannot grow trees easily and mobs can still cross over from other biomes. Also, mushroom biomes are rare, making them difficult to find.
Extra nighttime dangers of certain biomes
Biomes with more vegetation and hills create greater risks of the player being killed at night as mobs can be hidden behind blocks and the player can become damaged from being knocked off edges. Terrain with lots of water can slow the player, making it hard to run away from some mobs. Deserts, swamps, and snowy biomes spawn husks, bogged, and strays respectively, which are much more dangerous than their zombie and skeleton counterparts.
If living in a forested biome, it is a wise idea to clear cut any trees near your base to increase visibility and prevent mobs from hiding under them during the day. Dark forests are especially dangerous, as the extensive shaded areas can shelter many mobs throughout the day.
Carelessness with wolves
A tamed wolf can be useful as it can give the player a hand when fighting mobs and keep the player company when lonely. It can be easy for the player to forget to make the wolf sit down when not needed, which could prove problematic if the player hits an entity they do not want the wolf to fight. Also, even if sitting, any attack on the player causes the wolf to stand up and come go to its owner. After the player spends enough time with their wolves, the player is less likely to make those mistakes. The player may want a couple of wolves to ensure that they can have a new pet wolf if one dies.
Also, the player should beware of walking on ice, because a wolf teleporting to the player may end up trapped under the ice and drown.
If a player who owns a wolf is farming sheep for wool and wants to keep them alive, make sure the wolf does not teleport to the player while they are inside the enclosure, because wolves attack sheep. Similarly, wolves attack rabbits, so if you have a wolf and a rabbit, make sure to keep the rabbit away from the wolf. And this applies to foxes as well.
Not having equipment for trips from the base
It is important to be prepared if the player wants to go adventuring. There are a few things that the player should always carry with them when they leave their base:
General cases
- Armor
- A good sword (iron or better)
- Pickaxe (stone or better). Stone pickaxes can mine iron, lapis lazuli, and coal. The player needs an iron pickaxe or better to mine any of the other ores, and diamond to mine obsidian.
- Optional bow and arrows, but recommended for killing skeletons, creepers, and witches.
- At least one stack of dirt or cobblestone (the player should remember to dig up more along the way.)
- Water bucket
- Food
- Torches
- Compass and/or map (if the player plans to just explore)
- Bed
- Crafting table (this comes in handy, especially at night)
- Fishing rod (in case the player runs out of food)
- Wood (useful for crafting while the player is away from home)
- A boat (Makes traveling faster. Its speed is 8 blocks per second and walking is 5.61 blocks per second.)
Stronghold (only if trying to defeat the Ender Dragon)
- Armor (Full diamond or netherite)
- A good sword (Diamond enchanted or netherite enchanted)
- Bow, Infinity bow recommended
- Food
- Healing items like golden apples or potions
- At least a stack of torches.
- At least 12 eyes of ender, as some can break when the player is locating it.
Mining

- Shovel (Stone or better) (For underground dirt and gravel patches)
- Armor
- Pickaxes (several stone and iron)
- Sword (iron or better)
- Bucket of water
- A stack of torches
- Wood (for crafting more torches)
- Building blocks
- Coal (for the furnace and extra torches)
- Food
Mineshafts
- Milk (optional, to get rid of poison or other negative effects)
- Honey bottles (optional, to get rid of poison specifically, leaving all other status effects still active)
- Sword (iron or better)
- Bow and arrow (useful in caves with lava)
- Pickaxe (iron or better)
- Building blocks
- Bucket of water
- Shears to cut cobwebs
- Armor (iron or better)
Being careless with horses
Horses, donkeys, and mules are quick and some can give the player a place to keep excess items. The player should always keep a lead and a fence on hand when out with their horse to tie it up if the player dismounts it. If the player is going far, they may want to take a mule or donkey to help carry food and resources while providing a ride. The player should never dangle their horse from a high place with a lead. The player should be careful not to hit a horse if they own wolves, as the wolves may kill it. The player can name similarly-colored horses to help tell them apart.
Settling in villages carelessly
Villages are great places to live. They provide you with free food, resources and shelter. However, you may want to take some precautions when settling in.
- Secure the lava in the blacksmith's house, if present.
- Build bridges and walls where necessary.
- Light up all the houses and pathways as they are not always adequately lit.
- Avoid hitting villagers and iron golems if there is at least one iron golem in the village.
Doing raids in your base
This is important for people with villagers in their base. If your base has lots of fortifications and you are experienced enough to tackle a raid without losing any villagers, it may be a good idea to do a raid in your base. However, for other players, it is not the best idea. For example, you can risk losing valuable villagers, even if you blocked them off (attacks from vexes), ravagers destroying your crops and custom trees, pillagers shooting wooden buttons, entities and pressure plates, activating redstone contraptions and/or destroying minecarts, boats, armor stands, item frames, etc. If you are fighting near your spawn point and get killed by your spawn point, you end up stuck in a death loop because you respawn and get killed by the raider again. (This is not as much as a problem for experienced players) If you have to do a raid, consider blocking those things off and summoning as many iron golems as possible, especially near crop farms and villager trading halls, as the raiders can destroy it.
Breaking Bedrock
Outside of Creative mode, bedrock is unbreakable and unobtainable without the use of glitches, so attempting to break it in the overworld just wastes time as you cannot place blocks in the void. However in the Nether breaking bedrock can prove useful in gaining access to the Nether roof. As you can build above the Nether roof[Java Edition only] and nothing spawns there building Nether hubs and gold farms may be much easier and safer. A player who really wants to break some bedrock must be in Creative mode or use one of the glitches shown in Tutorial:Breaking bedrock.
Taking risks
If the player's hunger bar is full, they regenerate lost hearts quickly, at the cost of hunger points. Sometimes, an earlier risk is better than a long term one such as if the player were jumping down a mountain when night is about to fall. It may, in this case, be is a safer option to jump down, than to build their way down when night is about to fall. Risk sometimes depends on what the player is carrying with them, as rarer items could be lost in more dangerous situations. Creeper explosions can help fight mobs. Spider eyes can be useful as food, even though they cause a short effect of poison. If the player has low health, has the gamerule for regenerating health turned to false, or is playing in Hardcore Mode, they may need to judge the risk of certain situations differently.
Sometimes, you might have to build down, if you have a diamond or netherite sword and armor enchanted with Sharpness V and Protection IV, you can most likely cut down swathes of mobs. Sometimes, the enchantment might be Smite V, and there might be a lot of undead mobs coming up.
Carelessness around redstone contraptions
Redstone mechanisms can be dangerous if not used correctly. For example, the player might make a mistake and push a block into their own head and suffocate or blow themselves up, or trap themselves inside the build. This also breaks the redstone build, which costs time to repair.
Another danger is accidentally placing a water bucket, as redstone components are broken by water.
Careless use of redstone components
Redstone components, especially redstone dust, can create lag. The player should avoid using unnecessary redstone and try to keep the number of running redstone clocks to a minimum. An "off" lever could be useful to deactivate large redstone devices when not in use. Locking hoppers while not in use is also advisable as hoppers produce large amounts of lag.
Using cursed items
Curse of Binding and Curse of Vanishing are enchantments with negative effects. Unlike other enchantments, which can be removed using a grindstone, you cannot "un-curse" an item.
Curse of Vanishing causes an item to disappear when you die. Using an item with Curse of Vanishing is harmless, but there is no point in putting additional enchantments on such an item unless playing in Hardcore, because the item is lost when you die.
If you obtain an item cursed with Binding, just get rid of it. If it's made of gold, iron, or chain mail, you can smelt it in a furnace or blast furnace. Otherwise, simply drop the cursed item and it despawns by itself after 5 minutes. You can also destroy it by throwing it into lava, at a cactus, or into the void.
Move your cursor over the armor piece before wearing it in case it has curse of binding on it.
Don't wear armor that has Curse of Binding. The only ways to remove the armor is to die (if not playing on Hardcore) or to let the armor run out of durability. Even if you don't expect to remove the armor, you may later acquire an enchanted book that you want to add to your armor. Adding an enchantment to armor, or switching to different armor buffed up with different enchantments, requires you to remove the armor, but you cannot remove armor cursed with Binding. If you wear a chestplate with Curse of Binding, you also cannot use elytra.
Feeding cookies to parrots
If a parrot is fed a cookie, it dies[Java Edition only] or contracts fatal poison, which kills it after for 16 minutes, 40 seconds.[Bedrock Edition only] It's safer to give them seeds instead.
Multiplayer
Possible death
Equipment for PvP
If the player engages in combat against another player but does not have the correct equipment, they could die and lose any items they have in their inventory.
In a PvP (player vs player) battle, players normally take the best equipment to fight other players. Most use enchanted diamond armor or diamond swords. For PvP, the player should not use anything made out of leather, wood, or gold as armor and tools made of these materials are extremely weak. Some other less straightforward tools such as lava buckets and end crystals may also be used as weapons.
Bow attacks
With a few shots from a bow, a player can be killed. Any player who leaves themselves sitting out in the open where they could easily be shot on a server that allows PvP leaves themselves open to this danger and may want to find somewhere with more cover. A shield can be used to completely negate all arrow damage.
Attacking players wearing Thorns enchanted armor
Attacking players who are wearing Thorns enchanted armor with a melee weapon damages the attacking player also. The player should use non-melee attacks to avoid being hurt by the Thorns enchanted armor.
Trusting strangers
The player should be careful with trusting players they do not know. A player could be dishonest and appear otherwise until they find ways to harm another player or their base and possibly destroy their whole base with TNT.
Setting off redstone contraptions carelessly
The player may never know what a redstone contraption may do. It could trigger a trap. The player may want to dig around a pressure plate or button to first discover what it triggers. The player may instead decide to destroy any activation switches to avoid activating anything dangerous.
Breaking tripwires
Destroying tripwire without shears triggers the tripwire and any connected traps, similarly to walking over the tripwire. Breaking the tripwire with the shears does not trigger any nasty traps.
PvP in water
The player's movement is hampered in water, and while engaging other players in PvP, they may knock the player further into the water so they cannot get out. In this case, it is extremely advisable to stay away from bodies of water.
Joining PvP servers earlier
If the player knows the server has newly been made, they should prepare themselves before the rest of the server's players grief the spawn point or begin killing all new players. Now there might be custom set spawn radius (in 1.9) or spawn protection, however, this does not protect the player from being killed for fun once they step out of the area.
Wasted resources
Having the gamerule KeepInventory on Hardcore multiplayer
Usually, when the player dies, they drop their items and respawn. However, in Hardcore mode, once the player dies, they do not respawn. If the player then kept their inventory in a Hardcore world, then it actually consumes their items rather than dropping them which would in Multiplayer not allow other players to retrieve the dead player's items they lost. This system could be used if a player does not want items dropped upon the death of a player.
Other
Moving beds
Beds can be helpful by letting players skip through night and set their spawn point. At the same time, if blocks are placed around a bed, the player's bed is destroyed, or a second player sleeps in the same bed the player last slept in, their spawn is set back to the world spawn instead of next to the bed. Players can avoid angering fellow players by not messing with their beds.
Not keeping bases away from griefers
When playing on a public multiplayer server, the player should build their base away from the spawn, and even better in a hidden area. Having a base near spawn easily allows newcomers to come in and mess with the player and their possessions. Players have less need to worry about hiding a base on a private server with their friends and on servers with plug-ins which protect player's bases.
Not hiding valuables well enough
If another player finds someone's secret stash of goods, there is a good chance for these items to be stolen. If the player wants to hide a stash of goods, the items should be well hidden and possibly even defended with traps. Or even better, use an ender chest as other players are unable to access it. Putting the items into shulker boxes and bringing them around is also good, but other players can still steal them if they kill the player.
Making large chains of hoppers for transporting of items without placing a dropper on top of most of them
This causes lag and makes the server much less responsive. A hopper with nothing on top of it constantly tries to suck up nearby objects, while one with a dropper or composter on top only tries to pull stuff from the container itself. Droppers and composters are ideal for this purpose as they do not produce extra lag as furnaces do.
Breaking chests when moving homes
When moving bases closer to spawn, you want to gather all your items. However, the player should be on the lookout for others and shouldn't break chests or players can steal their content.
Doing extreme challenges in hardcore
Some people may ask players to try extreme challenges, such as no armor challenge, half heart hardcore, wooden tools only, etc. It is not recommended to do these challenges in hardcore, unless you created a backup or are experienced enough. If you are trying half heart hardcore, don't do it on a world you care about because it is extremely easy to die. If you are doing extreme challenges on a server because another player asked you to do so, you can usually reject the request. However, if you accepted, be sure to bring another person to watch and/or bring safety precautions (totem of undying, potions).
Possible ban or real-world consequence
Using X-ray mods, hacks, or cheats
Admins and other players do not appreciate the use of X-ray mods or resource packs on their servers, as it gives some players an unfair advantage over the other players and may lead to punishment and ultimately being banned from the server! It is never a good thing to X-ray, no matter how far away the player thinks admins are because they never know where admins are and what tools they may have to catch rule-breaking players. If the server allows it, or the player is given permission on a server, then they may use X-ray mods or resource packs, as long as they turn off these resources when done with them.
Breaching server consoles
Breaching a server's console is illegal. A player who breaches a server console risks the possibility of arrest and criminal charges. No server owner wants their servers compromised.
Technical
Playing with high settings on weak devices
This can slow down your device and ruin the fun of the game. You are also more likely to make a mistake or not be able to fight off mobs or players.
Playing worlds created in a newer version
Minecraft worlds created in newer versions may have a different data structure than older versions, and playing these worlds can corrupt them.
Not making backups
It is a good idea to backup your worlds on a regular basis, especially if you are planning to do something technically risky like testing a data pack or playing in a development version. Nothing is worse than finding out the world you have spent weeks, months, or years working on has been corrupted and you don't have a backup to go back to. In Java Edition, you can backup your world and access your backups folder (located at ![]()
.minecraft/backups) by going the Edit World screen. Bedrock Edition allows you to copy worlds in-game. If you are playing on Windows, you can also export worlds, allowing you to keep your backups separate from the rest of your worlds.
Command loops
Be careful while using commands, especially with repeating command blocks that are set to "Always".
If you make a repeating command block that executes /kill @e, you get killed repeatedly and are unable to do anything. Likewise, using the /particle command to repeatedly spawn a ton of particles forcefully or /execute to summon an entity at the location of its same type causes the game to crash whenever it tries to load the world within it.
If you get yourself stuck in one of these loops you must either:
- disable command blocks in server properties if on a server or realms
- use a program like MCEdit (for 1.12.2 and below) or Amulet Map Editor (1.12.2+) to delete the command block. Alternatively, you can use MCASelector to replace its blocktype if you can easily figure them out.
If you're on single player these only work if you are the owner of the said world. If not, it is hard to escape this, and you must ask for help.
Possible death
Traveling near the world edge
In Bedrock Edition, the farther out you go from spawn, the greater the chance of you falling into the void due to precision loss (with the player always falling through the world past 8,388,608), with this precision loss eventually resulting in stripe lands.
In Java Edition, there is a world border which prevents the player from traveling farther than 30,000,000 blocks from the world center. Players outside the border take damage and eventually die unless they quickly return within the border. In regular worlds, traveling near the world edge is safe, as it's normally impossible to get outside the border, but it may pose a risk in custom maps or servers as the world border can be moved or shrunk using commands.
Possible crash
Updating certain superflat worlds
If the player tries to build on a snow layer in a superflat world, the snow updates and begins destroying itself, which may destroy all the snow layer blocks for the entire rendered area.
Teleporting excessively
Teleporting a lot requires the game to load and unload lots of chunks, which is a lot of work for the device running the game. This can create large amounts of lag. It is also a waste of ender pearls and health if the player is in Survival mode.
Triggering large amounts of TNT
This may seem fun, but doing this creates lag because the game must calculate each TNT's explosion individually. A large enough set of explosions could crash the game multiple times. Also, don't make TNT superflat worlds for a similar reason.
Using extremely high looting or fortune levels
Looting increases the number of items that mobs drop and increases the chance of rare drops, while Fortune increases the number and/or chances of specific item drops. If the player is using commands, they can get a sword with a high-level looting enchantment or a tool with a high-level fortune enchantment that is not usually possible in the game. The player should not use such a weapon/tool to kill a bunch of mobs or mining resources, as those things could drop enough items to lag the game, possibly to the extent of crashing the game as well.
Dropping large numbers of items
If the player drops too many items at a time, by activating a lot of dispensers and droppers or by destroying a lot of chests full of items, or even by rapidly destroying a large number of tall kelp at their bases, then a large number of items could add lag to the world. Enough lag makes the game harder to play and may even crash the game. On Multiplayer servers, the player may get kicked for crashing the server.