Tutorial:Island survival
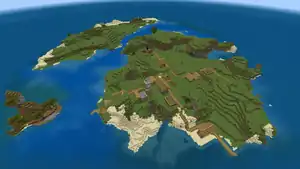
An "island" in Minecraft is typically any collection of terrain that is above sea level and is surrounded by water on all sides. Islands often generate in relatively remote areas and are often cut off from the mainland. A player who spawns on one of these may be faced with a major resource shortage.
An immediate option would be to simply create a new world, but for many players the challenge is appealing.
The Survival Island seed template in Bedrock Edition provides enough resources for longer survival with trees and a village. Other island seeds include:
-1671764014— a forest island with a dark forest island to the south.1034076700880184000— a very shattered island with an old growth pine taiga and a windswept forest.-2373702508882369733— a small forest island with the mainland not far away.183616003900139032— a snowy taiga island and a snowy plains island with a shipwreck and a village surrounded by a frozen ocean.-910048473617345612— two plains islands with a small sparse jungle.-385858218282266801— a large snowy plains island with a village.-900349373256773704— a taiga island far from the mainland.
Know your environment
Islands can generate in various ways. Some islands are very small and only consist of a few blocks of sand or stone, while other islands can contain multiple biomes and structures. Islands with land biomes are always surrounded by non-deep ocean biomes and often generate not far from land. Islands can also generate when an ocean or deep ocean biome reaches extremely high elevations, in which case the island can be very small without any features or structures.
If the island has no trees or structures and the bonus chest option is turned off, you may want to start a new world, or try to find a different island, unless you want the challenge.
When on an island, few to no animals may be present. It may be worth keeping animals alive for their resources. For example:
- A single chicken lays eggs, which can be thrown for chance to spawn a chick, which then grows into a chicken and can be bred with the first chicken to produce more.
- A single sheep is your best option for creating a bed, once you find two blocks of iron ore to smelt into ingots and create shears for getting wool. Shears and a bucket are good first uses of iron. You can also use four string to craft a block of wool, but this requires killing a lot of spiders, or venturing down a mineshaft, and string should be prioritized for making a fishing rod.
As soon as you get the chance, look around and out to sea: are you on a solitary island or is the island you are on part of a larger group of islands, an island chain or archipelago?
If the former is the case, then you should focus on what the island you are on has to offer and try to establish yourself.
If the latter is the case, however, then it may (depending on resources, time and how far apart the islands are) be worth taking a look at what the other islands have to offer as well. They could contain what your island lacks that you need to survive and thrive.
Surviving your first night
Before doing anything else, go to the nearest tree and collect the wood. If it is the only tree on the island, harvest the leaves first, because they drop saplings that can be planted to get more wood. Plant the saplings immediately after harvesting the wood. This is vital for obtaining more wood and more saplings. Oak trees can even yield apples, which can be used as an early food source, if all the leaves decay without dropping a single sapling, you might have to swim to nearby islands or to the mainland to find another tree.
If the island has any flowers, try putting oak, cherry, mangrove or birch saplings next to a flower, to give the sapling a 1⁄20 chance of growing with a bee nest, which can be useful as a source of honey and honeycomb. Trees that don't grow bee nests can be harvested again.
Because resources are low, craft only a minimal number of essential things.
If you find a pickaxe before mining a tree (from a ruined portal or exposed mineshaft) you should skip crafting the wooden pickaxe as it is a waste of wood, especially if there are few/no trees on the island, and focus on stone or iron tools instead
| Name | Ingredients | Crafting recipe | Description |
|---|---|---|---|
| Planks | Any Log | Repeat this recipe four times to get the necessary amount of materials. | |
| Crafting Table | Any Planks | Vital for crafting. | |
| Stick | Any Planks | Needed for torches and most tools. |
Hunger Management
With good strategic resource management, starvation wouldn't be much of a problem. To conserve energy for the first few days, be conservative with moving around, and avoid sprinting and jumping altogether, if possible.
Food from plant sources
Without animals, there are ways to get food:
- Kelp is an easy initial source of food, which can usually be found offshore a short swim, and can be broken by hand. When broken deep down (leaving one block to continue growing) all the kelp above the breaking point breaks and floats to the surface. It is easy to harvest a lot of kelp quickly, and safe to do on the first day before threatened by hostile mobs. It must be smelted in a furnace first to get dried kelp. Dried kelp can, in turn, be used to craft dried kelp blocks, which function both as a substitute building block and a good furnace fuel, smelting 20 items each.
- Farming crops is a simple and easy source of renewable food. A farm can be created on any island. Look for short grass and break it by hand, and you may get some wheat seeds before exhausting the supply of short grass, although bone meal can be used on grass blocks to grow more short grass.
- Just one seed is enough to start a farm. Put a block of dirt level with the shore water up to 4 blocks from the shore, craft a wooden hoe and use it on the dirt to turn it into farmland, and plant the seeds. Wait for them to mature before harvesting the wheat, which also yields more seeds, allowing for expansion of the farm. Three wheat can be crafted into bread, which is a good food source.
- With a farm, you can grow wheat, carrots, potatoes, beetroot, and other crops. Some crops can be used to breed animals, if animals are available to breed.
- Fishing with a fishing rod is the best way to get high-saturation foods once you have two string from killing spiders. Crafting a fishing rod gives an infinite supply of good food, and it is usually renewable as damaged enchanted fishing rods are often fished up, if it's enchanted with mending, it's essentially unbreakable, and while fishing you could also obtain bones, which is useful for speeding up crop growth.
- While fish may be eaten raw, they are much more nourishing when cooked. You need 8 cobblestones for a furnace as well as fuel (wood logs, or logs smelted into charcoal, which is the more efficient fuel) to cook the fish. An alternative option is to make a campfire, which requires no fuel apart from the charcoal or coal used to craft it and cooks four pieces at a time.
- Swimming after fish to kill them with a weapon or pickaxe risks being attacked by drowned. On the other hand, killing a fish this way can also drop a bone, which can be crafted into bone meal for speeding up the growth of crops and trees.
- Apples occasionally drop from oak and dark oak leaves (1⁄200 drop chance) when broken or decayed. Of course, this requires the island to have an oak tree.
- Carrots and potatoes are also rare drops from zombies, but not available early in the game. These can also be found from shipwreck chests later in the game.
- Rotten flesh is a last-resort when all else has failed. Wait until zombies spawn at night and kill them, or wait until morning when they burn in sunlight to get rotten flesh.
- If the island has a dark forest biome, chances are you could find red and brown mushrooms to craft mushroom stew, and if there are flowers (and you must know the flower combination) you can craft suspicious stew that gives the saturation effect, which essentially turns it into a superfood, or a regeneration stew for quick healing
Food from animals
If there is a chicken on the island and you are not desperate for food, collect its eggs as they are laid. Each egg thrown has a 1⁄8 chance of producing another chicken. This is one way to have a supply of chickens for food. Raw chicken does need cooking, however, as it can inflict food poisoning.
A sustainable food supply from animals requires breeding, and that requires farming, as described above. Once a producing farm is set up, however, eating the crop-based food is often a more efficient use of it. Animals are useful for other reasons, such as a source of milk to remove Poison and other bad effects, or leather for some armor.
If there are islands nearby, use some wood to build a boat to travel to other islands to find animals. An animal can be led into a boat by holding appropriate food (any type of seeds for chickens, wheat for cows and sheep, and potatoes, carrots or beetroots for pigs, or you can push/punch it into the boat).
A lead is useful for pulling an animal into a boat. Leads are easily obtained by waiting for wandering traders that regularly spawn on or near the island. Killing the wandering trader or pushing their llamas into a boat drops the lead. These can be used to move animals, or if you have enough string, you can craft them as the recipe no longer requires a slimeball.
If the island has large patches of grass blocks and is in a biome that passive mobs can spawn, you could swim/boat away for a while and come back, it might cause passive mobs to begin spawning, after that begin breeding them if possible
Food from loot chests
If you have already gone underground into a monster room or abandoned mineshaft and found beetroot, melon seeds, glow berries, instantly plant them to grow more, beetroot may not be a good food, but it keeps you alive and away from starving to death, pumpkin seeds are basically useless unless the island has resources for crafting pumpkin pie. Bread can be eaten normally, golden carrots found in ruined portals should be eaten sparingly, things like golden apples and enchanted apples should be reserved for combat or when you're really, really desparate
Cooking Food
After you have some kind of food, it's better to cook it up if possible, cooked meat restores much more hunger and saturation, and cooked chicken does not give the hunger effect, and kelp is literally inedible without cooking. Although if it's a potato, you should probably farm it instead so you can get more
If possible, craft a few campfires to cook food and save the coal for smelting ores or trading, while they are rather slow and only cook 4 items at a time, they do not require any more fuel, acts as a bright light source, and breaking them drops 2 charcoal, which can be used for smelting ores or crafting more campfires
Smokers cook food twice as fast as furnaces and 6 times faster than campfires, although they cost 4 logs, which can be quite expensive early game
Dying
If you can't find any food and really have no hope of finding any at this point, store all your items in a chest or throw them on the ground, them swim into the ocean and drown, respawning restores your saturation and hunger, although it will not work on hardcore mode
Shelter/Housing
Constructing a shelter
After collecting wood to create planks, build a crafting table in a convenient place. A door and wooden pickaxe are the essential things required for now.
If the island has a steep slope, or wall of dirt anywhere, it is simplest just to dig a cave into it, and place a door at the entrance. If possible, have the entrance face east so that the sunrise is visible through the door. If you place the door in a specific position (idr what it is like) zombies would be unable to break down the door even on Hard mode, because even though the door seems closed, the block state is open
For a shelter above ground, build a minimal one from dirt or sand, possibly only two blocks high inside, and place the door in the entrance. You'll eventually be mining anyway, so if you have enough materials, make room for a crafting table, a chest, and a mineshaft or stairway leading down.
Be sure you have nothing overhanging the entrance (no tree leaves, no other blocks), otherwise zombies can gather by your door during the night and be protected from sunlight when daytime comes, trapping you in your shelter. Without any overhang for protection, zombies burn up after sunrise.
Enter your shelter at sunset. Once you are in your shelter, start making some basic tools on your crafting table:
- Build a furnace, several stone pickaxes, and a couple of stone swords/axes as soon as possible. Your stone pickaxe lets you mine cobblestone, coal and iron, which should be easy to find by digging down a few layers into your island. Iron ingots lets you build iron tools, and if you're playing in the latest snapshots, you could also craft some copper gear, which is more durable and efficient than stone, can make armor and usually spawn in extremely large veins.
- Craft more torches. If you have not found any coal while digging for cobblestone, use planks (in Java Edition) or wood slabs (in Bedrock Edition), as fuel for your furnace to smelt logs to create charcoal, which you combine with sticks to make torches. You may have to wait for daytime to harvest and plant more trees to get more wood for tools and fuel, or if you are in a warm ocean, you could get some sea pickles and waterlog them to create a cheap and bright light source.
If you want to expand the shelter, simply dig down a few blocks and dig out rooms underground. Add ladders to the vertical shaft to get back up and add torches as necessary and as resources permit. Even if it is not needed, it is generally recommended for one to dig underground anyway so as to find cobblestone to make a furnace and to obtain another building material so as to avoid wasting wood. Make a stone pickaxe, sword, axe, shovel, and optionally a hoe, if you are in a position to start farming.
Once you are in a position to build an actual home base, note that islands often have limited space available. Therefore, you don't have much room to maneuver with if you build your house on the island itself, especially if it is a small island. A better approach is to build your base underground. Alternatively, you can build a platform on the water by placing a block on top of kelp to start the platform, then build your house from that starting point it and connect it to the island with a bridge.
Sleeping
Islands often have no sheep, so if it is impractical to find a sheep on another nearby island and shear it for wool, you can still get wool by crafting it from four pieces of string obtained from killing spiders, fishing for string also works, but it's the most unreliable way (and also the safest). Once you have three wool, you can make a bed with three planks.
It is advisable, however, to prioritize string to make a fishing rod for a reliable food supply before hunting down spiders to craft wool for a bed. It is often more efficient to find a sheep on another island. Occasionally a sheep may spawn on your island while you are away from it, or while you're mining deep underground.
Mining
To make a compact mine, craft ladders with sticks, and start digging down. Optionally, you can make a staircase, so that you don't need ladders to get back up. To look for a cave, listen for the sounds of bats and hostile mobs, and go toward the sound (it might be helpful if you turn subtitles on so it points out where the sound is coming from).
Once you find a cave, start mining. However, make sure that you have decent tools and weapons, plenty of torches, and optionally a shield and armor before attempting to go through caves, as monsters spawn in them. This is more likely if the island has been lit up and you have kept the chunks loaded, so that more mobs spawn in underground spaces and do not despawn.
Mining on an island is similar to how it is in normal survival. However, it is recommended to mine deep down, so that you don't accidentally burst into the ocean. It is most necessary to find, in this order, coal ore, iron, flint (from gravel), diamond, and obsidian (which requires a diamond pickaxe). Once you have obsidian, flint, and iron, you can make a Nether portal.
You may stumble upon a monster room while mining, the chests in there contain loot, and the spawner can be turned into a mob farm, see Tutorial:Defeating a monster room for more instructions
Update Aquatic
If you are playing in Minecraft after Update Aquatic, there is a chance that you might find a shipwreck or buried treasure chest near or on the island you are on. If this happens, you're in luck, as a shipwreck effectively solves all of the above three points (Crafting, Food and Shelter): the hull can be broken up and dismantled for wood planks, the ship often contains chests that oftentimes have food and resources in them and the ship itself can be converted into an impromptu improvised house for surviving the initial nights. The shipwreck is also likely to contain a map that shows the path to a Buried Treasure Chest, and the map might lead you to the mainland or nearby islands.
Craft shears and use it to collect some seagrass, then breed turtles, which spawn on the beach. They lay turtle eggs; make sure to protect them as the undead, stray wolves, and cats try to break it. When these eggs hatch, make sure to not let those baby turtles get to the ocean before growing up. The recommended strategy is to fence them in (during their egg stages). Now protect the baby turtles from zombies and skeletons. When those turtles grow, they drop turtle scutes, an item used to craft turtle shells, which is a useful helmet because it has the same protection as iron, lasts longer than iron, and allows you to breathe underwater longer.
Finding a buried treasure chest on the island can be a boon for survival, because the chest often contains treasure such like iron and gold ingots, various types of fish, (in rare cases) iron swords and leather tunics [Java Edition only], cake, TNT, potion of water breathing or regeneration, and chain armor[Bedrock Edition only]. Buried treasure chests are also guaranteed to contain a single heart of the sea item, which is used alongside 8 nautilus shells to craft a conduit. Nautilus shells are drops from the drowned, which are underwater zombie variants. They can also be caught as treasure from fishing. Buried Treasure is much rarer than shipwrecks and are also much harder to find, as they consist of only one block. However, if you find one (and are able to craft the conduit), you need to find some prismarine, dark prismarine, prismarine bricks or sea lanterns (all of which are found in ocean monuments), and you could construct yourself a conduit and live underwater.
Underwater Ruins are another uncommon structure that has the potential to greatly benefit a player's survival game. They generate mostly underwater, although if you are lucky enough to find one that generated on land, you effectively have a half-done house. As an added bonus, underwater ruins also contain chests with loot and treasure. If you have access to a conduit, you could use an underwater ruin as a base. Beware, however, as underwater ruins may potentially be inhabited by drowned which can, in the worst-case scenario, spawn with tridents, granting them a lethal ranged attack. Drowned are extremely dangerous underwater because they have no distraction from a limited breath meter, if you manage to kill the drowned and it drops the trident, don't immediately use it unless the durability of the item is still high, as tridents are quite difficult to obtain if you broke one.
If you have any raw cod, you could feed dolphins and have them guide you to a nearby ocean ruin, shipwreck or buried treasure, although if that area has been explored it probably wouldn't work
If your island is near or next to a warm ocean, you could see a coral reef which can be visible at night with sea pickles as a light source. Kelp does not generate in this biome and pufferfish may poison you when you get close to them.
Wandering trader spawn on the same island you are on (typically in the water). In island survival, however, because you likely have no emeralds, you can kill the trader for its leads and its llamas. If you have found emeralds from shipwrecks or treasure chests or ocean ruins, you can purchase some useful things from the wandering trader, notably enchanted iron pickaxes, saplings and logs. There is no penalty for attacking or killing one, and another eventually appears afterward.
Besides beach and forest biomes, the plains biome likely exists on the island you live on. Even though you live on an isolated island, an illager patrol could still spawn on your island; watch out if you see them. If your island is small, the illagers sometimes spawn in the water, and you can easily pick them off with a bow and arrow, then swim out to collect their loot.
Exploring
Once you have managed to set up a stable and reliable food- and tree farm and secured your basic necessities (housing and sleeping arrangements in some form), you can now begin to look outward and get on the business of exploring the greater world around you.
Start by making sure you have the materials shown above (a boat, food, weapons and tools, torches, and other necessary building blocks). Now, you can place the boat and start traveling away from the island. Be careful near underwater ravines, as bubble columns from magma blocks give you oxygen, but these blocks may also break your boat and pull you down underwater.
You can also travel the ocean by swimming instead of using a boat. Swimming near a dolphin speeds you up a lot, and also you can dive to see if there is a ruin or shipwreck at the ocean floor. You can also explore underwater caverns, but Water Breathing is required for exploring, or bring some doors.
While exploring the ocean, there is also a chance you might find a monument, where guardians and prismarine can be found, which is useful for your conduit. See Tutorial:Defeating an ocean monument for more. Once the island is out of sight, you can start searching for other islands or the mainland.
Beaches
If you find a beach, try looking for sugar cane. If you find some, harvest it and then return to the home island and craft the sugar cane into paper, then a map (but save some sugarcane so you can farm it to get more). Then, travel in the same direction with your map, this time bringing a lead. Use the lead to bring animals to the home island.
While you are filling your map, be sure to stop by any islands you see, as they may house generated structures on or underneath them.
Islands
If you see another island, head for it immediately, light it up, and dig down. Chances are that there is a generated structure underneath.
If you discover a generated structure, it is advisable to set up a second base of operations (a home away from home, so as to say), as many of the underground generated structures can generate quite large and take a long time to fully explore.
If there is nothing to be found there (not even ores), pillar jump back up, retrieving the ladders as you go. Then, travel the same distance from your home island as you were when you discovered the other island. In other words, your compass should face sideways.
Since biomes in islands are mostly plains, there is a small chance to find plains village on islands that provide more resources. However, there's also a chance you can find an isolated pillager outpost on small islands. If you don't think you can fight off the pillagers yet, note down the coordinates of the outpost and keep going.
Frozen ocean
If you didn't find any island, but frozen ocean or frozen deep ocean, there are also extra resources you can collect, such as snowballs from snow blocks, and packed ice and blue ice (make sure to break the ice using a pickaxe with silk touch enchantment). Despite kelp and seagrass not generated here, the surface is partially frozen (except deep frozen ocean), so you can walk on this biome. In rare cases, ruins and shipwreck can generate inside icebergs, providing a easy source of loot. Just make sure to have armor and weapons, because undead can spawn in these structures. Polar bears can spawn during the day, which can be dangerous when near cubs, and strays also spawn at night. Polar bears can drop fish and strays can drop bones, arrows, and sometimes tipped arrows.
The End
A game of Minecraft is never complete without a trip to the End. If you have found a stronghold, use it. Otherwise, bring potions of water breathing, throw an eye of ender, and travel in the direction that it went. After you have traveled a while, throw another, particularly if you see another island.
If the stronghold appears to be under a mushroom island, you must still use eyes of ender, as mushroom islands are bigger than regular islands.
If the stronghold turns out to be underwater, drink a potion of water breathing and dig down. Use an efficiency-enchanted pickaxe, and/or Aqua Affinity enchantment as mining underwater is slow. You can also place a block above your head after mining 3 blocks.
In Bedrock Edition before 1.4.0 Update, Or in Java Edition, using a door and making air pockets is also possible, although they will break without a block below.
Once you find a stronghold, it is a normal trip to the End (see Tutorial:End survival and Tutorial:Defeating the ender dragon).
See also
- Tutorial:Adventure survival
- Tutorial:Beginner's guide
- Tutorial:Complete main adventure
- Tutorial:Surviving in a single area indefinitely
- Tutorial:Survival with no enabled data packs