Tutorial:Making custom panoramas
This tutorial is exclusive to Java Edition.
This tutorial page needs cleanup to comply with the style guide.
[discuss]
Please help improve this page. The talk page may contain suggestions.
This tutorial shows how to make a custom panorama screenshot of your world.
Panoramas are the background images you see when you start Minecraft.
Starting Minecraft the right way
- Open the Minecraft Launcher.
- In the launcher you need to go to "Java Edition".
- Go to the "installations" tab and make a new installation.
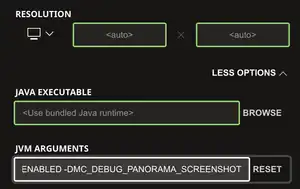
- Click "more options".
- In the "jvm" tab, put the following text after the already existing text:
-DMC_DEBUG_ENABLED -DMC_DEBUG_PANORAMA_SCREENSHOT
- Now save the installation and go back to "play".
- Start Minecraft with the installations you just made.
Making the files
Load up a world and fly to the place from where you want the panorama to be taken. Click F3 and F2.
Making the resource Pack
Locate your .minecraft folder. Go to "resourcepacks" and follow the tutorial Creating a resource pack if you need to. Go back to your .minecraft folder and locate "screenshots" the lowest files which should be "panorama_0 - 5". Copy them and paste them inside your resource pack under "assets/textures/gui/menu/panorama" Now load your resource pack and have fun with your panorama!
Gallery
-
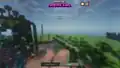 a panorama created with the use of this feature