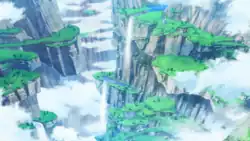
Area Zero
- Area 0 redirects here. For the area in Pokémon Picross, see Puzzle (Picross 3DS) → Area 00.
- If you were looking for the area in Pokémon Picross (Game Boy Color), see Puzzle (Picross GBC) → Area 0: Home.
| ||||
| ||||
| Location: | Great Crater of Paldea | |||
|---|---|---|---|---|
| Region: | Paldea | |||
| Generations: | IX | |||
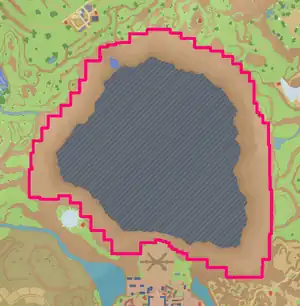 Location of Area Zero in Paldea. | ||||
| Pokémon world locations | ||||
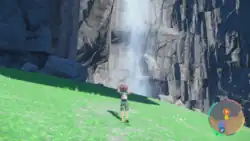
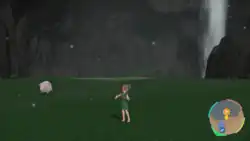
Area Zero (Japanese: エリアゼロ Area Zero) is an area located within the Great Crater of Paldea at the center of the Paldea region. It is initially accessed from the Zero Gate. After the player has entered Area Zero for the first time, they may also enter it by falling through the clouds over the Great Crater of Paldea.
The area is strictly off-limits to most people, though the Flying Taxi service still covers it. An official school rule, explicitly stated by Director Clavell, forbids any student of Naranja AcademyS/Uva AcademyV from entering Area Zero during the Treasure Hunt due to the aggressive Pokémon that live there and the hazardous geography of the area. It contains various wild Pokémon, including Paradox Pokémon, that usually cannot be encountered anywhere else. Additionally, it is where the Terastal phenomenon originated; Tera Orbs are made out of the crystals found in Area Zero. Furthermore, if the player Terastallizes their own Pokémon within Area Zero, the Tera Orb will automatically be recharged at the end of the battle.
During the events of The Indigo Disk, the player is accompanied by Briar, Carmine, and Kieran to the Area Zero Underdepths, a location below the Zero Lab, and by extension, Area Zero.
In the core series games
History
Background
The Area Zero Underdepths was formed 2,000,000 years prior to the events of Pokémon Scarlet and Violet by seismic shifts. These shifts also brought Terapagos to the brink of extinction. However, one Terapagos was able to survive by transforming into hard crystal and hibernating deep underground.
Over the next two million years, numerous cave-ins caused by further seismic shifts and erosion formed Area Zero as it's known today. Sometime during this prehistoric period, strange artifacts were left behind. A symbol was engraved into the floor of a cavern, and a large steel plate containing more symbols was left underground. Their exact origin and meaning is unknown.
Atleast 1,000,000 years prior to the games events, the Great Crater of Paldea was formed surrounding Area Zero, separating Area Zero from the rest of Paldea.
2,000 years prior to games events, the Paldean Empire attempted many expeditions into Area Zero, starting off the Great Age of Exploration. This era lasted for approximately 1,000 years, but none of the attempts were successful and eventually led to the empire's decline.
200 years prior to the games' events, Heath and the Area Zero Expedition team reached the bottom of the location, being the first ones in recorded history to ever achieve the feat. Heath proceeded to take many notes on the area, the Herba Mystica, the various wild Pokémon, and his first encounter with Paradox Pokémon. He recorded his research in the Scarlet BookS/Violet BookV, but ended up being accused of fabricating his story, and the whole expedition was widely discredited by the general public. The expedition team originally retrieved the Herba Mystica for a research project, but this failed due to local Pokémon consuming the herbs and becoming Titan Pokémon.
Four research stations were built inside the crater over time, and 60 years prior to the games events, the Terastal phenomenon was discovered in Area Zero. This phenomenon was limited in function, and couldn't be used outside of Area Zero.
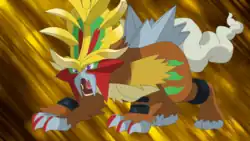
10 years prior to the games' events, Professor SadaS/Professor TuroV started an expedition into Area Zero, setting up the Zero Lab. The professor found a way to activate the Terastal phenomenon outside the crater through the use of Tera Orbs. They moved permanently into the Zero Lab to continue research on Area Zero and Paradox Pokémon as part of the Tera Project, leaving their son Arven behind to take care of himself. At one point during their research, they got sent to the future via the Crystal Pool in Kitakami, where they received a white volume from the player. With the help of this book, they created a time machine that allowed them to bring Paradox Pokémon to their timeline, thus populating Area Zero. During a territorial struggle between two different KoraidonS/MiraidonV, the professor was killed by the most aggressive one while trying to save the friendliest one.
At some point, Arven entered Area Zero in an attempt to find his parent, only for his Mabosstiff to be attacked by a creature described as "rampaging"S/"metallic, machine"V. This injured it to the point where all attempts at using traditional medicine failed to heal it.
Pokémon Scarlet and Violet
The Way Home
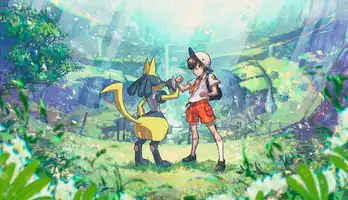
After being called by Professor SadaS/Professor TuroV in "Path of Legends", the player, Arven, Nemona, and Penny go to the great crater while riding on KoraidonS/MiraidonV.
As the group travels to the four research stations around the area to unlock the door to the professor's laboratory, they encounter primevalS/mechanicalV Pokémon, which are revealed to have been brought to the present day from another era by a time machine created by the professor. At the laboratory's entrance, some of these Paradox Pokémon confront the player and their friends, forcing the player to enter the Zero Lab alone while their friends fight off the Pokémon outside.
Inside the laboratory, the player discovers that the professor is actually a robot, created by the real professor before they were killed by a second and more aggressive KoraidonS/MiraidonV. The player also discovers that their KoraidonS/MiraidonV is the same one that the professor attempted to protect prior to their death. The artificial intelligence within the robot, despite being an exact copy of the professor's memories and knowledge, opposes the original professor's plan to keep the time machine running, as it would threaten to destroy Paldea's ecosystem with an overflow of Paradox Pokémon. However, because the AI is programmed to protect the time machine, the player is forced to battle it against its will.
Once the AI has been defeated, the player is rejoined by their friends, and a program called the Paradise Protection Protocol takes over the robot professor, as well as locking all Poké Balls not marked with the professor's ID. Finally regaining its ability to battle, the player's KoraidonS/MiraidonV confronts and defeats the other, more aggressive KoraidonS/MiraidonV, putting the Paradise Protection Protocol to an end. The AI, however, recognizes that its systems are so integrally connected with the time machine that the latter cannot be shut down as long as the AI remains present. To solve this problem, the AI travels to another era using the time machine, bidding the player and their friends farewell as it disappears. After the time machine shuts down permanently, the player and their friends decide to take a slow and scenic route back to Mesagoza.
The Indigo Disk
After gaining the permission from Paldea's Pokémon League to go into a new expedition to Area Zero, Briar invites the player, Carmine, and Kieran to serve as her protectors. They eventually reach the bottom and use Geeta's Indigo Disk to redirect the Zero Lab elevator, allowing them to go deeper down into the Area Zero Underdepths to find Terapagos.
Places of interest
Research Stations
There are four Research Stations located around Area Zero. Constructed 87 years prior to the events of Pokémon Scarlet and Violet, they act as way stations for those surveying Area Zero. Upon entering Area Zero for the first time, Professor SadaS/Professor TuroV requests that the player, Arven, Nemona, and Penny visits all four Research Stations to deactivate the locks of the Zero Lab, where they reside. Each of the Research Stations has a warp panel which can teleport the player to the Zero Gate or any of the other Research Stations, if they have already been visited. There is also a bed in each, where the player can rest and heal their party.
Each Research Station has journals which describe Professor Sada'sS/Professor Turo'sV efforts in studying Terastallization, Terastal energy, ancient PokémonS/future PokémonV, and the being linked to the Terastallization.
- See also: Area Zero journals
|
|
|
|
| Outside Research Station No. 1 |
Outside Research Station No. 2 |
Outside Research Station No. 3 |
Outside Research Station No. 4 |
|
|

|
|
| Inside Research Station No. 1 |
Inside Research Station No. 2 |
Inside Research Station No. 3 |
Inside Research Station No. 4 |
Zero Lab
- Main article: Zero Lab
The Zero Lab is where Professor SadaS/Professor TuroV conducted their research. It is located at the very bottom of Area Zero. It's also where the Professor built their time machine, allowing them to bring ancient PokémonS/future PokémonV to Area Zero. Through the Indigo Disk, the lab's elevator can move down to Area Zero Underdepths.
Strange symbols
In a huge cavern, strange symbols have been inscribed into its ground. It's unknown who or what inscribed them there, but Heath pondered if they could have been left by past explorers sent by the Paldean empire or even older still.
Metal plate
A big metallic plate inscribed with symbols similar to Paldea's present day map located in the same cavern the previous strange symbols were inscribed in. The material the plate is made of is extremely resistant and it's unknown how and why it was created.
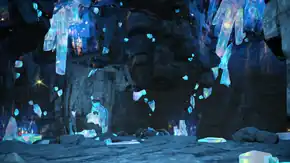
Area Zero Underdepths
- Main article: Area Zero Underdepths
Area Zero Underdepths is a large cavern and an extension of Area Zero. It's located about 3,300 feet (1 kilometer) under the surface and appears to have formed about 2,000,000 years ago. It is located under the Zero Lab and by extension, under Area Zero itself. It is solely inhabited by Glimmet, Glimmora, Carbink, and a few wild Terastallized Pokémon. It is also where the last of the Legendary Pokémon Terapagos slumbers.
Items

|
This section is incomplete. Please feel free to edit this section to add missing information and complete it. |
On the ground
| Item | Location | Games | |
|---|---|---|---|
| Dusk Stone | Overworld | S V | |
| Shiny Stone | Overworld | S V | |
| Bright Powder | Overworld | S V | |
| Sitrus Berry | Overworld | S V | |
| Apicot Berry | Overworld | S V | |
| Ganlon Berry | Overworld | S V | |
| Liechi Berry | Overworld | S V | |
| Petaya Berry | Overworld | S V | |
| Salac Berry | Overworld | S V | |
| Hyper Potion | Overworld | S V | |
| Burn Heal | Overworld | S V | |
| Adamant Mint | Overworld | S V | |
| Bold Mint | Overworld | S V | |
| Naive Mint | Overworld | S V | |
| Quick Ball | Overworld | S V | |
| Luxury Ball | Overworld | S V | |
TM Materials
| Item | Location | Games | |
|---|---|---|---|
| Pichu Fur | Overworld | S V | |
TMs
Pokémon
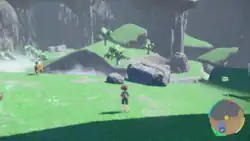
Upper Field
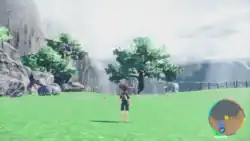
From the entrance of Area Zero to just before Research Station No. 2, the following Pokémon can spawn.
| Pokémon | Games | Terrain | Levels | Probability Weight | Group Rate | Group Pokémon | ||||||||
|---|---|---|---|---|---|---|---|---|---|---|---|---|---|---|
| Prairie | ||||||||||||||
| S | V | ✔ | ✘ | ✘ | ✘ | ✘ | 52-56 | 10 | ✘ | ✘ | ||||
| S | V | ✘ | ✘ | ✘ | ✔ | ✘ | 52-56 | 30 | ✘ | ✘ | ||||
| S | V | ✔ | ✘ | ✘ | ✘ | ✘ | 52-55 | 1 | ✘ | ✘ | ||||
| S | V | ✔ | ✘ | ✘ | ✘ | ✘ | 52-56 | 30 | 100% | |||||
| S | V | ✔ | ✘ | ✘ | ✘ | ✘ | 52-56 | 1 | 1 | 1 | 0 | ✘ | ✘ | |
| S | V | ✔ | ✘ | ✘ | ✘ | ✘ | 52-56 | 30 | ✘ | ✘ | ||||
| S | V | ✔ | ✘ | ✘ | ✘ | ✘ | 52-56 | 20 | 100% | |||||
| S | V | ✘ | ✘ | ✘ | ✘ | ✔ | 54-56 | 15 | 10% | |||||
| S | V | ✘ | ✘ | ✘ | ✔ | ✘ | 52-56 | 15 | 40% | |||||
| S | V | ✔ | ✘ | ✘ | ✘ | ✘ | 52-56 | 20 | ✘ | ✘ | ||||
| S | V | ✘ | ✘ | ✘ | ✔ | ✘ | 52-56 | 5 | ✘ | ✘ | ||||
| S | V | ✔ | ✘ | ✘ | ✘ | ✘ | 52-56 | 10 | 100% | |||||
| S | V | ✔ | ✘ | ✘ | ✘ | ✘ | 52-56 | 10 | 100% | |||||
| S | V | ✔ | ✘ | ✘ | ✘ | ✘ | 52-56 | 20 | ✘ | ✘ | ||||
| S | V | ✔ | ✘ | ✘ | ✘ | ✘ | 52-56 | 15 | ✘ | ✘ | ||||
| S | V | ✔ | ✘ | ✘ | ✘ | ✘ | 52-56 | 20 | ✘ | ✘ | ||||
| S | V | ✔ | ✘ | ✘ | ✘ | ✘ | 52-56 | 20 | ✘ | ✘ | ||||
| S | V | ✘ | ✘ | ✘ | ✔ | ✘ | 52-56 | 15 | ✘ | ✘ | ||||
| Riverside | ||||||||||||||
| S | V | ✔ | ✔ | ✘ | ✘ | ✘ | 52-56 | 20 | ✘ | ✘ | ||||
| S | V | ✔ | ✔ | ✘ | ✘ | ✘ | 52-62 | 1 | ✘ | ✘ | ||||
| S | V | ✔ | ✘ | ✘ | ✘ | ✘ | 52-60 | 30 | 100% | |||||
| S | V | ✔ | ✔ | ✘ | ✘ | ✘ | 52-60 | 10 | 100% | |||||
| S | V | ✘ | ✘ | ✘ | ✔ | ✘ | 52-60 | 5 | 100% | |||||
| S | V | ✔ | ✘ | ✘ | ✘ | ✘ | 52-60 | 20 | ✘ | ✘ | ||||
| Rocky Area | ||||||||||||||
| S | V | ✔ | ✘ | ✘ | ✘ | ✘ | 52-56 | 30 | 100% | |||||
| S | V | ✔ | ✘ | ✘ | ✘ | ✘ | 52-56 | 0 | 0 | 20 | 20 | 100% | ||
| S | V | ✘ | ✘ | ✘ | ✘ | ✔ | 54-56 | 15 | 10% | |||||
| S | V | ✔ | ✘ | ✘ | ✘ | ✘ | 52-56 | 30 | ✘ | ✘ | ||||
| S | V | ✔ | ✘ | ✘ | ✘ | ✘ | 52-56 | 30 | 100% | |||||
| S | V | ✔ | ✘ | ✘ | ✘ | ✘ | 52-56 | 60 | ✘ | ✘ | ||||
| S | V | ✔ | ✘ | ✘ | ✘ | ✘ | 52-56 | 20 | ✘ | ✘ | ||||
| S | V | ✔ | ✘ | ✘ | ✘ | ✘ | 52-53 | 20 | 100% | |||||
| S | V | ✔ | ✘ | ✘ | ✘ | ✘ | 52-55 | 30 | ✘ | ✘ | ||||
| S | V | ✔ | ✘ | ✘ | ✘ | ✘ | 52-56 | 60 | 100% | |||||
| S | V | ✔ | ✘ | ✘ | ✘ | ✘ | 52-56 | 10 | ✘ | ✘ | ||||
| S | V | ✔ | ✘ | ✘ | ✘ | ✘ | 52-56 | 15 | ✘ | ✘ | ||||
| S | V | ✔ | ✘ | ✘ | ✘ | ✘ | 52-56 | 15 | ✘ | ✘ | ||||
| A colored background means that the Pokémon can be found in this location in the specified game. A white background with a colored letter means that the Pokémon cannot be found here. Probability weight indicates the likelihood that a Pokémon will spawn at a certain point in this location relative to others that can spawn there. A higher probability weight generally indicates that a Pokémon is more likely to spawn. Pokémon with the highest or lowest level requirements may not spawn in every possible location within this area. A bolded level range replaces the Pokémon's non-bolded level range after the player has completed The Way Home. | ||||||||||||||
Lower Field
Between Research Station No. 2 and the cloud layer that separates the depths of Area Zero, the following Pokémon will spawn.
| Pokémon | Games | Terrain | Levels | Probability Weight | Group Rate | Group Pokémon | ||||||||
|---|---|---|---|---|---|---|---|---|---|---|---|---|---|---|
| Prairie | ||||||||||||||
| S | V | ✔ | ✘ | ✘ | ✘ | ✘ | 55-59 | 10 | ✘ | ✘ | ||||
| S | V | ✘ | ✘ | ✘ | ✔ | ✘ | 55-59 | 30 | ✘ | ✘ | ||||
| S | V | ✔ | ✘ | ✘ | ✘ | ✘ | 55 | 1 | ✘ | ✘ | ||||
| S | V | ✔ | ✘ | ✘ | ✘ | ✘ | 55-59 | 1 | 1 | 1 | 0 | ✘ | ✘ | |
| S | V | ✔ | ✘ | ✘ | ✘ | ✘ | 55-59 | 30 | ✘ | ✘ | ||||
| S | V | ✘ | ✘ | ✘ | ✘ | ✔ | 55-59 | 15 | 10% | |||||
| S | V | ✘ | ✘ | ✘ | ✔ | ✘ | 59 | 1 | ✘ | ✘ | ||||
| S | V | ✘ | ✘ | ✘ | ✔ | ✘ | 55-59 | 15 | 40% | |||||
| S | V | ✔ | ✘ | ✘ | ✘ | ✘ | 55-59 | 20 | ✘ | ✘ | ||||
| S | V | ✔ | ✘ | ✘ | ✘ | ✘ | 55-58 | 10 | 100% | |||||
| S | V | ✔ | ✘ | ✘ | ✘ | ✘ | 55-59 | 10 | 100% | |||||
| S | V | ✔ | ✘ | ✘ | ✘ | ✘ | 55-59 | 20 | ✘ | ✘ | ||||
| S | V | ✔ | ✘ | ✘ | ✘ | ✘ | 55-59 | 20 | ✘ | ✘ | ||||
| S | V | ✔ | ✘ | ✘ | ✘ | ✘ | 55-59 | 20 | ✘ | ✘ | ||||
| S | V | ✔ | ✘ | ✘ | ✘ | ✘ | 55-59 | 20 | ✘ | ✘ | ||||
| Riverside | ||||||||||||||
| S | V | ✔ | ✔ | ✘ | ✘ | ✘ | 55-56 | 20 | ✘ | ✘ | ||||
| S | V | ✔ | ✔ | ✘ | ✘ | ✘ | 55-59 | 1 | ✘ | ✘ | ||||
| S | V | ✘ | ✘ | ✘ | ✔ | ✘ | 55-59 | 30 | ✘ | ✘ | ||||
| S | V | ✔ | ✘ | ✘ | ✘ | ✘ | 55-59 | 30 | 100% | |||||
| S | V | ✔ | ✔ | ✘ | ✘ | ✘ | 55-59 | 10 | 100% | |||||
| S | V | ✔ | ✘ | ✘ | ✘ | ✘ | 55-59 | 10 | 100% | |||||
| S | V | ✔ | ✘ | ✘ | ✘ | ✘ | 55-59 | 20 | ✘ | ✘ | ||||
| S | V | ✘ | ✘ | ✘ | ✔ | ✘ | 55-59 | 5 | 100% | |||||
| S | V | ✔ | ✘ | ✘ | ✘ | ✘ | 55-59 | 30 | 100% | |||||
| S | V | ✔ | ✘ | ✘ | ✘ | ✘ | 55-59 | 20 | ✘ | ✘ | ||||
| Rocky Area | ||||||||||||||
| S | V | ✔ | ✘ | ✘ | ✘ | ✘ | 55-59 | 30 | 100% | |||||
| S | V | ✔ | ✘ | ✘ | ✘ | ✘ | 55-59 | 20 | 100% | |||||
| S | V | ✔ | ✘ | ✘ | ✘ | ✘ | 55-59 | 0 | 0 | 20 | 20 | 100% | ||
| S | V | ✘ | ✘ | ✘ | ✘ | ✔ | 55-59 | 15 | 10% | |||||
| S | V | ✔ | ✘ | ✘ | ✘ | ✘ | 55-59 | 30 | ✘ | ✘ | ||||
| S | V | ✔ | ✘ | ✘ | ✘ | ✘ | 55-59 | 30 | 100% | |||||
| S | V | ✔ | ✘ | ✘ | ✘ | ✘ | 55-59 | 60 | ✘ | ✘ | ||||
| S | V | ✔ | ✘ | ✘ | ✘ | ✘ | 55-59 | 20 | ✘ | ✘ | ||||
| S | V | ✔ | ✘ | ✘ | ✘ | ✘ | 55 | 30 | ✘ | ✘ | ||||
| S | V | ✔ | ✘ | ✘ | ✘ | ✘ | 55-59 | 60 | 100% | |||||
| S | V | ✔ | ✘ | ✘ | ✘ | ✘ | 55-59 | 10 | ✘ | ✘ | ||||
| S | V | ✔ | ✘ | ✘ | ✘ | ✘ | 55-59 | 15 | ✘ | ✘ | ||||
| S | V | ✔ | ✘ | ✘ | ✘ | ✘ | 55-59 | 15 | ✘ | ✘ | ||||
| A colored background means that the Pokémon can be found in this location in the specified game. A white background with a colored letter means that the Pokémon cannot be found here. Probability weight indicates the likelihood that a Pokémon will spawn at a certain point in this location relative to others that can spawn there. A higher probability weight generally indicates that a Pokémon is more likely to spawn. Pokémon with the highest or lowest level requirements may not spawn in every possible location within this area. A bolded level range replaces the Pokémon's non-bolded level range after the player has completed The Way Home. | ||||||||||||||
Small Cave
After exiting Research Station No. 2, walk to the left, and then continue going up the grassy hill. The following Pokémon will spawn inside. Despite appearing as a cave, several Prairie spawners can be found inside.
| Pokémon | Games | Terrain | Levels | Probability Weight | Group Rate | Group Pokémon | ||||||||
|---|---|---|---|---|---|---|---|---|---|---|---|---|---|---|
| Prairie | ||||||||||||||
| S | V | ✔ | ✘ | ✘ | ✘ | ✘ | 52-55 | 1 | ✘ | ✘ | ||||
| S | V | ✔ | ✘ | ✘ | ✘ | ✘ | 52-56 | 1 | 1 | 1 | 0 | ✘ | ✘ | |
| S | V | ✔ | ✘ | ✘ | ✘ | ✘ | 52-56 | 10 | 100% | |||||
| Cave | ||||||||||||||
| S | V | ✔ | ✘ | ✘ | ✘ | ✘ | 52-56 | 20 | ✘ | ✘ | ||||
| S | V | ✔ | ✘ | ✘ | ✘ | ✘ | 52-56 | 0 | 0 | 0 | 1 | ✘ | ✘ | |
| S | V | ✔ | ✘ | ✘ | ✘ | ✘ | 52-56 | 50 | 80% | |||||
| S | V | ✔ | ✘ | ✘ | ✘ | ✘ | 52-55 | 20 | ✘ | ✘ | ||||
| S | V | ✔ | ✘ | ✘ | ✘ | ✘ | 52-56 | 10 | 100% | |||||
| S | V | ✔ | ✘ | ✘ | ✘ | ✘ | 52-56 | 3 | 100% | |||||
| S | V | ✔ | ✘ | ✘ | ✘ | ✘ | 52-54 | 30 | ✘ | ✘ | ||||
| S | V | ✔ | ✘ | ✘ | ✘ | ✘ | 52-56 | 10 | ✘ | ✘ | ||||
| S | V | ✔ | ✘ | ✘ | ✘ | ✘ | 52-56 | 20 | ✘ | ✘ | ||||
| S | V | ✔ | ✘ | ✘ | ✘ | ✘ | 52 | 5 | 100% | |||||
| S | V | ✘ | ✘ | ✘ | ✔ | ✘ | 52-55 | 1 | ✘ | ✘ | ||||
| S | V | ✘ | ✘ | ✘ | ✔ | ✘ | 52-56 | 15 | ✘ | ✘ | ||||
| S | V | ✘ | ✘ | ✘ | ✔ | ✘ | 52-56 | 15 | ✘ | ✘ | ||||
| A colored background means that the Pokémon can be found in this location in the specified game. A white background with a colored letter means that the Pokémon cannot be found here. Probability weight indicates the likelihood that a Pokémon will spawn at a certain point in this location relative to others that can spawn there. A higher probability weight generally indicates that a Pokémon is more likely to spawn. Pokémon with the highest or lowest level requirements may not spawn in every possible location within this area. A bolded level range replaces the Pokémon's non-bolded level range after the player has completed The Way Home. | ||||||||||||||
- ↑ Due to a quirk in the spawning mechanics, when it is day, Flutter Mane will spawn and despawn so rapidly that they will not appear visible to the player at all, unless the player is in a Union Circle session, in which case they will appear briefly. This behavior does not apply to Shiny Flutter Mane, as Shiny Pokémon are immune to being despawned by such mechanics, nor does it apply during night.[1]
Station No. 3 Cave

After exiting Research Station No. 3, to the immediate right is a cave where the following Pokémon spawn. Despite appearing as a cave, several Prairie spawners can be found inside.
| Pokémon | Games | Terrain | Levels | Probability Weight | Group Rate | Group Pokémon | ||||||||
|---|---|---|---|---|---|---|---|---|---|---|---|---|---|---|
| Prairie | ||||||||||||||
| S | V | ✔ | ✘ | ✘ | ✘ | ✘ | 55 | 1 | ✘ | ✘ | ||||
| S | V | ✔ | ✘ | ✘ | ✘ | ✘ | 55-59 | 1 | 1 | 1 | 0 | ✘ | ✘ | |
| S | V | ✔ | ✘ | ✘ | ✘ | ✘ | 55-58 | 10 | 100% | |||||
| Riverside | ||||||||||||||
| S | V | ✔ | ✔ | ✘ | ✘ | ✘ | 55-56 | 20 | ✘ | ✘ | ||||
| S | V | ✔ | ✔ | ✘ | ✘ | ✘ | 55-59 | 1 | ✘ | ✘ | ||||
| S | V | ✔ | ✔ | ✘ | ✘ | ✘ | 55-59 | 10 | 100% | |||||
| S | V | ✘ | ✘ | ✘ | ✔ | ✘ | 55-59 | 5 | 100% | |||||
| Cave | ||||||||||||||
| S | V | ✔ | ✘ | ✘ | ✘ | ✘ | 55-59 | 20 | ✘ | ✘ | ||||
| S | V | ✔ | ✘ | ✘ | ✘ | ✘ | 55-59 | 0 | 0 | 0 | 1 | ✘ | ✘ | |
| S | V | ✔ | ✘ | ✘ | ✘ | ✘ | 55-59 | 50 | 80% | |||||
| S | V | ✔ | ✘ | ✘ | ✘ | ✘ | 55 | 20 | ✘ | ✘ | ||||
| S | V | ✔ | ✘ | ✘ | ✘ | ✘ | 55-59 | 10 | 100% | |||||
| S | V | ✔ | ✘ | ✘ | ✘ | ✘ | 55-59 | 3 | 100% | |||||
| S | V | ✔ | ✘ | ✘ | ✘ | ✘ | 55-59 | 10 | ✘ | ✘ | ||||
| S | V | ✔ | ✘ | ✘ | ✘ | ✘ | 55-59 | 20 | ✘ | ✘ | ||||
| S | V | ✘ | ✘ | ✘ | ✔ | ✘ | 55 | 1 | ✘ | ✘ | ||||
| S | V | ✘ | ✘ | ✘ | ✔ | ✘ | 55-59 | 15 | ✘ | ✘ | ||||
| S | V | ✘ | ✘ | ✘ | ✔ | ✘ | 55-59 | 15 | ✘ | ✘ | ||||
| A colored background means that the Pokémon can be found in this location in the specified game. A white background with a colored letter means that the Pokémon cannot be found here. Probability weight indicates the likelihood that a Pokémon will spawn at a certain point in this location relative to others that can spawn there. A higher probability weight generally indicates that a Pokémon is more likely to spawn. Pokémon with the highest or lowest level requirements may not spawn in every possible location within this area. A bolded level range replaces the Pokémon's non-bolded level range after the player has completed The Way Home. | ||||||||||||||
- ↑ Due to a quirk in the spawning mechanics, when it is day, Flutter Mane will spawn and despawn so rapidly that they will not appear visible to the player at all, unless the player is in a Union Circle session, in which case they will appear briefly. This behavior does not apply to Shiny Flutter Mane, as Shiny Pokémon are immune to being despawned by such mechanics, nor does it apply during night.[1]
Waterfall Cave
After exiting Research Station No. 3, turn right and travel along the edge of the crater until reaching a river with a waterfall on the right. After passing behind the waterfall, look up to find the entrance to a cave suspended in the cliff face. Inside the following Pokémon will spawn. Despite appearing as a cave, several Prairie spawners can be found inside.
| Pokémon | Games | Terrain | Levels | Probability Weight | Group Rate | Group Pokémon | ||||||||
|---|---|---|---|---|---|---|---|---|---|---|---|---|---|---|
| Prairie | ||||||||||||||
| S | V | ✔ | ✘ | ✘ | ✘ | ✘ | 55 | 1 | ✘ | ✘ | ||||
| S | V | ✔ | ✘ | ✘ | ✘ | ✘ | 55-59 | 1 | 1 | 1 | 0 | ✘ | ✘ | |
| S | V | ✔ | ✘ | ✘ | ✘ | ✘ | 55-58 | 10 | 100% | |||||
| Cave | ||||||||||||||
| S | V | ✔ | ✘ | ✘ | ✘ | ✘ | 55-59 | 20 | ✘ | ✘ | ||||
| S | V | ✔ | ✘ | ✘ | ✘ | ✘ | 55-59 | 0 | 0 | 0 | 1 | ✘ | ✘ | |
| S | V | ✔ | ✘ | ✘ | ✘ | ✘ | 55-59 | 50 | 80% | |||||
| S | V | ✔ | ✘ | ✘ | ✘ | ✘ | 55 | 20 | ✘ | ✘ | ||||
| S | V | ✔ | ✘ | ✘ | ✘ | ✘ | 55-59 | 10 | 100% | |||||
| S | V | ✔ | ✘ | ✘ | ✘ | ✘ | 55-59 | 3 | 100% | |||||
| S | V | ✔ | ✘ | ✘ | ✘ | ✘ | 55-59 | 10 | ✘ | ✘ | ||||
| S | V | ✔ | ✘ | ✘ | ✘ | ✘ | 55-59 | 20 | ✘ | ✘ | ||||
| S | V | ✘ | ✘ | ✘ | ✔ | ✘ | 55 | 1 | ✘ | ✘ | ||||
| S | V | ✘ | ✘ | ✘ | ✔ | ✘ | 55-59 | 15 | ✘ | ✘ | ||||
| S | V | ✘ | ✘ | ✘ | ✔ | ✘ | 55-59 | 15 | ✘ | ✘ | ||||
| A colored background means that the Pokémon can be found in this location in the specified game. A white background with a colored letter means that the Pokémon cannot be found here. Probability weight indicates the likelihood that a Pokémon will spawn at a certain point in this location relative to others that can spawn there. A higher probability weight generally indicates that a Pokémon is more likely to spawn. Pokémon with the highest or lowest level requirements may not spawn in every possible location within this area. A bolded level range replaces the Pokémon's non-bolded level range after the player has completed The Way Home. | ||||||||||||||
- ↑ Due to a quirk in the spawning mechanics, when it is day, Flutter Mane will spawn and despawn so rapidly that they will not appear visible to the player at all, unless the player is in a Union Circle session, in which case they will appear briefly. This behavior does not apply to Shiny Flutter Mane, as Shiny Pokémon are immune to being despawned by such mechanics, nor does it apply during night.[1]
Grassy Cave
After exiting Research Station No. 3, turn left and travel along the edge of the crater until seeing a pile of boulders to the left of a tree. Between the boulders is a narrow passage that will eventually lead to a cave. Inside the cave, the following Pokémon will spawn. Despite appearing as a cave, several Prairie spawners can be found inside, and the mysterious circular design found within the cave contains a mix of Cave and Ruin spawners.
| Pokémon | Games | Terrain | Levels | Probability Weight | Group Rate | Group Pokémon | ||||||||
|---|---|---|---|---|---|---|---|---|---|---|---|---|---|---|
| Prairie | ||||||||||||||
| S | V | ✔ | ✘ | ✘ | ✘ | ✘ | 55 | 1 | ✘ | ✘ | ||||
| S | V | ✔ | ✘ | ✘ | ✘ | ✘ | 55-59 | 1 | 1 | 1 | 0 | ✘ | ✘ | |
| S | V | ✔ | ✘ | ✘ | ✘ | ✘ | 55-58 | 10 | 100% | |||||
| Riverside | ||||||||||||||
| S | V | ✔ | ✔ | ✘ | ✘ | ✘ | 55-56 | 20 | ✘ | ✘ | ||||
| S | V | ✔ | ✔ | ✘ | ✘ | ✘ | 55-59 | 1 | ✘ | ✘ | ||||
| S | V | ✔ | ✔ | ✘ | ✘ | ✘ | 55-59 | 10 | 100% | |||||
| S | V | ✘ | ✘ | ✘ | ✔ | ✘ | 55-59 | 5 | 100% | |||||
| Cave | ||||||||||||||
| S | V | ✔ | ✘ | ✘ | ✘ | ✘ | 55-59 | 20 | ✘ | ✘ | ||||
| S | V | ✔ | ✘ | ✘ | ✘ | ✘ | 55-59 | 0 | 0 | 0 | 1 | ✘ | ✘ | |
| S | V | ✔ | ✘ | ✘ | ✘ | ✘ | 55-59 | 50 | 80% | |||||
| S | V | ✔ | ✘ | ✘ | ✘ | ✘ | 55 | 20 | ✘ | ✘ | ||||
| S | V | ✔ | ✘ | ✘ | ✘ | ✘ | 55-59 | 10 | 100% | |||||
| S | V | ✔ | ✘ | ✘ | ✘ | ✘ | 55-59 | 3 | 100% | |||||
| S | V | ✔ | ✘ | ✘ | ✘ | ✘ | 55-59 | 10 | ✘ | ✘ | ||||
| S | V | ✔ | ✘ | ✘ | ✘ | ✘ | 55-59 | 20 | ✘ | ✘ | ||||
| S | V | ✘ | ✘ | ✘ | ✔ | ✘ | 55 | 1 | ✘ | ✘ | ||||
| S | V | ✘ | ✘ | ✘ | ✔ | ✘ | 55-59 | 15 | ✘ | ✘ | ||||
| S | V | ✘ | ✘ | ✘ | ✔ | ✘ | 55-59 | 15 | ✘ | ✘ | ||||
| S | V | ✔ | ✘ | ✘ | ✘ | ✘ | 55-59 | 5 | ✘ | ✘ | ||||
| S | V | ✔ | ✘ | ✘ | ✘ | ✘ | 55-59 | 5 | ✘ | ✘ | ||||
| Ruins | ||||||||||||||
| S | V | ✔ | ✘ | ✘ | ✘ | ✘ | 55-56 | 5 | 100% | |||||
| A colored background means that the Pokémon can be found in this location in the specified game. A white background with a colored letter means that the Pokémon cannot be found here. Probability weight indicates the likelihood that a Pokémon will spawn at a certain point in this location relative to others that can spawn there. A higher probability weight generally indicates that a Pokémon is more likely to spawn. Pokémon with the highest or lowest level requirements may not spawn in every possible location within this area. A bolded level range replaces the Pokémon's non-bolded level range after the player has completed The Way Home. | ||||||||||||||
- ↑ Due to a quirk in the spawning mechanics, when it is day, Flutter Mane will spawn and despawn so rapidly that they will not appear visible to the player at all, unless the player is in a Union Circle session, in which case they will appear briefly. This behavior does not apply to Shiny Flutter Mane, as Shiny Pokémon are immune to being despawned by such mechanics, nor does it apply during night.[1]
Depths
In the depths of Area Zero past the cloud layer, the following Pokémon will spawn.
| Pokémon | Games | Terrain | Levels | Probability Weight | Group Rate | Group Pokémon | ||||||||
|---|---|---|---|---|---|---|---|---|---|---|---|---|---|---|
| Underground | ||||||||||||||
| S | V | ✔ | ✘ | ✘ | ✘ | ✘ | 57-60 | 15 | ✘ | ✘ | ||||
| S | V | ✔ | ✘ | ✘ | ✘ | ✘ | 57-60 | 20 | ✘ | ✘ | ||||
| S | V | ✔ | ✘ | ✘ | ✘ | ✘ | 57-60 | 30 | 100% | |||||
| S | V | ✔ | ✘ | ✘ | ✘ | ✘ | 57-60 | 20 | ✘ | ✘ | ||||
| S | V | ✘ | ✘ | ✘ | ✔ | ✘ | 57-60 | 20 | 100% | |||||
| S | V | ✔ | ✘ | ✘ | ✘ | ✘ | 57-60 | 20 | ✘ | ✘ | ||||
| S | V | ✔ | ✘ | ✘ | ✘ | ✘ | 57-60 | 20 | ✘ | ✘ | ||||
| S | V | ✔ | ✘ | ✘ | ✘ | ✘ | 57-60 | 5 | ✘ | ✘ | ||||
| S | V | ✘ | ✘ | ✘ | ✔ | ✘ | 57-60 | 40 | 30% | |||||
| S | V | ✔ | ✘ | ✘ | ✘ | ✘ | 57-60 | 2 | ✘ | ✘ | ||||
| S | V | ✔ | ✘ | ✘ | ✘ | ✘ | 57-60 | 10 | ✘ | ✘ | ||||
| S | V | ✔ | ✘ | ✘ | ✘ | ✘ | 57-60 | 20 | ✘ | ✘ | ||||
| S | V | ✔ | ✘ | ✘ | ✘ | ✘ | 57-60 | 20 | ✘ | ✘ | ||||
| S | V | ✔ | ✘ | ✘ | ✘ | ✘ | 57-60 | 10 | ✘ | ✘ | ||||
| S | V | ✘ | ✘ | ✘ | ✔ | ✘ | 57-60 | 3 | ✘ | ✘ | ||||
| S | V | ✔ | ✘ | ✘ | ✘ | ✘ | 57-60 | 10 | ✘ | ✘ | ||||
| S | V | ✔ | ✘ | ✘ | ✘ | ✘ | 57-60 | 20 | ✘ | ✘ | ||||
| S | V | ✔ | ✘ | ✘ | ✘ | ✘ | 57-60 | 20 | ✘ | ✘ | ||||
| S | V | ✔ | ✘ | ✘ | ✘ | ✘ | 57-60 | 10 | ✘ | ✘ | ||||
| S | V | ✘ | ✘ | ✘ | ✔ | ✘ | 57-60 | 3 | ✘ | ✘ | ||||
| S | V | ✔ | ✘ | ✘ | ✘ | ✘ | 57-60 | 1 | ✘ | ✘ | ||||
| S | V | ✔ | ✘ | ✘ | ✘ | ✘ | 57-60 | 1 | ✘ | ✘ | ||||
| A colored background means that the Pokémon can be found in this location in the specified game. A white background with a colored letter means that the Pokémon cannot be found here. Probability weight indicates the likelihood that a Pokémon will spawn at a certain point in this location relative to others that can spawn there. A higher probability weight generally indicates that a Pokémon is more likely to spawn. Pokémon with the highest or lowest level requirements may not spawn in every possible location within this area. A bolded level range replaces the Pokémon's non-bolded level range after the player has completed The Way Home. | ||||||||||||||
- ↑ Rarely appears only at the entrance to Depths.[2]
- ↑ 2.0 2.1 2.2 2.3 2.4 2.5 2.6 2.7 This Pokémon only appears after beating the main story
- ↑ Due to a quirk in the spawning mechanics, when it is day, Flutter Mane will spawn and despawn so rapidly that they will not appear visible to the player at all, unless the player is in a Union Circle session, in which case they will appear briefly. This behavior does not apply to Shiny Flutter Mane, as Shiny Pokémon are immune to being despawned by such mechanics, nor does it apply during night.[1]
Special encounters
Several mandatory Multi Battles with various wild Pokémon occur as part of the story. None of them can be caught, and they are coded to never be Shiny.
Outside Research Station No. 1
| ||||||||||||||||||||||||||||||||||

Outside Research Station No. 2
| Scarlet | Violet | ||||||||||||||||||||||||||||||||||||||||||||||||||||||||||||||||||||
|---|---|---|---|---|---|---|---|---|---|---|---|---|---|---|---|---|---|---|---|---|---|---|---|---|---|---|---|---|---|---|---|---|---|---|---|---|---|---|---|---|---|---|---|---|---|---|---|---|---|---|---|---|---|---|---|---|---|---|---|---|---|---|---|---|---|---|---|---|---|
|
| ||||||||||||||||||||||||||||||||||||||||||||||||||||||||||||||||||||


Outside Research Station No. 3
| Scarlet | Violet | ||||||||||||||||||||||||||||||||||||||||||||||||||||||||||||||||||||
|---|---|---|---|---|---|---|---|---|---|---|---|---|---|---|---|---|---|---|---|---|---|---|---|---|---|---|---|---|---|---|---|---|---|---|---|---|---|---|---|---|---|---|---|---|---|---|---|---|---|---|---|---|---|---|---|---|---|---|---|---|---|---|---|---|---|---|---|---|---|
|
| ||||||||||||||||||||||||||||||||||||||||||||||||||||||||||||||||||||

Outside the Zero Lab

Area Zero Depths

|
This section is missing one or more images. Please feel free to add any missing images to this section. Needed images can be uploaded to the Bulbagarden Archives. Reason: Image of Miraidon |
After finishing The Way Home, the player can encounter the other KoraidonS/MiraidonV on a small, raised plateau at the very bottom of Area Zero.
Koraidon will always have an Adamant Nature, while Miraidon will always have a Modest Nature. If defeated, they can be battled again after the game has been rebooted, provided that over one hour has passed in Nintendo Switch's internal clock since their defeat. They are coded to never be Shiny.
| Scarlet | Violet | ||||||||||||||||||||||||||||||||||||||||||||||||||||||||||||||||||||||||
|---|---|---|---|---|---|---|---|---|---|---|---|---|---|---|---|---|---|---|---|---|---|---|---|---|---|---|---|---|---|---|---|---|---|---|---|---|---|---|---|---|---|---|---|---|---|---|---|---|---|---|---|---|---|---|---|---|---|---|---|---|---|---|---|---|---|---|---|---|---|---|---|---|---|
|
| ||||||||||||||||||||||||||||||||||||||||||||||||||||||||||||||||||||||||
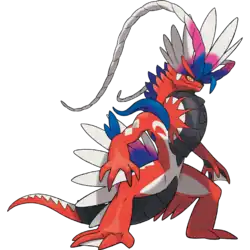
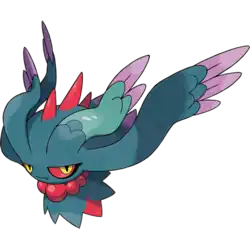
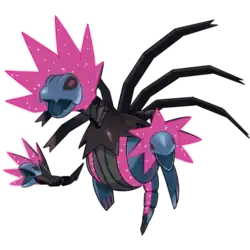
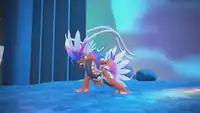
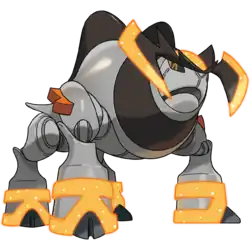
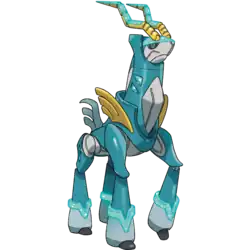
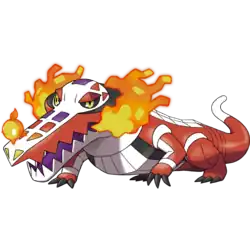
Paradox Pokémon
Once the player has accepted Perrin's request at Blueberry Academy's Terarium as part of The Indigo Disk, they can encounter Raging Bolt and Gouging FireS/Iron Crown and Iron BoulderV in specific locations throughout Area Zero. If defeated, they can be battled again after the game has been rebooted, provided that over one hour has passed in Nintendo Switch's internal clock since their defeat. They are coded to never be Shiny.
Pokémon Scarlet
|
| ||||||||||||||||||||||||||||||||||||||||||||||||||||||||||||||||||||||||

Pokémon Violet
|
| ||||||||||||||||||||||||||||||||||||||||||||||||||||||||||||||||||||||||
Trainers
Multi Battle partners
Nemona
Nemona uses these teams as a Multi Battle partner against a wild Glimmora, then later against an escaping Great TuskS/Iron TreadsV:
 If the player chose Sprigatito:
|
|||||||||||||||||||||||||||||||||||||||||||||||||||||||||||||||||||||||||||||||||||||||||||||||||||||||||||||||||||||||||||||||||||||||||||||||||||||||||||||||||||||||||||||||||||||||||||||||||||||||||||
| |||||||||||||||||||||||||||||||||||||||||||||||||||||||||||||||||||||||||||||||||||||||||||||||||||||||||||||||||||||||||||||||||||||||||||||||||||||||||||||||||||||||||||||||||||||||||||||||||||||||||||
Penny
Penny uses this team as a Multi Battle partner against a hostile Scream TailS/Iron BundleV, and then against an escaping Brute BonnetS/Iron HandsV:
|
|||||||||||||||||||||||||||||||||||||||||||||||||||||||||||||||||||||||||||||||||||||||||||||||||||||||||||||||||||||||||||||||||||||||||||||||||||||||||||||||||||||||||||||||||||||||||||||||||||||||
| |||||||||||||||||||||||||||||||||||||||||||||||||||||||||||||||||||||||||||||||||||||||||||||||||||||||||||||||||||||||||||||||||||||||||||||||||||||||||||||||||||||||||||||||||||||||||||||||||||||||


Arven
Arven uses this team as a Multi Battle partner against an aggressive Great TuskS/Iron TreadsV, and later against an escaping Flutter ManeS/Iron JugulisV:
|
|||||||||||||||||||||||||||||||||||||||||||||||||||||||||||||||||||||||||||||||||||||||||||||||||||||||||||||||||||||||||||||||||||||||||||||||||||||||||||||||||||||||||||||||||||||||||||||||||||||||||||||
| |||||||||||||||||||||||||||||||||||||||||||||||||||||||||||||||||||||||||||||||||||||||||||||||||||||||||||||||||||||||||||||||||||||||||||||||||||||||||||||||||||||||||||||||||||||||||||||||||||||||||||||


In animation
Pokémon Horizons: The Series
Area Zero was first mentioned in The Terapagos I Don't Know, where Geeta revealed that it is managed by the Paldea Pokémon League, and that a Pokémon resembling Terapagos was once sighted there. Liko, Roy, and Dot showed interest in seeing the place in person, but Clavell revealed that an accident happened there recently, and that entering wasn't possible at the moment. Geeta assured the trio that she'd accompany them there someday.
In Encounters at the Crystal Pool, in a flashback, Briar narrated to the Rising Volt Tacklers about her ancestor Heath's expedition to Area Zero, where he had encountered a Terapagos.
In The Wonders of the World!, in a flashback of 100 years prior to the events of the series, Rystal reveals to Lucius that she had found her Terapagos Pagogo while exploring the Great Crater of Paldea, in Area Zero.
In Entei's Fierce Battle Cry!, Briar contacted the Rising Volt Tacklers and informed them that a Pokémon resembling Entei had been sighted within Area Zero. They decided to meet with her and travel to Area Zero to try and find Lucius's Entei. In the following episode, after emerging victorious together in a Triple Battle against Top Champion Geeta, Liko, Roy, and Dot were granted permission to enter Area Zero along with Friede, who had been granted permission on his merits as a Pokémon Professor. Meanwhile, Coral and Sidian entered the area illegally in order to monitor the Rising Volt Tacklers's activities.
In Total-lie Awesome Pokémon in Area Zero?!, Liko, Roy, Dot, and Friede meet up with Briar, as they start their search for Lucius's Entei. However, Roy encounters a wild Sandy Shocks and gets separated from the group. Coral tries to follow, but encounters a wild Scream Tail and teams up with it to battle a Great Tusk. Roy defeats Sandy Shocks and goes to reunite with the group, as he tells the girls and Friede what he saw. Coral accidentally catches Scream Tail, which she nicknames Screamypuff (オニプリン Onipurin), and introduces it to Sidian.
In The Pillar of Fire, the Rising Volt Tacklers and Briar finally encounter Lucius's Entei, which was revealed to be a Paradox Pokémon named Gouging Fire that Lucius and Rystal confused with an Entei. Gouging Fire took Lucius's belt from Liko and they started a battle. When Dot took it back, they passed the test, and Gouging Fire joined them and the other heroes. At the end, Pagogo and the five heroes summoned the remaining one, the Black Rayquaza.
In Beyond the Shining Rainbow, the Rising Volt Tacklers started their battle with the Black Rayquaza, using Area Zero's terrain to their advantage to hit it from all sides. Eventually, only Crocalor was left, forcing Pagogo to step up and join Liko to battle Rayquaza as well. Pagogo then shared its energy with Crocalor, Terastallizing it and allowing them to perform the final hit before calling Rayquaza back to the Poké Ball. As a result of gathering all Six Heroes, Pagogo regained all of its power and Rayquaza started leading the Brave Olivine to Laqua.
Pokémon seen in Area Zero
 Unknown Pokémon |
 Terapagos |
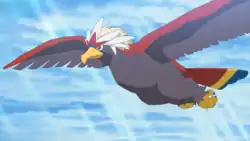 Braviary ♂ |
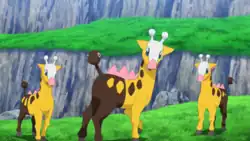 Girafarig (×3) |
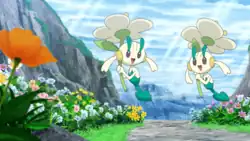 Floette (×2) ♀ |
 Venomoth (multiple) |
 Jumpluff (multiple) |
 Meditite |
 Volcarona |
 Dudunsparce |
 Sandy Shocks |
 Great Tusk |
- In Over the Top!, Geeta revealed that Glimmora and its pre-evolution Glimmet are Pokémon native to Area Zero.
- In Total-lie Awesome Pokémon in Area Zero?!, Briar revealed that Pokémon can be found in future forms in Area Zero.
Pokémon previously seen in Area Zero
 Terapagos |
 Scream Tail |
 Gouging Fire |
In the TCG
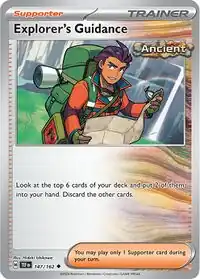
Area Zero makes a minor appearance in the background of the Pokémon Trading Card Game card Explorer's Guidance from Temporal Forces, a set with a focus on various Paradox Pokémon. The card depicts an explorer within the upper fields of Area Zero, carrying a copy of the Scarlet Book.
Gallery
Artwork
|
|
| Shiny Lucario event art by Raita Kazama[3] |
HOME Wallpaper Blueberry Pokédex |
Music
| Games | Location | Song name (Japanese) | Song name (English) | Composition | Arrangement |
|---|---|---|---|---|---|
| S V | When heading into Area Zero for the first time |
パルデアの大穴へ! | To the Great Crater of Paldea | Hiromitsu Maeba Toby Fox |
Hiromitsu Maeba |
| When outside in Area Zero | エリアゼロ | Area Zero | Toby Fox[4] | Go Ichinose[4] | |
| During a wild Pokémon battle |
戦闘!エリアゼロのポケモン | Battle! (Area Zero Pokémon) | Toby Fox | Go Ichinose | |
| When the gate to the Zero Lab opens up |
ゲートが開いて | The Gate Opens | Hiromitsu Maeba Toby Fox |
Hiromitsu Maeba | |
| During the battle against the Paradox Pokémon that exit the time machine for the first time |
戦闘!エリアゼロのポケモン 2 | Battle! (Area Zero Pokémon 2) | Toby Fox | Go Ichinose Hiromitsu Maeba |
Trivia
- Wild Tera Pokémon can only be found in the Area Zero Underdepths.
- The Paldean Pokédex does not list Area Zero as a spawn location for any of the Pokémon that spawn there, and is also the only area in the game without any form of map.
- The Paldean Pokédex states that Glimmet has a "very rare" spawn chance. However, they are quite common in Area Zero - particularly in the deeper portions of the area - despite appearing rarely in the rest of Paldea, potentially implying some connection between Glimmet and Area Zero.
- This connection is reinforced by also commonly being found around the Crystal Pool.
- The fact that White Flower Floette is the only form that spawns in Area Zero may be referencing the death of Professor Sada/Professor Turo, due to the fact that white blossoms, specifically the white Chrysanthemum flower in Japan, symbolize grief, and are often used in funerals.
- Every moth-based Pokémon present in Pokémon Scarlet and Violet can be found in Area Zero, namely Venomoth, Masquerain, Volcarona, Frosmoth, Slither WingS, and Iron MothV. This may be a reference to moths' perceived attraction to light, given Area Zero's extremely bright surface and caverns filled with glowing crystals. It may also be another reference to death, which moths often symbolize.
- Volcarona is the only Pokémon with Paradox Pokémon relatives to be found in Area Zero and in the same area as them.
- Area Zero is internally referred to as Atlantis in the game's files.
In other languages
| ||||||||||||||||||||||||||||||||
Notes
References
Related articles
| The Pokémon League | |||
|---|---|---|---|
| Participation Trainer • Battle • Gym Leaders Gyms • Badges • Referee Championship matches Elite Four • Orange League Champion League Pokémon League Conferences Indigo • Silver • Ever Grande • Lily of the Valley Vertress • Lumiose • Manalo |
Regional Pokémon Leagues Indigo • OrangePtS • Johto • Hoenn • Sinnoh Unova (BB) • Kalos • Alola • Galar • Paldea Areas of jurisdiction Pokémon League Reception Gate • Hall of Fame Palace of Victory • Cerulean Cave • Others Admissions Exam • Pokémon Association PIA • World Coronation Series (Masters Eight Tournament) | ||
| Paldea | ||||||||||
|---|---|---|---|---|---|---|---|---|---|---|
|
| ||||||||||
| ||||||||||
|
|
| Game locations of Legendary and Mythical Pokémon | ||||||||||||||||||||||||||
|---|---|---|---|---|---|---|---|---|---|---|---|---|---|---|---|---|---|---|---|---|---|---|---|---|---|---|
| ||||||||||||||||||||||||||
| This article is part of Project Locations, a Bulbapedia project that aims to write comprehensive articles on every location in the Pokémon world. |