Story Mode:Giant Magma Golem


|
Details | |
|---|---|
| Gameplay appearances |
|
| Attack strength |
Fireball: 1/2 heart ( |
| Found in |
|
| Free roam interactable |
No |
| First appearance | |
| Latest appearance |
Below the Bedrock |
{
    "title": "Giant Magma Golem",
    "rows": [
        {
            "field": "",
            "label": "Details"
        },
        {
            "field": "\n*Combat\n*Cutscene",
            "label": "(link to MCSM:Gameplay article, displayed as Gameplay<br>appearances)"
        },
        {
            "field": "Fireball: 1/2 heart (<span class=\"iconbar pixel-image nowrap\" style=\"--icon-offset:-1px;\" title=\"0.5  hearts\">(link to File:Half Heart (icon).png article, displayed as 9px|link=|alt=💔)</span>)<br>\nMelee: ?<sup class=\" nowrap Inline-Template \" title=\"\">[<i>[https://minecraft.wiki/w/Story_Mode_talk:Giant_Magma_Golem <span title=\"An editor has requested that this be tested in the game to prove that it is a true statement. Once you have tested this in-game and you get the same results as this states, you may remove this template.\" >needs testing</span>]</i>]</sup>(link to Category:Testing needed article, displayed as Category:Testing needed)",
            "label": "Attack<br>strength"
        },
        {
            "field": "\n*<span class=\"sprite-file\" style=\"\">(link to File:StoryModeAreaSprite overworld-(main).png article, displayed as 16x16px|link=MCSM:Overworld (main)|alt=|class=pixel-image|)</span>(link to MCSM:Overworld (main) article, displayed as <span class=\"sprite-text\">Overworld (main)</span>)\n** (link to MCSM:Romeoburg article, displayed as Romeoburg)",
            "label": "Found in"
        },
        {
            "field": "No",
            "label": "(link to MCSM:Gameplay#Interactive free roam article, displayed as Free roam<br>interactable)"
        },
        {
            "field": "''(link to MCSM:Below the Bedrock article, displayed as Below the Bedrock)''",
            "label": "First appearance"
        },
        {
            "field": "''Below the Bedrock''",
            "label": "Latest appearance"
        }
    ],
    "invimages": [],
    "images": [
        "Giant Magma Golem.png",
        "Giant Magma Golem Posed.png",
        "Giant Magma Golem Cobblestone Right Arm.png",
        "Giant Magma Golem Cobblestone Right Arm No Left Arm.png",
        "Giant Magma Golem Cobblestone Left Arm.png",
        "Giant Magma Golem Cobblestone Left Arm No Right Arm.png",
        "Giant Magma Golem No Right Arm.png",
        "Giant Magma Golem No Left Arm.png",
        "Giant Magma Golem No Arms.png",
        "Giant Magma Golem Damaged Leg.png",
        "Giant Magma Golem Transition 1.png",
        "Giant Magma Golem Transition 2.png",
        "Giant Magma Golem Transition 3.png",
        "Giant Magma Golem Cooled Damaged.png"
    ]
}
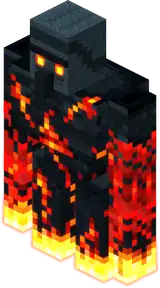
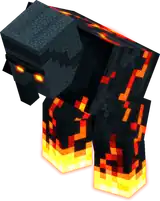
The giant magma golem is a boss that the characters fought in Below the Bedrock. It is a golem variant made up of magma and cobblestone that is created by Romeo as a final boss to the challenge he created for his friends. It appeared after Radar messed with the redstone circuitry, causing the challenge to immediately jump to its final level, the six-hundredth stage.
Behavior
The giant magma golem is capable of shooting out fireballs and magma cubes. It is also capable of slamming its arms down which can light up the area where it smashes it. Despite its large size, it is capable of quick and nimble jumps.
History
During Jesse, Petra, and Radar’s search for a weapon to defeat Romeo in Below the Bedrock, they faced a combat challenge consisting of six hundred stages in Romeoburg. In an attempt to stop the challenge, Radar interfered with the golem-spawning machine, causing it to advance directly to the final stage. The floor opened, and the final boss, the giant magma golem, emerged.
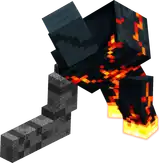
Jesse engaged the boss by activating the waterfall mechanisms to cool and harden its arms before breaking them with a pickaxe. Meanwhile, Petra and Radar provided support during the battle. Jesse then crafted TNT and placed it on a crafting table. When the golem stepped on it, the explosion destroyed the floor, causing the golem to fall into the water below
Appearances and media
Sounds
| Sounds | ||||||||
|---|---|---|---|---|---|---|---|---|
| Sound | Descriptive name | GUID | Event path | One-shot | Streaming | 3D | Sound bank | Season |
| SFX | ? | ? | ? | ? | ? | 204.bank | Two | |
| SFX | ? | ? | ? | ? | ? | 204.bank | Two | |
| SFX | ? | ? | ? | ? | ? | 204.bank | Two | |
| SFX | ? | ? | ? | ? | ? | 204.bank | Two | |
| SFX | ? | ? | ? | ? | ? | 204.bank | Two | |
| SFX | ? | ? | ? | ? | ? | 204.bank | Two | |
| SFX | ? | ? | ? | ? | ? | 204.bank | Two | |
| SFX | ? | ? | ? | ? | ? | 204.bank | Two | |
| SFX | ? | ? | ? | ? | ? | 204.bank | Two | |
| SFX | ? | ? | ? | ? | ? | 204.bank | Two | |
| SFX | ? | ? | ? | ? | ? | 204.bank | Two | |
| SFX | ? | ? | ? | ? | ? | 204.bank | Two | |
| SFX | ? | ? | ? | ? | ? | 204.bank | Two | |
| SFX | ? | ? | ? | ? | ? | 204.bank | Two | |
| SFX | ? | ? | ? | ? | ? | 204.bank | Two | |
| SFX | ? | ? | ? | ? | ? | 204.bank | Two | |
| SFX | ? | ? | ? | ? | ? | 204.bank | Two | |
| SFX | ? | ? | ? | ? | ? | 204.bank | Two | |
| SFX | ? | ? | ? | ? | ? | 204.bank | Two | |
| SFX | ? | ? | ? | ? | ? | 204.bank | Two | |
| SFX | ? | ? | ? | ? | ? | 204.bank | Two | |
| SFX | ? | ? | ? | ? | ? | 204.bank | Two | |
| SFX | ? | ? | ? | ? | ? | 204.bank | Two | |
| SFX | ? | ? | ? | ? | ? | 204.bank | Two | |
| SFX | ? | ? | ? | ? | ? | 204.bank | Two | |
| SFX | ? | ? | ? | ? | ? | 204.bank | Two | |
| SFX | ? | ? | ? | ? | ? | 204.bank | Two | |
| SFX | ? | ? | ? | ? | ? | 204.bank | Two | |
| SFX | ? | ? | ? | ? | ? | 204.bank | Two | |
| SFX | ? | ? | ? | ? | ? | 204.bank | Two | |
| SFX | ? | ? | ? | ? | ? | 204.bank | Two | |
| SFX | ? | ? | ? | ? | ? | 204.bank | Two | |
| SFX | ? | ? | ? | ? | ? | 204.bank | Two | |
| SFX | ? | ? | ? | ? | ? | 204.bank | Two | |
| SFX | ? | ? | ? | ? | ? | 204.bank | Two | |
| SFX | ? | ? | ? | ? | ? | 204.bank | Two | |
Gallery
-

-
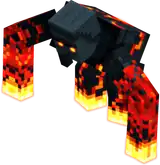
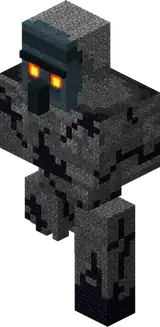
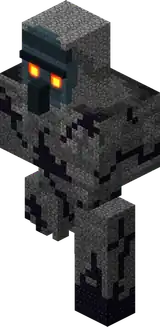
 Full model with the cobblestone texture.
 -
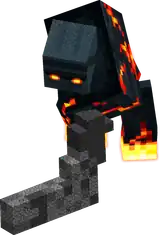
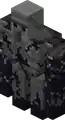
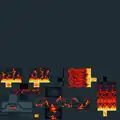 Texture from the game.
| |||||||||||
| |||||||||||