Stone Field
|
|
|

|
This article is incomplete. Please feel free to edit this article to add missing information and complete it. Reason: monster houses, items, traps |
| ||||||||||||||||||||||||||||||||||||||||||
| ||||||||||||||||||||||||||||||||||||||||||
| ||||||||||||||||||||||||||||||||||||||||||
| ||||||||||||||||||||||||||||||||||||||||||
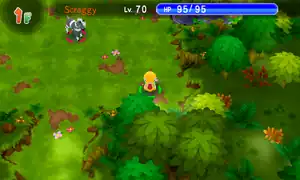
Stone Field (Japanese: ストンフィールド Stone Field) is a dungeon in Pokémon Super Mystery Dungeon that is located on the Water Continent. It is unlocked during Chapter 6 of the story.
Pokémon encountered
| Pokémon | Floors | Levels | Recruit Rate | |
|---|---|---|---|---|
| Gloom | 2F-5F | ?? | Unrecruitable | |
| Ponyta | 2F-5F | ?? | Unrecruitable | |
| Drowzee | 1F-4F | ?? | Unrecruitable | |
| Mareep | 1F-5F | ?? | Unrecruitable | |
| Girafarig | 1F-5F | ?? | Unrecruitable | |
| Porygon2 | ?? | ?? | Unrecruitable | |
| Stantler | 1F-5F | ?? | Unrecruitable | |
| Lotad | 1F-5F | ?? | Unrecruitable | |
| Bagon | 1F-5F | ?? | Unrecruitable | |
| Blitzle | 1F-4F | ?? | Unrecruitable | |
| Axew | 1F-5F | ?? | Unrecruitable | |
| Golett | 1F-5F | ?? | Unrecruitable | |
| Pawniard | 1F-5F | ?? | Unrecruitable | |
| Clauncher | 1F-5F | ?? | Unrecruitable | |
| Helioptile | ?? | ?? | Unrecruitable | |
| Heliolisk | 1F-5F | ?? | Unrecruitable | |
| Noibat | 2F-5F | ?? | Unrecruitable | |
| Machamp | 3F-5F | ?? | Unrecruitable | |
| These Pokémon are recruited through the Connection Orb rather than fighting them. | ||||
Items
| Item | Electric | |||||||
|---|---|---|---|---|---|---|---|---|
| 30-65 Poké | 1F-5F | |||||||
| Apple | 1F-4F | |||||||
| Oran Berry | 1F-2F, 4F | |||||||
| Cheri Berry | 5F | |||||||
| Pecha Berry | 1F | |||||||
| Rawst Berry | 5F | |||||||
| Elixir | 1F-4F | |||||||
| Barrage | 1F, 4F-5F | |||||||
| Big Ears | 2F-3F | |||||||
| Confusion Guard | 3F | |||||||
| Clutch Performer | 1F | |||||||
| Dizzying Stare | 1F-2F | |||||||
| Lullaby | 1F, 3F | |||||||
| Power Boost X | 1F, 4F | |||||||
| Status Immunity | 4F | |||||||
| Super Critical | 1F-2F | |||||||
| Toughness | 1F, 3F | |||||||
| Trap Proof | 2F-3F | |||||||
| Type Bulldozer | 3F | |||||||
| Wand Expert | 3F | |||||||
| Tiny Reviver Seed | 2F-5F | |||||||
| Pure Seed | 4F | |||||||
| 3 Confuse Wand | 1F | |||||||
| 5 Warp Wand | 3F | |||||||
| Petrify Orb | 2F | |||||||
| Rollcall Orb | 1F | |||||||
| Totter Orb | 2F | |||||||
Traps encountered
| Image | Trap | Floors |
|---|---|---|

|
Gust Trap | 2F, 4F |

|
Slow Trap | 1F-3F |

|
Slumber Trap | 13F |
In other languages
| ||||||||||||||||||
| This article is part of both Project Locations and Project Sidegames, Bulbapedia projects that, together, aim to write comprehensive articles on the Pokémon Locations and Sidegames, respectively. |