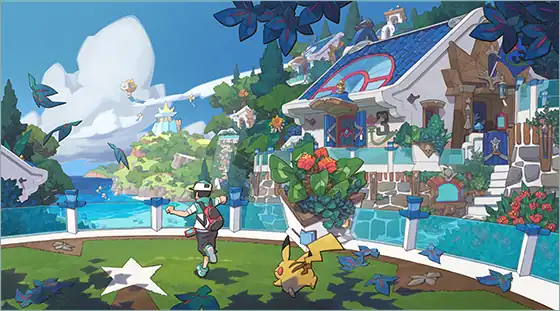
Trainer Lodge
The Trainer Lodge (Japanese: トレーナーズサロン Trainer's Salon) is a location in Pokémon Masters EX introduced in August 2022 which enables the player character to interact with other sync pairs. Increasing friendship levels with sync pairs rewards the player with rare items including Certificates of Excellence, while achieving a friendship level of 100 unlocks a new Pokémon to pair with the guest Trainer. Only a select group of sync pairs can be interacted with in the Trainer Lodge, with Rosa available as the default Trainer for the tutorial.
The Trainer Lodge is unlocked after completing PML Arc: Chapter 1: New Adventure, New Goal.
Gameplay
Interactions
The player character starts the interaction by initiating a chat with a Trainer, and is given three topics of discussion to choose from. After the player selects a topic, the Trainer's reaction to it will determine the base number of points awarded:
- Super exciting!: 10 points
- Excitement building!: 7 points
- Interesting!: 5 points
In addition, bonus points will be added for each consecutive topic selected. For example, the second topic selected will earn 1 bonus point, the third topic selected will earn 2 bonus points, and so on. Thus, the longer the interaction lasts, the more points that will be earned for each topic selected.
The player continues to choose one of three discussion topics as the Trainer's attention wanes. Attention starts at 100%, and it drops for each topic chosen after the second topic. After the player chooses a topic, the interaction has a chance of ending if the Trainer's attention is less than 100%, so each interaction lasts for at least three topics. The chance of the interaction ending increases as the attention percentage decreases, with the lowest possible attention level being 0%.
Topics are associated with one of seven categories: Pokémon, Items, Friends, Hobbies, Fashion, Places, and Other. The Trainer is assigned a hot topic category from one of these categories for each interaction. Selecting a discussion topic of their hot topic category halves attention drop and can make the Trainer reach max vibes. Max vibes is a state that lasts for two topic selections, and while active, the Trainer's attention will not drop, the interaction will not end, and the amount of friendship points earned for each topic selection are doubled. Max vibes can only be reached once per interaction. If the Trainer's level is high enough (estimated at level 30 or above), there is a chance that the hot topic will be revealed at the start of the interaction.
The following table lists all the amounts of points that can be earned during each round of topic selection:
| Topic number | Normal state | Max vibes | ||||
|---|---|---|---|---|---|---|
| Interesting | Excitement building | Super exciting | Interesting | Excitement building | Super exciting | |
| 1 | 5 | 7 | 10 | - | - | - |
| 2 | 6 | 8 | 11 | 12 | 16 | 22 |
| 3 | 7 | 9 | 12 | 14 | 18 | 24 |
| 4 | 8 | 10 | 13 | 16 | 20 | 26 |
| 5 | 9 | 11 | 14 | 18 | 22 | 28 |
| 6 | 10 | 12 | 15 | 20 | 24 | 30 |
| 7 | 11 | 13 | 16 | 22 | 26 | 32 |
| 8 | 12 | 14 | 17 | 24 | 28 | 34 |
| 9 | 13 | 15 | 18 | 26 | 30 | 36 |
| 10 | 14 | 16 | 19 | 28 | 32 | 38 |
| 11 | 15 | 17 | 20 | 30 | 34 | 40 |
| 12 | 16 | 18 | 21 | 32 | 36 | 42 |
| 13 | 17 | 19 | 22 | 34 | 38 | 44 |
| 14 | 18 | 20 | 23 | 36 | 40 | 46 |
| 15 | 19 | 21 | 24 | 38 | 42 | 48 |
A gift can be given to the Trainer to restore attention, refresh topics, and multiply the amount of friendship points earned at the end of the interaction. Gifts can be purchased in the Lodge Exchange and are specific to each sync pair. These come in standard, good, and awesome forms, with more valuable gifts giving greater boosts.
Once the interaction ends, friendship level with the Trainer will increase by the amount the friendship points earned. The interaction will also be given a rating based on the amount of friendship points earned before applying any gift or multiple-interaction bonuses:
- Great (depicted in silver text) = 40 points or less
- Excellent (depicted in gold text) = 41-79 points
- Wonderful (depicted in rainbow text) = 80 points or more
The only effect the rating has on gameplay is that Trainers will use a different line of dialogue at the end of a Great or Excellent conversation than they do after a Wonderful conversation, with the dialogue after a Wonderful conversation indicating that they enjoyed the conversation more.
The "item" used to initiate an interaction is also called an interaction. Each day, interactions are automatically restored up to a maximum of three. If the player already has three or more interactions, no interactions will be restored that day. Players can also purchase Interaction Counts to restore interactions, and these can restore interactions beyond the three limit. Using interaction counts, the maximum number of interactions that can be stored is 10. All stored interactions can be used at once, which will multiply the friendship points depending on the number of interactions used (e.g. using up two interactions at once will double the points after completing the interaction).
If the app is closed before an interaction is completed, any interactions and items used during that interaction will be returned to the player the next time they return to the Trainer Lodge. Any interactions that have not yet been reclaimed do not count towards the player's total when interactions are restored at the beginning of the day. Thus, if the player uses all their interactions, closes the app before the interaction is completed, and then does not return to the Trainer Lodge until the next day (even if the player reopened the app on the first day), the player will receive all the interactions they had used in addition to the daily three being restored.
The location of the interaction can be chosen prior to the chat, with various locations unlocked as friendship level increases. Help items can also be used before the interaction to provide various benefits during the interaction. The primary method of obtaining these is to purchase them in the Lodge Exchange.
| Item | Description | Cost | Limit | |
|---|---|---|---|---|

|
Interaction Count | Restores interactions. | 3 per day | |

|
Insight Specs | Reveals the hot topic of an interaction. | No limit | |

|
Boost Juice | Ensures max vibes when you select a topic that matches your guest's hot topic during an interaction. | No limit | |

|
Dig-It Shovel | Attention drops are reduced by 2 during an interaction. The lowest number this drop can reach is zero. | No limit | |

|
Feel Ring | Topics that match your guest's hot topic will appear more often during an interaction. | No limit | |
Once per day, a guest visiting the Trainer Lodge will give the player a random present. The guest giving the present will be the last Trainer that the player interacted with on the previous day. If that Trainer is un-invited from the Lodge, one of the other guests currently visiting will be chosen at random to offer the player a present. Items that the player may be gifted by guest Trainers include: help items, Lodge Stones, 1★ Friend Keys, Fiery / Soothing / Wistful Stones, Extracts, Co-op Sync Orbs, Level-Up Manuals, Power-Ups, Move Candy Coins, and 5★ Scout Tickets. The quality or quantity of items received by greeting a Trainer will improve as that Trainer's friendship level increases.
| Item | Amount (Level 1–9) | Amount (Level 10–29) | Amount (Level 30+) | Rate | |
|---|---|---|---|---|---|

|
2★ Level-Up Manual | ×10 | - | - | 10.0% |

|
3★ Level-Up Manual | - | ×10 | - | |

|
4★ Level-Up Manual | - | - | ×10 | 7.0% |

|
5★ Scout Ticket | - | - | ×10 | 1.0% |

|
Strike Move Candy Coin | - | - | ×1 | 0.5% |

|
Tech Move Candy Coin | - | - | ×1 | 0.5% |

|
Support Move Candy Coin | - | - | ×1 | 0.5% |

|
Move Candy Coin | - | - | ×1 | 0.5% |

|
3★ Power-Up | ×1 | - | - | 1.0% |

|
4★ Power-Up | - | ×1 | - | |

|
5★ Power-Up | - | - | ×1 | |

|
Co-Op Sync Orb | ×500 | ×750 | ×1,000 | 5.0% |

|
Fiery Stone | ×1 | ×2 | ×3 | 5.0% |

|
Soothing Stone | ×1 | ×2 | ×3 | 5.0% |

|
Wistful Stone | ×1 | ×2 | ×3 | 5.0% |

|
Fiery Extract | ×1 | ×2 | ×3 | 10.0% |

|
Soothing Extract | ×1 | ×2 | ×3 | 10.0% |

|
Wistful Extract | ×1 | ×2 | ×3 | 10.0% |

|
Rare Extract | ×1 | ×2 | ×3 | 10.0% |

|
Omni Extract | ×1 | ×2 | ×3 | 5.0% |
|
|
Insight Specs | ×1 | ×2 | ×3 | 5.0% |
|
|
Boost Juice | ×1 | ×2 | ×3 | 5.0% |
|
|
Dig-It Shovel | ×1 | ×2 | ×3 | 5.0% |
|
|
Feel Ring | ×1 | ×2 | ×3 | 5.0% |

|
Lodge Stone | ×50 | ×70 | ×100 | 1.0% |

|
1★ Friend Key | ×1 | ×2 | ×3 | 3.0% |
Gifts
Gifts can be purchased in the Lodge Exchange. The boosts supplied by gifts differ on their value:
- Standard gifts: restores attention by 10, refreshes topics, and multiplies friendship points earned by ×1.10.
- Good gifts: restores attention by 20, refreshes topics, and multiplies friendship points earned by ×1.30.
- Awesome gifts: restores attention by 30, refreshes topics, and multiplies friendship points earned by ×1.50.
The cost of a gift depends on the corresponding sync pair's role, as well as the quality of the gift itself:
| Gift quality | Role | ||||
|---|---|---|---|---|---|
| Standard gift | |||||
| Good gift | |||||
| Awesome gift | |||||
The following table lists all the gifts available for each sync pair.
| Sync pair | Item | Cost | |
|---|---|---|---|
 Blue & Pidgeot |

|
Pendant | |

|
Good Pendant | ||

|
Awesome Pendant | ||
 Leaf & Eevee |

|
Wristband | |

|
Good Wristband | ||

|
Awesome Wristband | ||
 Giovanni & Mewtwo |

|
Cuff Link | |

|
Good Cuff Link | ||

|
Awesome Cuff Link | ||
 Lance & Dragonite |

|
Cape | |

|
Good Cape | ||

|
Awesome Cape | ||
 Silver & Ho-Oh |

|
Berry Set | |

|
Good Berry Set | ||

|
Awesome Berry Set | ||
 Morty & Drifblim |

|
Bandanna | |

|
Good Bandanna | ||

|
Awesome Bandanna | ||
 Jasmine & Steelix |

|
Dining Voucher | |

|
Good Dining Voucher | ||

|
Awesome Dining Voucher | ||
 May & Mudkip/ Marshtomp/Swampert |

|
Hair Band | |

|
Good Hair Band | ||

|
Awesome Hair Band | ||
 Steven & Metagross |

|
Silver Ring | |

|
Good Silver Ring | ||

|
Awesome Silver Ring | ||
 Wally & Gallade |

|
Guidebook | |

|
Good Guidebook | ||

|
Awesome Guidebook | ||
 Brendan & Treecko/ Grovyle/Sceptile |

|
Pokéblock Set | |

|
Good Pokéblock Set | ||

|
Awesome Pokéblock Set | ||
 Cynthia & Garchomp |

|
Hair Accessory | |

|
Good Hair Accessory | ||

|
Awesome Hair Accessory | ||
 Dawn & Turtwig/ Grotle/Torterra |

|
Hair Clip | |

|
Good Hair Clip | ||

|
Awesome Hair Clip | ||
 Adaman & Leafeon |

|
Pocket Watch | |

|
Good Pocket Watch | ||

|
Awesome Pocket Watch | ||
 Irida & Glaceon |

|
Folding Fan | |

|
Good Folding Fan | ||

|
Awesome Folding Fan | ||
 Volkner & Luxray |

|
Battery | |

|
Good Battery | ||

|
Awesome Battery | ||
 Volo & Togepi |

|
Abacus | |

|
Good Abacus | ||

|
Awesome Abacus | ||
 Rosa & Snivy/ Servine/Serperior |

|
Sun Visor | |

|
Good Sun Visor | ||

|
Awesome Sun Visor | ||
 N & Zekrom |

|
Figurine | |

|
Good Figurine | ||

|
Awesome Figurine | ||
 Elesa & Zebstrika |

|
Nail Polish | |

|
Good Nail Polish | ||

|
Awesome Nail Polish | ||
 Skyla & Swanna |

|
Goggles | |

|
Good Goggles | ||

|
Awesome Goggles | ||
 Cheren & Stoutland |

|
Tie Clip | |

|
Good Tie Clip | ||

|
Awesome Tie Clip | ||
 Iris & Haxorus |

|
Ribbon | |

|
Good Ribbon | ||

|
Awesome Ribbon | ||
 Professor Sycamore & Xerneas |

|
Coffee Beans | |

|
Good Coffee Beans | ||

|
Awesome Coffee Beans | ||
 Serena & Fennekin/ Braixen/Delphox |

|
Hat Band | |

|
Good Hat Band | ||

|
Awesome Hat Band | ||
 Calem & Espurr/ Meowstic |

|
Poké Puff Set | |

|
Good Poké Puff Set | ||

|
Awesome Poké Puff Set | ||
 Shauna & Chesnaught |

|
Scrunchie | |

|
Good Scrunchie | ||

|
Awesome Scrunchie | ||
 Diantha & Gardevoir |

|
Perfume | |

|
Good Perfume | ||

|
Awesome Perfume | ||
 Lillie & Clefairy |

|
Pokémon Encyclopedia | |

|
Good Pokémon Encyclopedia | ||

|
Awesome Pokémon Encyclopedia | ||
 Acerola & Palossand |

|
Antique Book | |

|
Good Antique Book | ||

|
Awesome Antique Book | ||
 Gladion & Silvally |

|
Ear Cuff | |

|
Good Ear Cuff | ||

|
Awesome Ear Cuff | ||
 Lana & Araquanid |

|
Fishing Lure | |

|
Good Fishing Lure | ||

|
Awesome Fishing Lure | ||
 Lusamine & Pheromosa |

|
High Heels | |

|
Good High Heels | ||

|
Awesome High Heels | ||
 Marnie & Morpeko |

|
Handheld Mirror | |

|
Good Handheld Mirror | ||

|
Awesome Handheld Mirror | ||
 Raihan & Duraludon |

|
Earrings | |

|
Good Earrings | ||

|
Awesome Earrings | ||
 Gloria & Zacian |

|
Spice | |

|
Good Spice | ||

|
Awesome Spice | ||
 Kabu & Centiskorch |

|
Shoes | |

|
Good Shoes | ||

|
Awesome Shoes | ||
 Leon & Charizard |

|
Cap | |

|
Good Cap | ||

|
Awesome Cap | ||
 Rika & Clodsire |

|
Tie | |

|
Good Tie | ||

|
Awesome Tie | ||
 Iono & Bellibolt |

|
Makeup Kit | |

|
Good Makeup Kit | ||

|
Awesome Makeup Kit | ||
 Arven & Mabosstiff |

|
Spice Box | |

|
Good Spice Box | ||

|
Awesome Spice Box | ||
 Lacey & Granbull |

|
Pokémon Cookies | |

|
Good Pokémon Cookies | ||

|
Awesome Pokémon Cookies | ||
 Larry & Dudunsparce |

|
Business Card Holder | |

|
Good Business Card Holder | ||

|
Awesome Business Card Holder | ||
 Carmine & Sinistcha |

|
Fried Noodles | |

|
Good Fried Noodles | ||

|
Awesome Fried Noodles | ||
 Lear & Hoopa |

|
Ring | |

|
Good Ring | ||

|
Awesome Ring | ||
Locations
Interaction locations are unlocked by increasing the Trainer's friendship levels. Different locations provide additional topics to be discussed. Once the player has unlocked multiple interaction locations with a particular Trainer, they can choose "Random" to interact with the Trainer at a random location outside of the Trainer Lodge.
| Location | Friendship Level | Additional topics |
|---|---|---|
 Trainer Lodge |
Default | Trainer Lodge, Pasio |

|
5 | Bustling places, sweets |

|
10 | Grass types, quiet places |

|
15 | Adventure, Pokéathlons |

|
25 | Bug types, forests |

|
30 | The ocean, Water types |

|
35 | Rock types, ruins |
|
40 | The PML, partner Pokémon |

|
45 | Windmills, Flying types |

|
50 | Ninjas, veteran Trainers |
Additional locations have been made available for the duration of certain seasonal events:
| Location | Event | Additional topics |
|---|---|---|
|
Fall (2022, 2023, 2024) | Ghosts, parades |
|
Holiday (2022, 2023, 2024) | Snow, Ice types |

|
New Year's (2023, 2024, 2025) | Dragon types, Normal types |

|
Summer (2023, 2024) | Festivals, stars |
Friendship levels
All Trainers start at friendship level 1, with an initial level cap of 100. The friendship level cap can be increased with Friend Keys, up to a maximum level cap of 2,147,483,647. Increasing the friendship level through interactions provides various rewards for the player.
In the Invite Guests menu, the border around a Trainer's icon depends on their current friendship level:
- Lv 1: Bronze
- Lv 50: Silver
- Lv 100: Gold
- Lv 200: Green
- Lv 300: Blue
- Lv 400: Purple
- Lv 500: Orange
- Lv 700: Red
- Lv 1,000: Rainbow
| Item | Description | Acquisition | |
|---|---|---|---|
|
|
1★ Friend Key | Increases a guest's friendship level cap by 1. |
|

|
2★ Friend Key | Increases a guest's friendship level cap by 5. |
|

|
3★ Friend Key | Increases a guest's friendship level cap by 10. |
|
Friendship Level-Up Rewards
Various rewards are earned when leveling up sync pairs, including Lodge Stones at every level (10 each level) which can be used to exchange for items and sync pairs in the Lodge Exchange. Reaching levels 10 and 30 unlock Friendship Stories with the Trainer, while levels 20 and 40 unlock Friend and Story Snapshots of the Trainer respectively. Increasing the level to 100 unlocks an additional Pokémon for the guest Trainer to pair with. Duplicates of this new sync pair (to raise sync move level) can be purchased in the Lodge Exchange with Lodge Stones.
Trainer photos and Friendship Stories can be viewed in the Scrapbook. Photos are given a default Bronze Frame, with Silver, Gold, Rainbow, and Special Frames successively unlocked by increasing the sync pair's move level from two to five. Raising the sync pair's potential to 6★ EX unlocks a holo foil texture for the photo.
Levels past 100 do not have special milestone rewards - they will only grant the standard 10 Lodge Stones per level.
| Friendship level | Reward |
|---|---|
| Each level | Lodge Stone ×10 |
| 5 | 5★ Scout Ticket ×10 |
| 10 |  A Special Day with (Trainer): Part 1 |
| 15 | Strike Move Candy Coin |
| 20 |  Friend Snapshot |
| 25 | 5★ Power-Up ×5 |
| 30 | A Special Day with (Trainer): Part 2 |
| 35 | 5★ Scout Ticket ×10 |
| 40 |  Story Snapshot |
| 45 | Tech Move Candy Coin |
| 50 |  Certificate of Excellence ×2 |
| 55 | 5★ Power-Up ×5 |
| 60 | Certificate of Excellence ×2 |
| 65 | 5★ Scout Ticket ×10 |
| 70 | Support Move Candy Coin |
| 75 | 5★ Power-Up ×5 |
| 80 | Certificate of Excellence ×3 |
| 85 | Move Candy Coin |
| 90 | 5★ Power-Up ×5 |
| 95 | Certificate of Excellence ×3 |
| 100 | Sync pair (see below table) |
Expeditions

Players can send several sync pairs on expeditions to explore various areas of Pasio and obtain items used as currency in the Lodge Exchange. Sync pairs involving the player character cannot be sent on expeditions, and two Trainers with the same name cannot be on the same expedition team. The expedition skill of each team member determines the discovery level for four categories of items that can be obtained: ![]() Fiery Crystals,
Fiery Crystals, ![]() Soothing Crystals,
Soothing Crystals, ![]() Wistful Crystals, and
Wistful Crystals, and ![]() rare caches (chests that can contain rare items including Lodge Stones and 5★ Power-Ups). The discovery level of each item category can range from 0 to 10, with higher levels increasing the number and rarity of expedition rewards obtained.
rare caches (chests that can contain rare items including Lodge Stones and 5★ Power-Ups). The discovery level of each item category can range from 0 to 10, with higher levels increasing the number and rarity of expedition rewards obtained.
On occasion, a Cheer On icon will be displayed above the Trainer set in the first slot of the expedition team, which increases the discovery levels of all categories by 1 for 12 hours. Expedition items can also be used to raise the team's discovery level. Most items increase the discovery level of one category by 2, while Omni Extracts increase all discovery levels by 1. Each expedition item lasts for 24 hours, and only one expedition item can be used at a time.
Up to two expedition teams can be created concurrently. Team A will automatically have a base discovery level of 1 for Fiery and Soothing Crystals, while Team B will have a base discovery level of 1 for Wistful Crystals and rare caches. Expedition teams are initially capped at three sync pairs, which can be increased to six by purchasing Expedition Team Slot +1 items in the Lodge Exchange.
Once per day, a Poké Ball will spawn at each expedition site, which when opened will contain an item including Tomes, 3★ Level-Up Manuals, Co-op Sync Orbs, Big Pearls, 1★ Friend Keys, and Lodge Stones.
Starting from version 2.25.0, there is a rare chance of a drop-in event occurring in one or both expedition teams each time the Expeditions screen is reloaded. During a drop-in event, the Trainers on the expedition team do not appear, being replaced by one or more Trainers who are not part of the expedition team visiting the expedition area. Examples of drop-in events include:
- Lear, Rachel, and Sawyer searching for Hoopa in a plains area. Hoopa is hiding behind a plant on the far side of the expedition site.
- Lisia showing off to her fans.
- Viola taking pictures of Elesa.
- Team Magma Grunts exploring a volcanic area.
- Team Galactic Grunts exploring a mountainous area.
- Maylene supervising the training of three Black Belts.
- Sonia and Mallow watching their Tsareena interact.
- Nanu offering a Youngster a choice between three Alolan Meowth.
When a drop-in event occurs, a Poké Ball will spawn in the area, containing more or rarer items than those found in the daily Poké Balls. If the daily Poké Ball in an area has not been collected before the drop-in event occurs, it cannot be collected until the Expeditions screen is reloaded, ending the drop-in event.
The following table details what items can be collected from Poké Balls in normal expedition areas and drop-in events:
| Item (Daily) | Item (Drop-In Event) | Rate | ||
|---|---|---|---|---|

|
Fire Tome, Vol. 1 ×10 | 
|
Fire Codex, Vol. 1 ×10 | 4% |

|
Water Tome, Vol. 1 ×10 | 
|
Water Codex, Vol. 1 ×10 | 4% |

|
Electric Tome, Vol. 1 ×10 | 
|
Electric Codex, Vol. 1 ×10 | 4% |

|
Grass Tome, Vol. 1 ×10 | 
|
Grass Codex, Vol. 1 ×10 | 4% |

|
Ice Tome, Vol. 1 ×10 | 
|
Ice Codex, Vol. 1 ×10 | 4% |

|
Fighting Tome, Vol. 1 ×10 | 
|
Fighting Codex, Vol. 1 ×10 | 4% |

|
Poison Tome, Vol. 1 ×10 | 
|
Poison Codex, Vol. 1 ×10 | 4% |

|
Ground Tome, Vol. 1 ×10 | 
|
Ground Codex, Vol. 1 ×10 | 4% |

|
Flying Tome, Vol. 1 ×10 | 
|
Flying Codex, Vol. 1 ×10 | 4% |

|
Psychic Tome, Vol. 1 ×10 | 
|
Psychic Codex, Vol. 1 ×10 | 4% |

|
Bug Tome, Vol. 1 ×10 | 
|
Bug Codex, Vol. 1 ×10 | 4% |

|
Rock Tome, Vol. 1 ×10 | 
|
Rock Codex, Vol. 1 ×10 | 4% |

|
Ghost Tome, Vol. 1 ×10 | 
|
Ghost Codex, Vol. 1 ×10 | 4% |

|
Dragon Tome, Vol. 1 ×10 | 
|
Dragon Codex, Vol. 1 ×10 | 4% |

|
Dark Tome, Vol. 1 ×10 | 
|
Dark Codex, Vol. 1 ×10 | 4% |

|
Steel Tome, Vol. 1 ×10 | 
|
Steel Codex, Vol. 1 ×10 | 4% |

|
Fairy Tome, Vol. 1 ×10 | 
|
Fairy Codex, Vol. 1 ×10 | 4% |

|
Normal Tome, Vol. 1 ×10 | 
|
Normal Codex, Vol. 1 ×10 | 4% |
|
|
3★ Level-Up Manual ×10 |
|
4★ Level-Up Manual ×10 | 8% |
|
|
Co-op Sync Orb ×500 |
|
Co-op Sync Orb ×1,000 | 8% |

|
Pearl ×10 | 
|
Big Pearl ×10 | 10% |
|
|
Lodge Stone ×50 |
|
Lodge Stone ×100 | 1% |
|
|
1★ Friend Key ×1 |
|
1★ Friend Key ×1 | 1% |
When an additional interaction location is added during certain seasonal events, an additional expedition team becomes available, which exclusively explores the limited-time seasonal area. Sync pairs corresponding to the seasonal event will give a +1 bonus to the ![]() rare cache discovery level if added to this expedition team, on top of their usual expedition skill bonuses. Drop-in events cannot occur in limited-time expedition areas.
rare cache discovery level if added to this expedition team, on top of their usual expedition skill bonuses. Drop-in events cannot occur in limited-time expedition areas.
Expedition rewards
Expedition rewards are found every minute, and will accumulate up to one of two possible limits:
- A total of 30,000 crystals.
- A total of 100 rare caches.
Once either limit is reached, no further items will be discovered until the rewards are claimed. The player may claim these rewards at any time. When the duration of a limited-time expedition team ends, the player will receive all the crystals and rare caches that the team had gathered the next time the Expeditions screen is loaded.
| Item | Description | |
|---|---|---|

|
Fiery Crystal | Used at the lodge exchange in the Trainer Lodge. |

|
Great Fiery Crystal | |

|
Ultra Fiery Crystal | |
|
|
Fiery Stone | |

|
Soothing Crystal | |

|
Great Soothing Crystal | |

|
Ultra Soothing Crystal | |
|
|
Soothing Stone | |

|
Wistful Crystal | |

|
Great Wistful Crystal | |

|
Ultra Wistful Crystal | |
|
|
Wistful Stone | |
Rare caches
Rare caches grant a random item from a set pool when opened. Caches of higher rarities tend to have rarer items, or items in larger quantities.
| Item |  1★ 1★
|
 2★ 2★
|
 3★ 3★
| |||
|---|---|---|---|---|---|---|
| ×1 | 0.5% | ×1 | 0.8% | ×1 | 1.2% | |
| ×10 | 0.2% | ×20 | 0.2% | ×30 | 0.2% | |
| - | - | ×10 | 0.4% | |||
| ×200 | 4.0% | ×400 | 4.0% | ×600 | 3.4% | |
| ×1 | 0.2% | - | - | |||
| - | ×1 | 0.2% | - | |||
| - | - | ×1 | 0.2% | |||
| ×20 | 19.5% | - | - | |||
| - | ×20 | 12.2% | ×30 | 9.6% | ||
| ×10,000 | 9.6% | ×30,000 | 10.1% | ×60,000 | 5.0% | |
| ×1 | 15.0% | ×2 | 17.5% | ×3 | 20.0% | |
| ×1 | 15.0% | ×2 | 17.5% | ×3 | 20.0% | |
| ×1 | 15.0% | ×2 | 17.5% | ×3 | 20.0% | |
| ×100 | 2.0% | ×200 | 2.0% | ×300 | 2.0% | |
| ×300 | 4.0% | ×500 | 4.0% | ×700 | 4.0% | |
| ×100 | 2.0% | ×200 | 2.0% | ×300 | 2.0% | |
| ×300 | 4.0% | ×500 | 4.0% | ×700 | 4.0% | |
| ×100 | 2.0% | ×200 | 2.0% | ×300 | 2.0% | |
| ×300 | 4.0% | ×500 | 4.0% | ×700 | 4.0% | |
| ×10 | 1.0% | ×20 | 1.0% | ×30 | 1.0% | |
| ×1 | 2.0% | - | - | |||
| - | ×1 | 1.0% | - | |||
| - | - | ×1 | 1.0% | |||
Discovery levels
The expedition team's discovery level affects the number and rarity of items obtained. Expedition rewards have a chance of being found once per minute as long as there is at least one Trainer on the expedition team.
| Discovery Level | Fiery Crystal | Soothing Crystal | Wistful Crystal | Rare Cache | ||||||||
|---|---|---|---|---|---|---|---|---|---|---|---|---|
| 1 | ×1 | - | - | ×1 | - | - | ×1 | - | - | ×1 | - | - |
| 2 | ||||||||||||
| 3 | ×1-2 | - | - | ×1-2 | - | - | ×1-2 | - | - | |||
| 4 | ×1-2 | ×1 | - | ×1-2 | ×1 | - | ×1-2 | ×1 | - | ×1 | ×1 | - |
| 5 | ||||||||||||
| 6 | ×1-2 | ×1-2 | - | ×1-2 | ×1-2 | - | ×1-2 | ×1-2 | - | |||
| 7 | ×2-3 | ×1-2 | ×1 | ×2-3 | ×1-2 | ×1 | ×2-3 | ×1-2 | ×1 | ×1 | ×1 | ×1 |
| 8 | ||||||||||||
| 9 | ×3 | ×2 | ×1-2 | ×3 | ×2 | ×1-2 | ×3 | ×2 | ×1-2 | |||
| 10 | ×3 | ×2-3 | ×2 | ×3 | ×2-3 | ×2 | ×3 | ×2-3 | ×2 | |||
Expedition items
These items assist with increasing discovery levels and can be purchased in the Lodge Exchange. Extracts can also be obtained as a random daily present from a guest in the Trainer Lodge.
| Expedition Item | Description | Cost | |
|---|---|---|---|
|
|
Fiery Extract | When used during an expedition, raises your Fiery Crystal discovery level by 2 for 24 hours. | |
|
|
Soothing Extract | When used during an expedition, raises your Soothing Crystal discovery level by 2 for 24 hours. | |
|
|
Wistful Extract | When used during an expedition, raises your Wistful Crystal discovery level by 2 for 24 hours. | |
|
|
Rare Extract | When used during an expedition, raises your rare cache discovery level by 2 for 24 hours. | |
|
|
Omni Extract | When used during an expedition, raises all discovery levels by 1 for 24 hours. | |

|
Expedition Team Slot +1 | Increases the max number of Trainers you can add to your expedition team. |
|
Redecorating
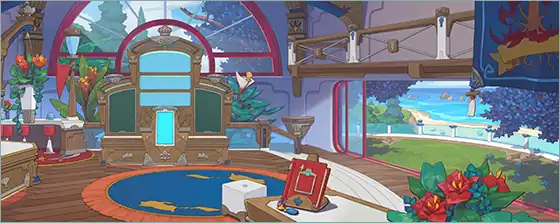
Starting from version 2.30.0, players were given the ability to redecorate the Trainer Lodge. The player has three main ways of decorating the lodge: choosing a style, hanging up artwork and photos, and setting out plushies and replicas.
Styles
Choosing a style changes the appearance of the whole Trainer Lodge, including the color of the floor, walls, and furniture. By default, the Trainer Lodge uses the style "Normal", but additional styles can be purchased in the Lodge Exchange. The player can only purchase each style once and may freely switch between any of the styles they own at any time.
- Note: The Team Rocket Style is only available to purchase after completing the Final Chapter of the Villain Arc.
| Style | Cost | |
|---|---|---|
| Normal | - | |

|
Natural Style | |

|
Noble Style | |

|
Hisui Style | |

|
Team Rocket Style | |

|
New Year's Style | |

|
Palentine's Day Style | |

|
Egg Hunt Style | |

|
Summer Style | |

|
Monochromatic Style | |

|
Horror Night Style | |

|
Winter Party Style | |

|
Paldea Style | |
Artwork and photos
The player can hang up to three pieces of artwork or photos in the Trainer Lodge at once: one on each of the bulletin boards in the center of the lodge, and one on the bulletin board on the far left side of the lodge. By default, nothing is hung on these bulletin boards.
The photos available to hang up are the same ones found in the Scrapbook; as soon as the player unlocks a snapshot in the Scrapbook, an unlimited number of copies of it can be placed on the bulletin boards in the center of the lodge.
Most artwork is obtained by exchanging crystals in the Lodge Exchange, and the player may only set out as many copies of a piece of artwork as they have obtained; that is, if the player wishes to put the same piece of artwork on multiple bulletin boards at the same time, they must purchase multiple copies of the artwork. The artwork is divided into three categories, based on their number:
- 1000s artwork has been previously used on the title screen for the game.
- 2000s artwork has been previously used as a splash screen when loading up the game.
- 3000s artwork was commissioned to promote various story chapters or events and shared on social media.
The only significant difference between the three categories of art is that 1000s and 2000s artwork has rectangular dimensions, while 3000s art has square dimensions. As a result, only 3000s art can be displayed on the square bulletin board, found on the far left side of the Trainer Lodge.
Once obtained, artwork and photos can also be set to display on loading screens. If multiple pictures are set to display on loading screens, one will be chosen at random each time a loading screen occurs.
There are three pieces of artwork that cannot be obtained through the Lodge Exchange. Only one copy of each artwork was available during each availability period, so duplicates of these pieces of artwork can only be obtained if the artwork was available for multiple periods.
| Artwork | Description | How to obtain | Availability period |
|---|---|---|---|
|
No. 1007 Can be used to decorate the Trainer Lodge. Can be viewed in your scrapbook. |
Time We Got Down to It! rally reward | January 22 to February 22, 2024 |

|
No. 2003 Can be used to decorate the Trainer Lodge. Can be viewed in your scrapbook. |
Victor's Cooking Class! exchange shop | February 9 to 26, 2024 February 4 to 22, 2025 |

|
No. 1008 Can be used to decorate the Trainer Lodge. Can be viewed in your scrapbook. |
Rika's Elite Test rally reward | May 14 to June 14, 2024 |
The following table lists all artwork that can be obtained from the Lodge Exchange.
| Artwork | Description | Cost | Number Exchangeable |
|---|---|---|---|
|
No. 1000 Can be used to decorate the Trainer Lodge. Can be viewed in your scrapbook. |
2 | |
|
No. 1001 Can be used to decorate the Trainer Lodge. Can be viewed in your scrapbook. |
2 | |
|
No. 1002 Can be used to decorate the Trainer Lodge. Can be viewed in your scrapbook. |
2 | |
|
No. 1003 Can be used to decorate the Trainer Lodge. Can be viewed in your scrapbook. |
2 | |

|
No. 1004 Can be used to decorate the Trainer Lodge. Can be viewed in your scrapbook. |
2 | |
|
No. 1005 Can be used to decorate the Trainer Lodge. Can be viewed in your scrapbook. |
2 | |
|
No. 1006 Can be used to decorate the Trainer Lodge. Can be viewed in your scrapbook. |
2 | |
|
No. 1009 Can be used to decorate the Trainer Lodge. Can be viewed in your scrapbook. |
2 | |
|
No. 1010 Can be used to decorate the Trainer Lodge. Can be viewed in your scrapbook. |
2 | |
|
No. 1011 Can be used to decorate the Trainer Lodge. Can be viewed in your scrapbook. |
2 | |
|
No. 1012 Can be used to decorate the Trainer Lodge. Can be viewed in your scrapbook. |
2 | |
|
No. 1013 Can be used to decorate the Trainer Lodge. Can be viewed in your scrapbook. |
2 | |
|
No. 1014 Can be used to decorate the Trainer Lodge. Can be viewed in your scrapbook. |
2 | |
|
No. 1015 Can be used to decorate the Trainer Lodge. Can be viewed in your scrapbook. |
2 | |
|
No. 1016 Can be used to decorate the Trainer Lodge. Can be viewed in your scrapbook. |
2 | |

|
No. 1017 Can be used to decorate the Trainer Lodge. Can be viewed in your scrapbook. |
2 | |
|
No. 1018 Can be used to decorate the Trainer Lodge. Can be viewed in your scrapbook. |
2 | |
|
No. 1019 Can be used to decorate the Trainer Lodge. Can be viewed in your scrapbook. |
2 | |
|
No. 2000 Can be used to decorate the Trainer Lodge. Can be viewed in your scrapbook. |
2 | |
|
No. 2001 Can be used to decorate the Trainer Lodge. Can be viewed in your scrapbook. |
2 | |
|
No. 2002 Can be used to decorate the Trainer Lodge. Can be viewed in your scrapbook. |
2 | |
|
No. 2004 Can be used to decorate the Trainer Lodge. Can be viewed in your scrapbook. |
2 | |
|
No. 2005 Can be used to decorate the Trainer Lodge. Can be viewed in your scrapbook. |
2 | |
|
No. 2006 Can be used to decorate the Trainer Lodge. Can be viewed in your scrapbook. |
2 | |
|
No. 2007 Can be used to decorate the Trainer Lodge. Can be viewed in your scrapbook. |
2 | |
|
No. 2008 Can be used to decorate the Trainer Lodge. Can be viewed in your scrapbook. |
2 | |
|
No. 2009 Can be used to decorate the Trainer Lodge. Can be viewed in your scrapbook. |
2 | |
|
No. 2010 Can be used to decorate the Trainer Lodge. Can be viewed in your scrapbook. |
2 | |
|
No. 3000 Can be used to decorate the Trainer Lodge. Can be viewed in your scrapbook. |
3 | |
|
No. 3001 Can be used to decorate the Trainer Lodge. Can be viewed in your scrapbook. |
3 | |

|
No. 3002 Can be used to decorate the Trainer Lodge. Can be viewed in your scrapbook. |
3 | |
|
No. 3003 Can be used to decorate the Trainer Lodge. Can be viewed in your scrapbook. |
3 | |
|
No. 3004 Can be used to decorate the Trainer Lodge. Can be viewed in your scrapbook. |
3 | |
|
No. 3005 Can be used to decorate the Trainer Lodge. Can be viewed in your scrapbook. |
3 | |
|
No. 3006 Can be used to decorate the Trainer Lodge. Can be viewed in your scrapbook. |
3 | |
|
No. 3007 Can be used to decorate the Trainer Lodge. Can be viewed in your scrapbook. |
3 | |
|
No. 3008 Can be used to decorate the Trainer Lodge. Can be viewed in your scrapbook. |
3 | |
|
No. 3009 Can be used to decorate the Trainer Lodge. Can be viewed in your scrapbook. |
3 | |
|
No. 3010 Can be used to decorate the Trainer Lodge. Can be viewed in your scrapbook. |
3 | |
|
No. 3011 Can be used to decorate the Trainer Lodge. Can be viewed in your scrapbook. |
3 | |
|
No. 3012 Can be used to decorate the Trainer Lodge. Can be viewed in your scrapbook. |
3 | |
|
No. 3013 Can be used to decorate the Trainer Lodge. Can be viewed in your scrapbook. |
3 | |

|
No. 3014 Can be used to decorate the Trainer Lodge. Can be viewed in your scrapbook. |
3 | |
|
No. 3015 Can be used to decorate the Trainer Lodge. Can be viewed in your scrapbook. |
3 | |

|
No. 3016 Can be used to decorate the Trainer Lodge. Can be viewed in your scrapbook. |
3 | |
|
No. 3017 Can be used to decorate the Trainer Lodge. Can be viewed in your scrapbook. |
3 | |
|
No. 3018 Can be used to decorate the Trainer Lodge. Can be viewed in your scrapbook. |
3 | |
|
No. 3019 Can be used to decorate the Trainer Lodge. Can be viewed in your scrapbook. |
3 | |
|
No. 3020 Can be used to decorate the Trainer Lodge. Can be viewed in your scrapbook. |
3 | |
|
No. 3021 Can be used to decorate the Trainer Lodge. Can be viewed in your scrapbook. |
3 | |

|
No. 3022 Can be used to decorate the Trainer Lodge. Can be viewed in your scrapbook. |
3 | |
|
No. 3023 Can be used to decorate the Trainer Lodge. Can be viewed in your scrapbook. |
3 | |
|
No. 3024 Can be used to decorate the Trainer Lodge. Can be viewed in your scrapbook. |
3 | |
|
No. 3025 Can be used to decorate the Trainer Lodge. Can be viewed in your scrapbook. |
3 | |

|
No. 3026 Can be used to decorate the Trainer Lodge. Can be viewed in your scrapbook. |
3 | |
|
No. 3027 Can be used to decorate the Trainer Lodge. Can be viewed in your scrapbook. |
3 | |
|
No. 3028 Can be used to decorate the Trainer Lodge. Can be viewed in your scrapbook. |
3 | |
|
No. 3029 Can be used to decorate the Trainer Lodge. Can be viewed in your scrapbook. |
3 | |

|
No. 3030 Can be used to decorate the Trainer Lodge. Can be viewed in your scrapbook. |
3 | |
|
No. 3031 Can be used to decorate the Trainer Lodge. Can be viewed in your scrapbook. |
3 | |
|
No. 3032 Can be used to decorate the Trainer Lodge. Can be viewed in your scrapbook. |
3 | |
|
No. 3033 Can be used to decorate the Trainer Lodge. Can be viewed in your scrapbook. |
3 | |
|
No. 3034 Can be used to decorate the Trainer Lodge. Can be viewed in your scrapbook. |
3 | |
|
No. 3035 Can be used to decorate the Trainer Lodge. Can be viewed in your scrapbook. |
3 | |
|
No. 3036 Can be used to decorate the Trainer Lodge. Can be viewed in your scrapbook. |
3 | |
|
No. 3037 Can be used to decorate the Trainer Lodge. Can be viewed in your scrapbook. |
3 | |
|
No. 3038 Can be used to decorate the Trainer Lodge. Can be viewed in your scrapbook. |
3 | |
|
No. 3039 Can be used to decorate the Trainer Lodge. Can be viewed in your scrapbook. |
3 | |
|
No. 3040 Can be used to decorate the Trainer Lodge. Can be viewed in your scrapbook. |
3 | |
|
No. 3041 Can be used to decorate the Trainer Lodge. Can be viewed in your scrapbook. |
3 | |
|
No. 3042 Can be used to decorate the Trainer Lodge. Can be viewed in your scrapbook. |
3 | |
|
No. 3043 Can be used to decorate the Trainer Lodge. Can be viewed in your scrapbook. |
3 | |
|
No. 3044 Can be used to decorate the Trainer Lodge. Can be viewed in your scrapbook. |
3 | |
|
No. 3045 Can be used to decorate the Trainer Lodge. Can be viewed in your scrapbook. |
3 | |
|
No. 3046 Can be used to decorate the Trainer Lodge. Can be viewed in your scrapbook. |
3 | |
|
No. 3047 Can be used to decorate the Trainer Lodge. Can be viewed in your scrapbook. |
3 | |
|
No. 3048 Can be used to decorate the Trainer Lodge. Can be viewed in your scrapbook. |
3 | |
|
No. 3049 Can be used to decorate the Trainer Lodge. Can be viewed in your scrapbook. |
3 | |
|
No. 3050 Can be used to decorate the Trainer Lodge. Can be viewed in your scrapbook. |
3 | |
|
No. 3051 Can be used to decorate the Trainer Lodge. Can be viewed in your scrapbook. |
3 | |
|
No. 3052 Can be used to decorate the Trainer Lodge. Can be viewed in your scrapbook. |
3 | |
|
No. 3053 Can be used to decorate the Trainer Lodge. Can be viewed in your scrapbook. |
3 | |
|
No. 3054 Can be used to decorate the Trainer Lodge. Can be viewed in your scrapbook. |
3 | |
|
No. 3055 Can be used to decorate the Trainer Lodge. Can be viewed in your scrapbook. |
3 | |
|
No. 3056 Can be used to decorate the Trainer Lodge. Can be viewed in your scrapbook. |
3 | |
|
No. 3057 Can be used to decorate the Trainer Lodge. Can be viewed in your scrapbook. |
3 | |
|
No. 3058 Can be used to decorate the Trainer Lodge. Can be viewed in your scrapbook. |
3 | |
|
No. 3059 Can be used to decorate the Trainer Lodge. Can be viewed in your scrapbook. |
3 | |
|
No. 3060 Can be used to decorate the Trainer Lodge. Can be viewed in your scrapbook. |
3 | |
|
No. 3061 Can be used to decorate the Trainer Lodge. Can be viewed in your scrapbook. |
3 |
Replicas and plushies
The player can decorate the shelves in the center of the Trainer Lodge with up to nine replicas or plushies, arranged in a 3×3 grid. By default, nine replicas are placed on these shelves:
| Objet | Description | |
|---|---|---|

|
Pasio Tower | Can be used to decorate the Trainer Lodge. |

|
Wooden Star | |

|
Ice Tower | |

|
Red Stone | |

|
Moon Trophy | |

|
Wooden Metronome | |

|
Blue Tuning Fork | |

|
Wonder Stone | |

|
Star Trophy | |
More replicas and plushies are available for purchase in the Lodge Exchange. There is one replica and one plushie corresponding to each Trainer who can be invited to the lodge, and these become available for purchase once the player reaches friendship level 100 with the corresponding Trainer. As with artwork, only one of each replica or plushie that the player owns can be displayed at a time. Players can purchase up to nine of each replica and plushie.
The cost of a replica or plushie depends on the role of the corresponding sync pair:
| Role | |||
|---|---|---|---|
| Sync pair | Replica | Plushie | ||||||
|---|---|---|---|---|---|---|---|---|
| Item | Description | Cost | Item | Description | Cost | |||
Blue & Pidgeot |
Earth Badge | A replica of the following item: Earth Badge It can be used to decorate the Trainer Lodge. |

|
Blue Plushie | Can be used to decorate the Trainer Lodge. | |||
Leaf & Eevee |

|
Leaf's Hat | A replica of the following item: Leaf's Hat It can be used to decorate the Trainer Lodge. |
|
Leaf Plushie | Can be used to decorate the Trainer Lodge. | ||
Giovanni & Mewtwo |

|
Team Rocket Plaque | A replica of the following item: Team Rocket Plaque It can be used to decorate the Trainer Lodge. |

|
Giovanni Plushie | Can be used to decorate the Trainer Lodge. | ||
Lance & Dragonite |

|
Dragon Fang | A replica of the following item: Dragon Fang It can be used to decorate the Trainer Lodge. |

|
Lance Plushie | Can be used to decorate the Trainer Lodge. | ||
Silver & Ho-Oh |

|
Rainbow Wing | A replica of the following item: Rainbow Wing It can be used to decorate the Trainer Lodge. |

|
Silver Plushie | Can be used to decorate the Trainer Lodge. | ||
Morty & Drifblim |

|
Ho-Oh Plaque | A replica of the following item: Ho-Oh Plaque It can be used to decorate the Trainer Lodge. |
|
Morty Plushie | Can be used to decorate the Trainer Lodge. | ||
Jasmine & Steelix |

|
Olivine City Lighthouse | A replica of the following item: Olivine City Lighthouse It can be used to decorate the Trainer Lodge. |

|
Jasmine Plushie | Can be used to decorate the Trainer Lodge. | ||
May & Mudkip/ Marshtomp/Swampert |
|
Wailmer Pail | A replica of the following item: Wailmer Pail It can be used to decorate the Trainer Lodge. |

|
May Plushie | Can be used to decorate the Trainer Lodge. | ||
Steven & Metagross |

|
Rare Stone | A replica of the following item: Rare Stone It can be used to decorate the Trainer Lodge. |

|
Steven Plushie | Can be used to decorate the Trainer Lodge. | ||
Wally & Gallade |

|
Wally's Pendant | A replica of the following item: Wally's Pendant It can be used to decorate the Trainer Lodge. |

|
Wally Plushie | Can be used to decorate the Trainer Lodge. | ||
Brendan & Treecko/ Grovyle/Sceptile |

|
Brendan's Hat | A replica of the following item: Brendan's Hat It can be used to decorate the Trainer Lodge. |

|
Brendan Plushie | Can be used to decorate the Trainer Lodge. | ||
Cynthia & Garchomp |
|
Old Charm | A replica of the following item: Old Charm It can be used to decorate the Trainer Lodge. |
|
Cynthia Plushie | Can be used to decorate the Trainer Lodge. | ||
Dawn & Turtwig/ Grotle/Torterra |

|
Dawn's Hat | A replica of the following item: Dawn's Hat It can be used to decorate the Trainer Lodge. |

|
Dawn Plushie | Can be used to decorate the Trainer Lodge. | ||
Adaman & Leafeon |

|
Diamond Clan Plaque | A replica of the following item: Diamond Clan Plaque It can be used to decorate the Trainer Lodge. |

|
Adaman Plushie | Can be used to decorate the Trainer Lodge. | ||
Irida & Glaceon |

|
Pearl Clan Plaque | A replica of the following item: Pearl Clan Plaque It can be used to decorate the Trainer Lodge. |

|
Irida Plushie | Can be used to decorate the Trainer Lodge. | ||
Volkner & Luxray |

|
Sunyshore Gym Gears | A replica of the following item: Sunyshore Gym Gears It can be used to decorate the Trainer Lodge. |

|
Volkner Plushie | Can be used to decorate the Trainer Lodge. | ||
Volo & Togepi |

|
Ginkgo Guild Plaque | A replica of the following item: Ginkgo Guild Plaque It can be used to decorate the Trainer Lodge. |
|
Volo Plushie | Can be used to decorate the Trainer Lodge. | ||
Rosa & Snivy/ Servine/Serperior |

|
Promo Card | A replica of the following item: Promo Card It can be used to decorate the Trainer Lodge. |

|
Rosa Plushie | Can be used to decorate the Trainer Lodge. | ||
N & Zekrom |

|
N's Cube | A replica of the following item: N's Cube It can be used to decorate the Trainer Lodge. |
|
N Plushie | Can be used to decorate the Trainer Lodge. | ||
Elesa & Zebstrika |

|
Elesa's Headphones | A replica of the following item: Elesa's Headphones It can be used to decorate the Trainer Lodge. |

|
Elesa Plushie | Can be used to decorate the Trainer Lodge. | ||
Skyla & Swanna |
Jet Badge | A replica of the following item: Jet Badge It can be used to decorate the Trainer Lodge. |

|
Skyla Plushie | Can be used to decorate the Trainer Lodge. | |||
Cheren & Stoutland |

|
Cheren's Book | A replica of the following item: Cheren's Book It can be used to decorate the Trainer Lodge. |

|
Cheren Plushie | Can be used to decorate the Trainer Lodge. | ||
Iris & Haxorus |

|
Iris's Floating Shawl | A replica of the following item: Iris's Floating Shawl It can be used to decorate the Trainer Lodge. |

|
Iris Plushie | Can be used to decorate the Trainer Lodge. | ||
Professor Sycamore & Xerneas |

|
Phonograph | A replica of the following item: Phonograph It can be used to decorate the Trainer Lodge. |

|
Professor Sycamore Plushie | Can be used to decorate the Trainer Lodge. | ||
Serena & Fennekin/ Braixen/Delphox |

|
Serena's Hat | A replica of the following item: Serena's Hat It can be used to decorate the Trainer Lodge. |

|
Serena Plushie | Can be used to decorate the Trainer Lodge. | ||
Calem & Espurr/ Meowstic |

|
Calem's Hat | A replica of the following item: Calem's Hat It can be used to decorate the Trainer Lodge. |

|
Calem Plushie | Can be used to decorate the Trainer Lodge. | ||
Shauna & Chesnaught |

|
Shauna's Fireworks Photo | A replica of the following item: Shauna's Fireworks Photo It can be used to decorate the Trainer Lodge. |

|
Shauna Plushie | Can be used to decorate the Trainer Lodge. | ||
Diantha & Gardevoir |

|
Diantha's Bag | A replica of the following item: Diantha's Bag It can be used to decorate the Trainer Lodge. |

|
Diantha Plushie | Can be used to decorate the Trainer Lodge. | ||
Lillie & Clefairy |

|
Poké Doll | A replica of the following item: Poké Doll It can be used to decorate the Trainer Lodge. |
|
Lillie Plushie | Can be used to decorate the Trainer Lodge. | ||
Acerola & Palossand |

|
Acerola's Armband | A replica of the following item: Acerola's Armband It can be used to decorate the Trainer Lodge. |

|
Acerola Plushie | Can be used to decorate the Trainer Lodge. | ||
Gladion & Silvally |

|
Gladion's Outerwear | A replica of the following item: Gladion's Outerwear It can be used to decorate the Trainer Lodge. |

|
Gladion Plushie | Can be used to decorate the Trainer Lodge. | ||
Lana & Araquanid |

|
Lana's Hair Accessory | A replica of the following item: Lana's Hair Accessory It can be used to decorate the Trainer Lodge. |

|
Lana Plushie | Can be used to decorate the Trainer Lodge. | ||
Lusamine & Pheromosa |

|
Aether Foundation Plaque | A replica of the following item: Aether Foundation Plaque It can be used to decorate the Trainer Lodge. |

|
Lusamine Plushie | Can be used to decorate the Trainer Lodge. | ||
Marnie & Morpeko |

|
Team Yell Towel | A replica of the following item: Team Yell Towel It can be used to decorate the Trainer Lodge. |

|
Marnie Plushie | Can be used to decorate the Trainer Lodge. | ||
Raihan & Duraludon |

|
Rotom Phone | A replica of the following item: Rotom Phone It can be used to decorate the Trainer Lodge. |

|
Raihan Plushie | Can be used to decorate the Trainer Lodge. | ||
Gloria & Zacian |

|
Gloria's Bag | A replica of the following item: Gloria's Bag It can be used to decorate the Trainer Lodge. |

|
Gloria Plushie | Can be used to decorate the Trainer Lodge. | ||
Kabu & Centiskorch |

|
Kabu's Towel | A replica of the following item: Kabu's Towel It can be used to decorate the Trainer Lodge. |
|
Kabu Plushie | Can be used to decorate the Trainer Lodge. | ||
Leon & Charizard |

|
Leon's Trophy | A replica of the following item: Leon's Trophy It can be used to decorate the Trainer Lodge. |

|
Leon Plushie | Can be used to decorate the Trainer Lodge. | ||
Rika & Clodsire |

|
Rika's Glasses | A replica of the following item: Rika's Glasses It can be used to decorate the Trainer Lodge. |

|
Rika Plushie | Can be used to decorate the Trainer Lodge. | ||
Iono & Bellibolt |

|
Iono Zone Plaque | A replica of the following item: Iono Zone Plaque It can be used to decorate the Trainer Lodge. |

|
Iono Plushie | Can be used to decorate the Trainer Lodge. | ||
Arven & Mabosstiff |

|
Arven's Backpack | A replica of the following item: Arven's Backpack It can be used to decorate the Trainer Lodge. |
|
Arven Plushie | Can be used to decorate the Trainer Lodge. | ||
Lacey & Granbull |

|
Lacey's Hair Clip | A replica of the following item: Lacey's Hair Clip It can be used to decorate the Trainer Lodge. |

|
Lacey Plushie | Can be used to decorate the Trainer Lodge. | ||
Larry & Dudunsparce |

|
Larry's Workbag | A replica of the following item: Larry's Workbag It can be used to decorate the Trainer Lodge. |

|
Larry Plushie | Can be used to decorate the Trainer Lodge. | ||
Carmine & Sinistcha |

|
Carmine's Hair Band | A replica of the following item: Carmine's Hair Band It can be used to decorate the Trainer Lodge. |

|
Carmine Plushie | Can be used to decorate the Trainer Lodge. | ||
Lear & Hoopa |

|
Lear Sunglasses | A replica of the following item: Lear Sunglasses It can be used to decorate the Trainer Lodge. |

|
Lear Plushie | Can be used to decorate the Trainer Lodge. | ||
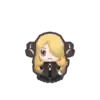
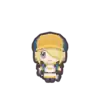
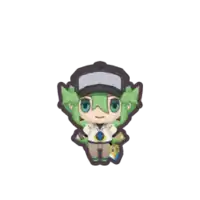
Available Trainers
Rosa is the first Trainer available in the lodge by default, and other Trainers can be invited if the player has scouted and teamed up with the sync pair. A maximum of five Trainers can be present at one time in the lodge. Different topic interactions will give different ratings for each Trainer, with certain topics only available at certain locations.
| Sync pair | Description | Interactions | Pokémon unlocked at Lv. 100 | ||
|---|---|---|---|---|---|
| Super exciting | Excitement building | Interesting | |||
Blue & Pidgeot |
This skilled Trainer from Kanto is Professor Oak's grandson. The legendary Trainer Red is both his best friend and greatest rival. |
|
|
|
 Blue & Exeggutor |
Leaf & Eevee |
This Trainer from the Kanto region is cheerful and friendly. Her tremendous talent in battle is backed by her deep love for Pokémon. |
|
|
|
 Leaf & Clefable |
Giovanni & Mewtwo |
This leader of Team Rocket is plotting world domination. He takes a great interest in those who have power, even if they're his enemies. |
|
|
|
 Giovanni & Nidorino |
Lance & Dragonite |
This famous dragon master is also the Indigo League Champion. He has a strong sense of justice, and many Trainers look up to him. |
|
|
|
 Lance & Kingdra |
Silver & Ho-Oh |
This Trainer has a sharp look in his eyes and is always aiming to get stronger. Something in his past made him hate working in teams. |
|
|
|
 Silver & Feraligatr |
Morty & Drifblim |
This Johto Gym Leader is often doing some sort of secret training. he has a mellow personality and is well-liked by ghost Pokémon. |
|
|
|
 Morty & Gastly |
Jasmine & Steelix |
This Johto Gym Leader is very modest. She has a kind heart and takes care of sick Pokémon. |
|
|
|
 Jasmine & Magnemite |
May & Mudkip/ Marshtomp/Swampert |
This cheerful young lady is Professor Birch's daughter. Her dream is to befriend all the Pokémon in the world. |
|
|
|
 May & Wailmer |
Steven & Metagross |
This Champion from Hoenn has a hobby of collecting stones. He likes both Steel-type Pokémon and fossil Pokémon. |
|
|
|
 Steven & Cradily |
Wally & Gallade |
This boy from Hoenn loves Pokémon battles. He's a hard worker who always pushes himself to grow stronger. |
|
|
|
 Wally & Delcatty |
Brendan & Treecko/ Grovyle/Sceptile |
This Trainer from Hoenn is a bit mischievous, but he is serious about Pokémon battles. His goal is to surpass his dad, Norman, who is a Gym Leader. |
|
|
|
 Brendan & Swellow |
Cynthia & Garchomp |
This Sinnoh Champion is an archaeologist who researches myths. She's a cool and collected lady, but there may be other sides to her. |
|
|
|
 Cynthia & Gastrodon (West Sea) |
Dawn & Turtwig/ Grotle/Torterra |
This Trainer from Sinnoh is super positive and loves taking care of others, but she can be a little scatterbrained at times. |
|
|
|
 Dawn & Wormadam (Plant Cloak) |
Adaman & Leafeon |
This leader of the Diamond Clan from the Hisui region can be a little impatient, but he is also a caring and dependable ally. |
|
|
|
 Adaman & Vaporeon |
Irida & Glaceon |
This young leader of the Pearl Clan from the Hisui region is fascinated by a new "space"—the artificial island of Pasio. |
|
|
|
 Irida & Flareon |
Volkner & Luxray |
This Gym Leader is said to be the strongest in the Sinnoh region. He's good at tinkering with machines but can go overboard at times... |
|
|
|
 Volkner & Raichu |
Volo & Togepi |
This merchant belongs to the Ginkgo Guild in the Hisui region. He has a strong interest in Pokémon mythology and rare items. |
|
|
|
 Volo & Gible |
Rosa & Snivy/ Servine/Serperior |
This bright Trainer from Unova has a strong sense of justice. Her time at Pokéstar Studios may have gotten her interested in acting. |
|
|
|
 Rosa & Dewott |
N & Zekrom |
This young man has the mysterious power to converse with Pokémon. He's a mathematical genius with a surprising interest in certain topics. |
|
|
|
 N & Sigilyph |
Elesa & Zebstrika |
This Gym Leader from Unova is also a model. Rumor has it she's been thinking of ways to come off as more approachable. |
|
|
|
 Elesa & Joltik |
Skyla & Swanna |
This Gym Leader from Unova is also a pilot. Her energetic personality attracts a large fan following. |
|
|
|
 Skyla & Unfezant |
Cheren & Stoutland |
This Gym Leader from Unova is also a novice teacher. He always has his students and Pokémon on his mind. |
|
|
|
 Cheren & Purrloin |
Iris & Haxorus |
This Champion from Unova is both cheerful and energetic. She hopes people and Pokémon can grow even closer to each other. |
|
|
|
 Iris & Druddigon |
Professor Sycamore & Xerneas |
This Pokémon Professor from the Kalos region researches Mega Evolution. He knows a lot about coffee, and his hobby is visiting cafés. |
|
|
|
 Professor Sycamore & Bulbasaur |
Serena & Fennekin/ Braixen/Delphox |
This Trainer from the Kalos region loves fashion. Her personality is bright and lively, but she also has a side to her that's a bit more stoic. |
|
|
|
 Serena & Fletchling |
Calem & Espurr/ Meowstic |
This Trainer from Kalos is cool and stoic, but under the surface, he's hiding a burning respect for his rival that's stronger than anyone else's! |
|
|
|
 Calem & Fennekin |
Shauna & Chesnaught |
This Trainer traveled around Kalos to discover her dream. She's good at solving puzzles and cherishes the memories she's made. |
|
|
|
Shauna & Delcatty |
Diantha & Gardevoir |
This Champion from Kalos is also a famous actress. Surprisingly, she's quite friendly and can often be found in cafés. |
|
|
|
 Diantha & Tyrantrum |
Lillie & Clefairy |
Lillie, daughter of the Aether Foundation's president, has traveled around Alola. She's kind and works hard but isn't so confident in her sewing skills. |
|
|
|
 Lillie & Comfey |
Acerola & Palossand |
This mysterious young girl is an Alola captain and Elite Four member who claims to be descended from old royalty. |
|
|
|
 Acerola & Banette |
Gladion & Silvally |
Gladion doesn't say much, but he cares deeply about his friends, family, and Pokémon. He used to be much more rebellious and fixated on becoming stronger. |
|
|
|
 Gladion & Golbat |
Lana & Araquanid |
One of the captains of Akala Island in the Alola region. She loves fishing and owns multiple fishing rods she made herself. |
|
|
|
 Lana & Lanturn |
Marnie & Morpeko |
This Trainer aims for the top spot to put her hometown on the map. She's been practicing how to smile for the fans who cheer her on. |
|
|
|
 Marnie & Toxicroak |
Raihan & Duraludon |
This Trainer is the strongest Gym Leader in Galar and also Leon's rival. He's usually the friendly type but can get fierce when it comes to battles. |
|
|
|
 Raihan & Gigalith |
Gloria & Zacian |
This young lady went through the Galar region's Gym Challenge. She enjoys playing outdoors and loves curry more than anything else. |
|
|
|
 Gloria & Thwackey |
Kabu & Centiskorch |
The motto of this Fire-type Gym Leader from Galar is to keep learning and training as long as he is alive. |
|
|
|
 Kabu & Torkoal |
Rika & Clodsire |
This member of Paldea's Elite Four is a Ground-type user. She's usually easygoing, but her personality shifts gears when she's in work mode. |
|
|
|
 Rika & Whiscash |
Iono & Bellibolt |
This Levincia Gym Leader from Paldea is also a popular streamer, known for her unmistakable catchphrases. |
|
|
|
 Iono & Wattrel |
Arven & Mabosstiff |
A student who attends an academy in Paldea and wants to be a cook one day. While he may seem unfriendly, he is truly compassionate and thoughtful. |
|
|
|
 Arven & Nacli |
Lacey & Granbull |
This member of Blueberry Academy's BB League Elite Four is reliable and adores cute things. |
|
|
|
 Lacey & Alcremie |
Larry & Dudunsparce |
This Medali Gym Leader from Paldea is also a member of the region's Elite Four. He seems to lack motivation, but nothing excites him more than food. |
|
|
|
 Larry & Oinkologne |
Lear & Hoopa |
The prince of a certain kingdom and creator of the artificial island of Pasio. After the PML, his aim is to become a king who treasures the power of bonds. |
|
|
|
 Lear & Krookodile |
Lodge Exchange
Crystals/Stones/Coins
Crystals can be exchanged for various items including sync pair items and coins. Items useful for Interactions, Expeditions, and Redecorating can also be purchased from the Lodge Exchange and are listed above.
| Item | Description | Cost | |
|---|---|---|---|

|
Buff Pack ++ ×10 | Contains the following items: Buff Blend ++ ×1 Great Buff Blend ++ ×1 |
|

|
Tech Pack ++ ×10 | Contains the following items: Tech Tonic ++ ×1 Great Tech Tonic ++ ×1 |
|

|
Aid Pack ++ ×10 | Contains the following items: Aid Ade ++ ×1 Great Aide Ade ++ ×1 |
|

|
Buff Pack + ×10 | Contains the following items: Buff Blend + ×1 Great Buff Blend + ×1 Ultra Buff Blend + ×1 |
|

|
Tech Pack + ×10 | Contains the following items: Tech Tonic + ×1 Great Tech Tonic + ×1 Ultra Tech Tonic + ×1 |
|

|
Aid Pack + ×10 | Contains the following items: Aid Ade + ×1 Great Aid Ade + ×1 Ultra Aid Ade + ×1 |
|

|
Coins ×10,000 | - | |
Lodge Stones
Lodge Stones can be exchanged for sync pairs and other various items.
| Item | Description | Cost | |
|---|---|---|---|
| Sync Pairs | |||
| Sync pairs join your team the first time you obtain them. From the second time on, their sync moves and move level will level up. Notes: Each sync pair can be exchanged a maximum of four times. A sync pair is unlocked when the player reaches friendship level 100 with the corresponding Trainer. |
|||
| Other | |||
|
|
Certificate of Excellence ×1 | Used for unlocking sync pair level caps. | |
|
|
Co-op Sync Orb ×1,000 | Can be exchanged for sync pair–specific sync orbs. | |
|
|
4★ Level-Up Manual ×10 | Used for leveling up sync pairs. | |

|
Codex Set, Vol. 1 ×20 | Contains all 18 types of Codex Vol. 1. | |

|
Tome Set, Vol. 1 ×40 | Contains all 18 types of Tome Vol. 1. | |

|
Elite Four Notes ×10 | Used for unlocking sync pair level caps. | |

|
Gym Leader Notes ×10 | Used for unlocking sync pair level caps. | |
Music
The background music that plays in the Trainer Lodge during the daytime (6:00 AM to 5:59 PM) changes depending on the season. The background music that plays during the nighttime (6:00 PM to 5:59 AM) is always![]() Trainer Lodge (Evening). The music change occurs sometime during the last week of the month, when the game receives an end-of-month update.
Trainer Lodge (Evening). The music change occurs sometime during the last week of the month, when the game receives an end-of-month update.
From August 25 to September 26, 2022, the first month that the Trainer Lodge was available, the background music was![]() Trainer Lodge (Summer). This was changed to
Trainer Lodge (Summer). This was changed to![]() Trainer Lodge (Autumn) in subsequent years so that the song for each season would play for three full months.
Trainer Lodge (Autumn) in subsequent years so that the song for each season would play for three full months.
| Month | ||||
|---|---|---|---|---|
| January | N/A | N/A | N/A | ✔ |
| February | ✔ | N/A | N/A | ✔ |
| March | ✔ | N/A | N/A | N/A |
| April | ✔ | N/A | N/A | N/A |
| May | ✔ | ✔ | N/A | N/A |
| June | N/A | ✔ | N/A | N/A |
| July | N/A | ✔ | N/A | N/A |
| August | N/A | ✔ | ✔ | N/A |
| September | N/A | N/A | ✔ | N/A |
| October | N/A | N/A | ✔ | N/A |
| November | N/A | N/A | ✔ | ✔ |
| December | N/A | N/A | N/A | ✔ |
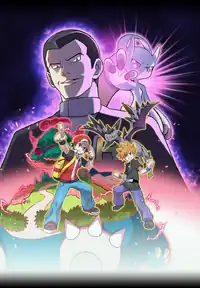
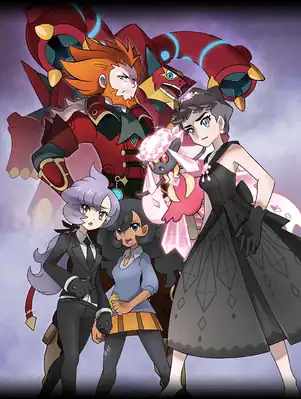
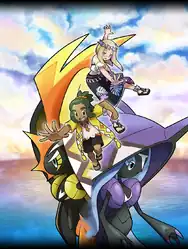
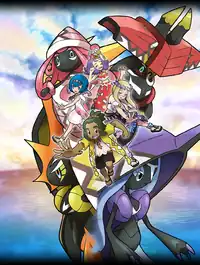
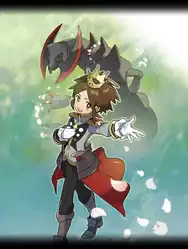
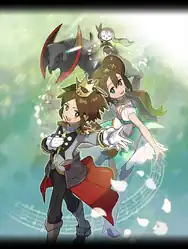
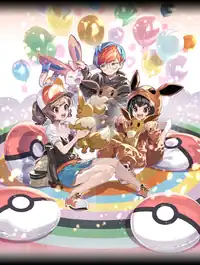
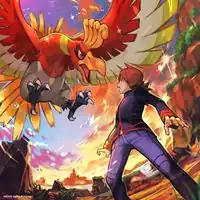
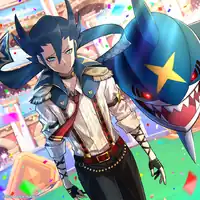
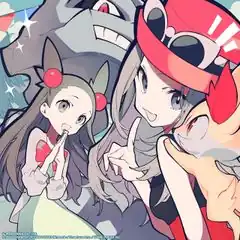
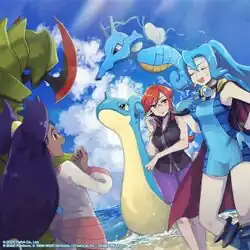
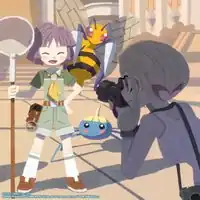
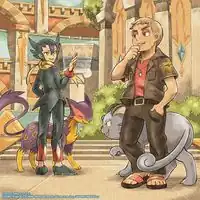
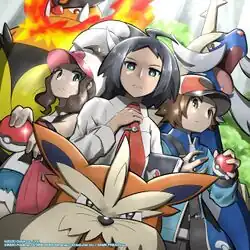
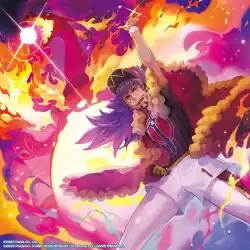
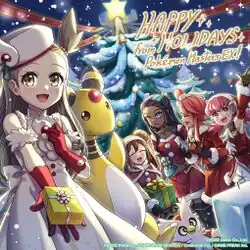
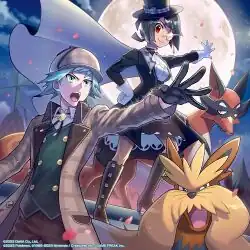
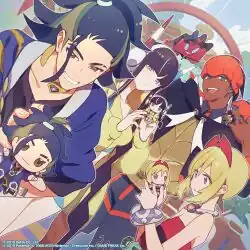
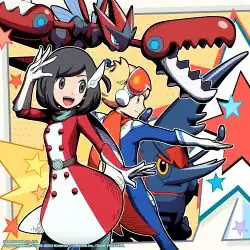
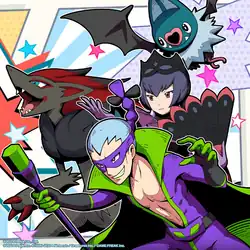
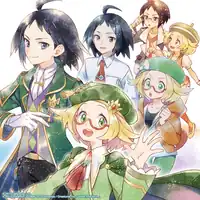
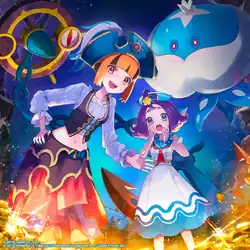
Gallery
|
|
|
|
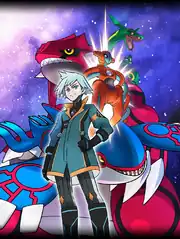
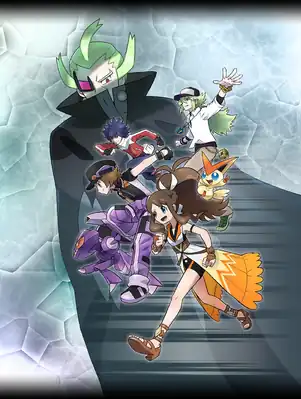
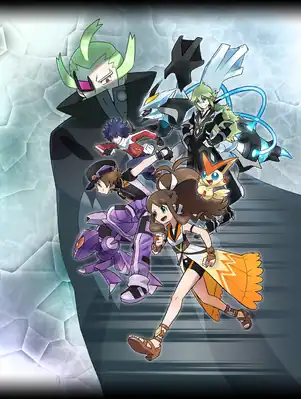
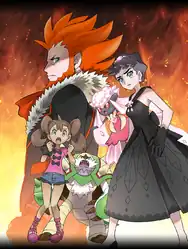
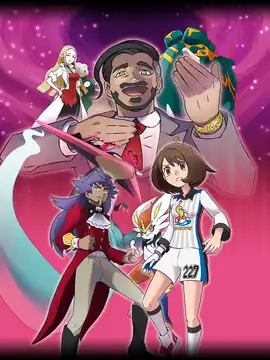
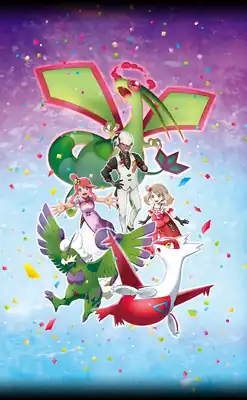
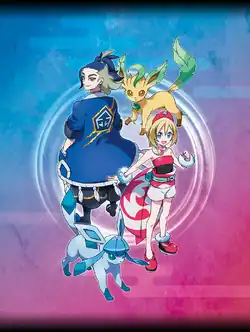
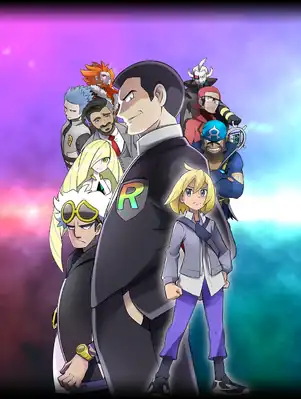
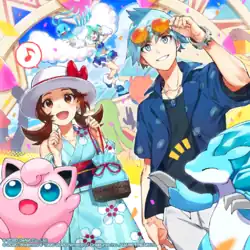
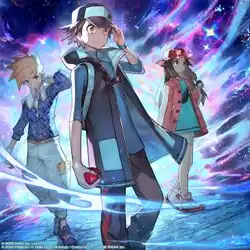
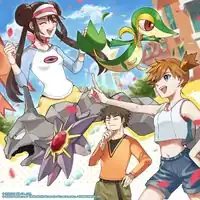
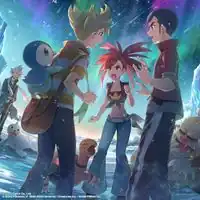
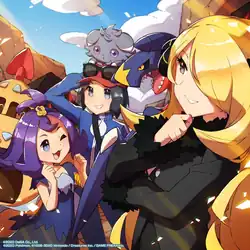
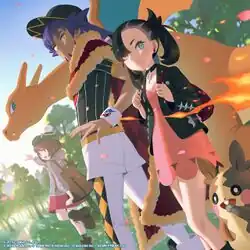
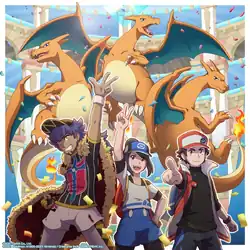
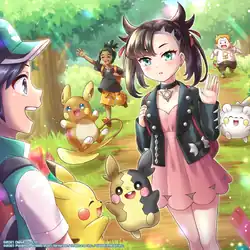
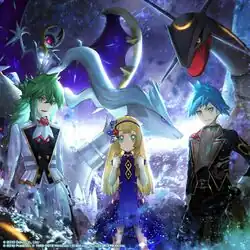
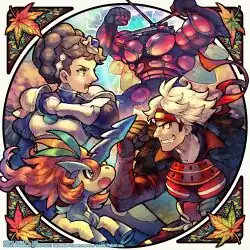
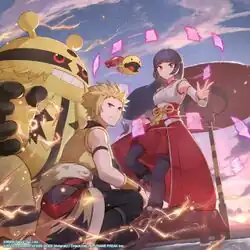
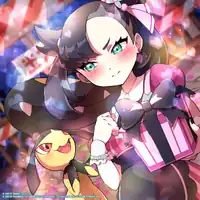
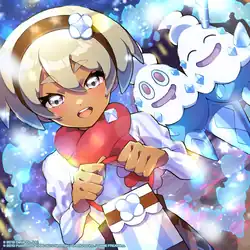
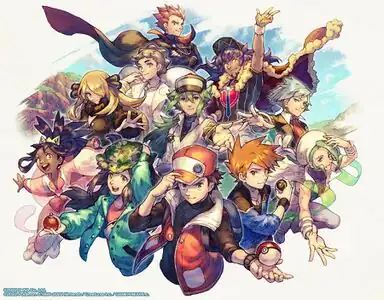
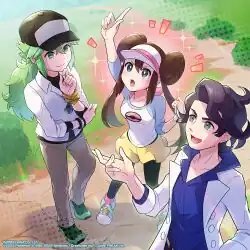
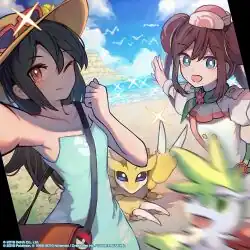
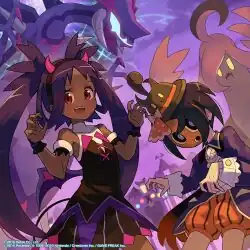
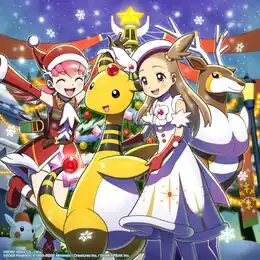
| Trainer Lodge teaser artwork by Peron |
Artwork of the initial nine Trainer Lodge guests | Artwork commemorating Trainer Lodge Week by MaP |
| ||
| Concept art showcasing the exterior of the Trainer Lodge | ||
| ||
| Concept art showcasing the interior of the Trainer Lodge | ||
Trivia
- All visitors to the Trainer Lodge have seven different interaction topics of each category (excluding location-exclusive interaction topics) except for N, who has only six different topics in the Items category.
- Excluding location-exclusive interaction topics, the most common interaction topic is Pokémon battles, which is a possible interaction topic for every visitor to the Trainer Lodge except Shauna.
- Jasmine is the only guest to have Pokéathlons as a super exciting interaction topic; everyone else has it as an interesting interaction topic.
- Wally is the only guest to have Gym Leaders as a super exciting interaction topic without having been a Gym Leader at any point in the core series.
- Kabu is the only guest to have Champions as a super exciting interaction topic without having been a Champion at any point in the core series.
- The image in the promo card decoration is taken directly from the first Brycen-Man movie in Pokémon Black 2 and White 2.
- When Leaf was first introduced to the Trainer Lodge, her gifts erroneously cost Soothing Crystals despite being a support sync pair. This was corrected on September 5, 2023.
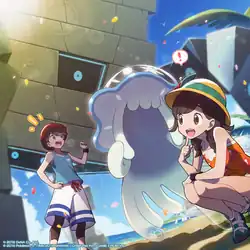
- 3000s artworks are placed in order from release date in events; however, a few artworks are placed out of order, like artwork no. 3000-3005 and artwork no. 3041 (Leon and Gigantamax Charizard) and no. 3042 (Merry Christmas 2022).
- The Kalos Villain Arc Memories artwork is the only artwork that is unavailable in-game.
- Shauna and Lacey both have one of their English voice clips for reacting to a topic get cut off before it finishes playing. For Shauna, the voice clip is "That. Was. Amazing!", and it gets cut off after the word "was". For Lacey, the voice clip is "I think that's a fine idea!", and it gets cut off in the middle of the word "idea".
| This article is part of Project Sidegames, a Bulbapedia project that aims to write comprehensive articles on the Pokémon Sidegames. |