Plush room

A plush room is an area in Pokémon Friends where the player can display their Pokémon plush and furniture. Plush rooms are unlocked after the player creates their first plush.
In the mobile version of the game, the player only has access to one plush room by default. In the Nintendo Switch version, three plush rooms are available by default. Additional rooms can be made available in both versions by purchasing DLC, up to a maximum of five.
Mechanics
Placing plush
Plush can be placed in a plush room by selecting the Place Plush button. This brings up a menu listing all of the player's plush, divided into tabs based on what type of yarn was used to create them. Beneath each plush image is the number of plush available for the player to place; if the player has no plush available to place, this number will be 0 and the plush's image will be grayed out. The player can only place as many plush as they own across all their plush rooms—for example, if the player only owns one Joltik plush and that plush has been placed in Room 1, they cannot place a Joltik plush in Room 2. If a plush of a particular species has already been placed in the current plush room, a small green icon will appear beneath the plush image. If a plush of a particular species has already been placed in a different plush room, a small red icon will appear beneath the plush image. If both are true, both icons will appear.
After a plush is selected, it will appear in a circle on top of the Place Plush button. From there, it can be selected and moved to anywhere in the room; if another button is selected instead, the placement will be canceled. Plush can be placed on the floor or on furniture. A red square marker appears beneath the plush while it is being moved, indicating where it will land upon being placed. However, this square primarily marks the location of the Pokémon's body and not additional features such as Cyndaquil's flames or Whimsicott's cotton, which can hinder the plush from sitting exactly as desired. The player can move a plush further back in the room by holding it at the top of the screen, though this also increases the height of the plush. Moving the plush downward will maintain the same depth until the plush reaches the ground, allowing it to be placed gently. After being placed, a plush can be rotated by selecting it and then holding the icon that appears above its head for a second. This causes an opaque white sphere to appear around the plush, and it can then be rotated freely until the plush is deselected. Plush that have already been placed can be moved again, but plush cannot be moved and rotated simultaneously.
Plush in a plush room are subject to simulated physics, so a plush may fall over if it is dropped from a great height, placed on the edge of a piece of furniture, or placed on top of another plush. Moving the plush again will correct its orientation, though this also resets any rotation that the player applied to it.
Each plush room can hold no more than 20 total plush. If this limit has been met, the message "You can't place any more plush in here" will be displayed at the bottom of the Place Plush menu, and all plush images will be grayed out. In addition, no more than five L or XL size plush can be placed in a particular plush room. When this occurs, all L and XL plush will have their images grayed out, and the message "You can't place any more plush of this size in here" will be displayed at the bottom of the Place Plush menu if a plush of that size is tapped.
Placing furniture

Placing furniture is very similar to placing plush. Selecting the Place Furniture button brings up a menu listing all of the player's plush, divided into tabs based on whether the furniture is placed on the floor (such as beds and chairs) or on the wall (such as shelves). Unlike plush, there is no limit to how many copies of a piece of furniture can be placed in plush rooms, so there is no icon to indicate if a particular piece of furniture is used in other plush rooms. However, there is still a green icon indicating that a piece of furniture has already been placed in the current room.
Once a piece of furniture has been selected, it will appear in a circle on top of the Place Furniture button. From there, it can be selected and moved to anywhere in the room; if another button is selected instead, the placement will be canceled. Floor furniture can only be placed on the floor; holding it above the floor will be considered an attempt to place it on the wall, and releasing it on the wall cancels the placement. Similarly, wall furniture can only be placed on the wall; releasing it on the floor cancels the placement. Despite this, the red square marker appears beneath furniture as well. Furniture that has already been placed can be moved again, but if the furniture is moved to an invalid location, it will return to its original position. Furniture cannot be rotated.
Furniture is not subject to simulated physics, so it cannot be placed on top of plush or other furniture. If a piece of furniture is being held so that it overlaps plush or other furniture, the objects being overlapped will turn blue. Releasing the furniture in this state will cause the blue furniture and plush to be put away.
By default, the player's first plush room contains two basic shelves and one basic basket. Additional plush rooms do not have any furniture in them by default.
Changing rooms
If multiple plush rooms are available, the ability to change rooms is unlocked when the player visits their plush rooms for the second time. The current plush room is highlighted in yellow, and the icon to the right of each room name indicates whether that room contains plush, furniture, or both. Selecting a plush room from this menu will immediately bring the player to that plush room. Whatever plush room the player is in when they leave their plush rooms is the same room they will return to the next time they load their plush rooms.
The names of plush rooms can also be changed from this menu. By default, the first plush room is called "My First Room", and additional rooms are called "New Room 1", "New Room 2", and so on. The names of plush rooms are limited to 14 characters, but otherwise there is no restriction on what they can be named.
Changing wallpaper
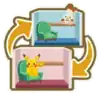
The ability to change wallpaper is unlocked when the player visits their plush rooms for the second time. In the mobile version of the game, the player must also have purchased any of the DLC packs to unlock this feature. When a wallpaper is selected from this menu, it will be immediately applied to the room in a painting-like animation. The same wallpaper can be used in multiple rooms simultaneously; all plush rooms use the Pikachu Room wallpaper by default.
The following table lists all the wallpaper options for plush rooms.
| Icon | Name | Availability | |
|---|---|---|---|
| Mobile | Switch | ||

|
Pikachu Room | Base game | |
|
Pika Playroom | Basic Pack | Base game |
|
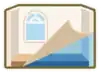
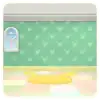
Meadow Room | Basic Pack | Base game |
|
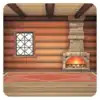
Cozy Cabin Room | Basic Pack | Base game |

|
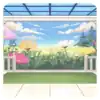
Bright Beach Room | Puzzle On! Pack #1 | |

|
Seaside Sunset Room | Puzzle On! Pack #1 | |

|
Fantasy Forest Room | Puzzle On! Pack #1 | |
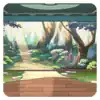
|
Sunlit Forest Room | Puzzle On! Pack #1 | |

|
Planet Playroom | Puzzle On! Pack #2 | |
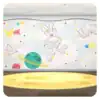
|
Cute Constellation Room | Puzzle On! Pack #2 | |

|
Sunny Garden Party Room | Puzzle On! Pack #2 | |

|
Starry Garden Party Room | Puzzle On! Pack #2 | |

Other


There is a rewind button in the bottom-left corner of the screen that, when held for two seconds, will undo the last action performed in the room (moving furniture, rotating plush, etc.). Up to five actions can be rewound, but the button has to be held for two seconds each time. Only actions that have been performed since the last time the room was loaded can be rewound.
Unwanted plush or furniture can be removed from a plush room using the Tidy Up button. An individual plush or piece of furniture moved beneath the Tidy Up button will be removed from the room. Pressing the Tidy Up button will cause a red striped border to appear around the edges of the screen, and any plush or furniture item selected while this border is present will be immediately put away. Pressing the Tidy Up button again—or any of the other on-screen buttons—will remove the border.
The button in the bottom-right corner of the screen will hide all on-screen buttons, which can be utilized to take screenshots of plush rooms. Tapping the screen or pressing any button on the controller will bring the buttons back into view.
Controls
There are three main methods of interacting with a plush room. Using the left stick will cause a cursor to appear in the center of the screen that can then be moved around the screen. With this cursor, the A button can be used to press on-screen buttons and interact with furniture and plush. Using the left arrow buttons or pressing the A button after a touch screen input will cause a different cursor to appear that starts on the on-screen button closest to the previous cursor or touch screen input and jumps directly between on-screen buttons. With this cursor, the A button can be used to press on-screen buttons; however, this cursor cannot interact with furniture and plush. Finally, tapping the touch screen can be used to press on-screen buttons and interact with furniture and plush at any time. This option can only be used when the Nintendo Switch is in handheld mode, and it is the only option available on mobile devices.
Plush and furniture can be moved by moving the cursor to it and holding the A button; the plush or furniture item will move around with the cursor until the A button is released. If the A button is immediately released after moving the cursor to a plush, the rotation icon will appear above its head. The cursor can then be moved to the rotation icon, and holding down the A button on this icon for one second will turn on rotation controls. While rotation controls are active, the cursor can still be moved around the screen, and holding the A button while the cursor is above the plush allows the plush to be rotated using the left stick; the L, R, ZL, and ZR buttons cannot be used to rotate a plush. Releasing the A button after rotating allows the cursor to be moved around the screen again. Pressing the A button while the cursor is not above the plush will turn off rotation controls.
The other option for moving plush and furniture is to tap a plush or piece of furniture and drag it around the screen. The rotation icon will appear above a plush's head as soon as it is tapped, and tapping and holding it for one second will turn on rotation controls. While rotation controls are active, tapping and dragging the plush will rotate it. Tapping any part of the screen other than the plush will turn off rotation controls. These controls can only be used when the Nintendo Switch is in handheld mode, and it is the only option available on mobile devices.
In menus in a plush room, the left stick and left arrow buttons function identically, both making the cursor jump between on-screen buttons. In the Place Plush and Place Furniture menus, which consist of multiple tabs, tabs can be switched between using the L or ZL button to move left and the R or ZR button to move right. The cursor cannot be used to change tabs. The A button can be used to select things in a menu, and the B button can be used to exit a menu. Tapping on-screen buttons in a menu functions the same as in the main plush room on Nintendo Switch and mobile, with the added benefit of certain menus being scrollable by swiping.
Trivia
- The Pikachu Room wallpaper is the only wallpaper that contains a door to the room.
- The Cute Constellation Room wallpaper contains constellations featuring Jirachi, Scorbunny, and Rayquaza, all of whom are available in the game as plush.
Related articles
| This article is part of Project Sidegames, a Bulbapedia project that aims to write comprehensive articles on the Pokémon Sidegames. |